Launching Instances with the GUI
Launch an instance
To launch an instance with the GUI, follow the steps:
In the navigation side bar, click Project > Compute > Instances to get to the Instances page.

The Instances page
Click the Launch Instance button in the upper right corner. This will open the Launch Instance wizard with several configuration steps. Steps with
*are required.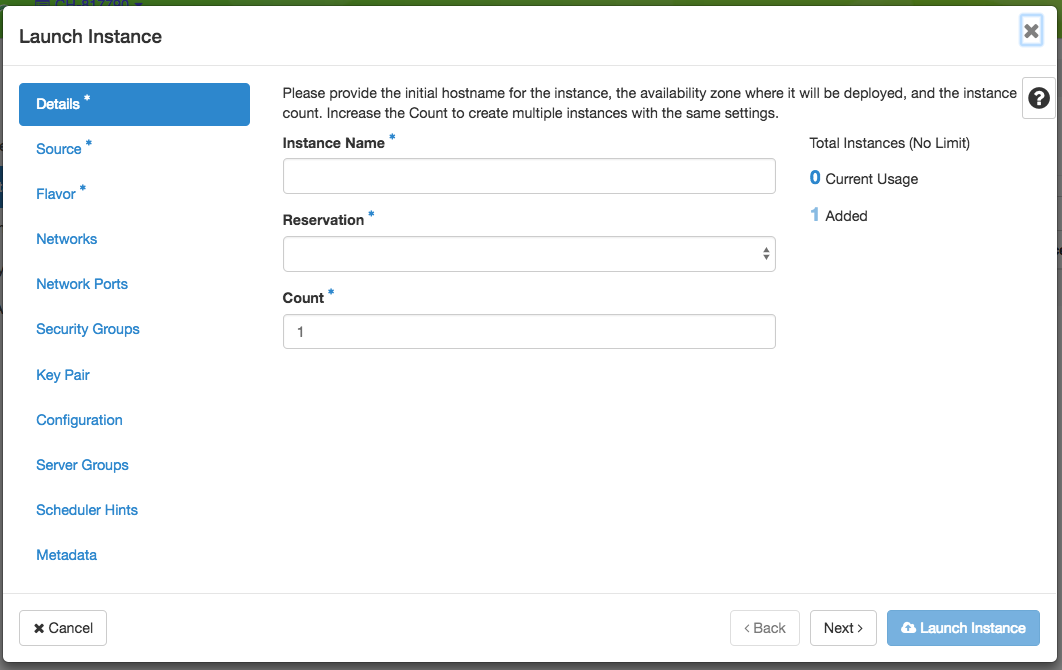
The Launch Instance wizard.
In the Details step, enter a name for your instance that is unique within your project and select a currently active reservation for the instance.
In the Source step, select an image for your instance and click the “up” arrow. The image should move to the Allocated list, and can be removed by clicking the “Down” arrow if you wish to select a different image.

The Source configuration step
In the Flavor step, select the baremetal flavor by clicking the “up” arrow next to it. This is the only flavor available.

The Flavor configuration step
Hint
If you are familiar with Openstack, other implementations allow for the selection of flavors based on machine disk size and RAM. On Chameleon, the only flavor available is “baremetal” because hardware selection is performed in reservations.
In the Networks step, select a network by clicking the “up” arrow next to it. To learn about the Chameleon default network and how to create your own network, see Networking.
In the Key Pair step, select one of your SSH key pairs. If you only have one key pair associated with your account, then it is selected by default.
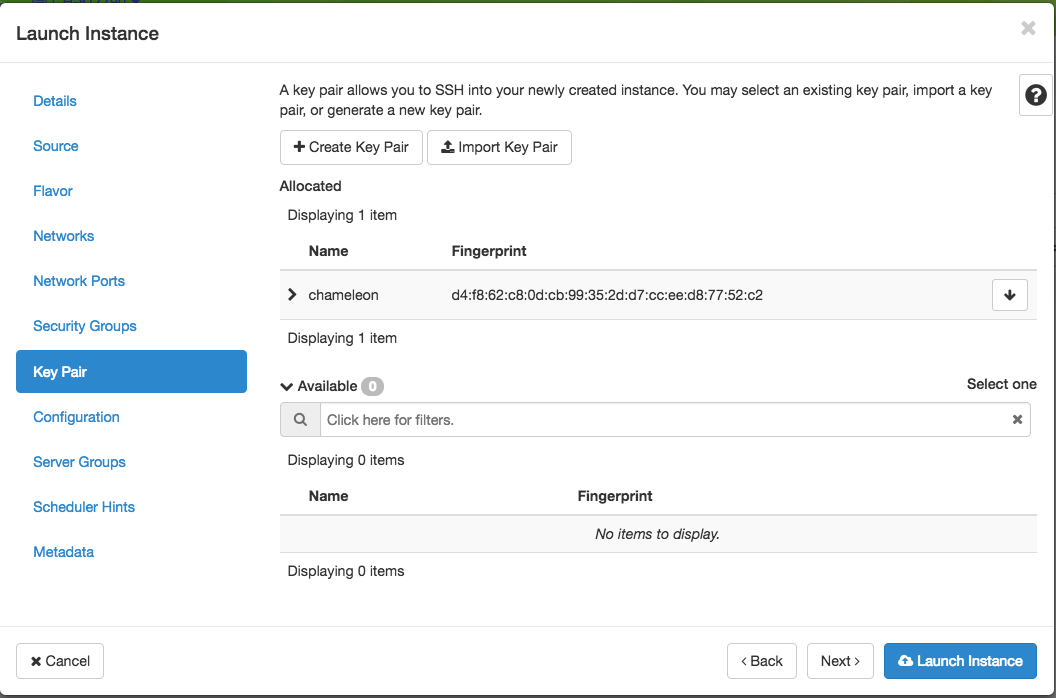
The Key Pair configuration step
Important
It is a good practice to make sure that the instance is launching with the key pair of your choice, or you will not be able to access your instance.
Tip
You may import or create key pairs directly through this step.
Creating a New Key Pair
To create a key pair through the interface:
Click + Create Key Pair button
Provide a name for your new key pair and click Create Key Pair
A
.pemfile containing the private key will be automatically downloadedThe public key is saved automatically to Chameleon
Save the private key to a secure location (your home directory is recommended for macOS/Linux)
Importing an Existing Key Pair
To import a key pair you’ve generated on your computer:
Click Import Key Pair button
Provide a name for your imported key pair
Paste your public key (typically found at
~/.ssh/id_rsa.pub)
Note
Chameleon only stores the public key for each SSH key pair. Never upload your private key! Private keys begin with
-----BEGIN RSA PRIVATE KEY-----Tip
On macOS, you can copy your public key with:
cat ~/.ssh/id_rsa.pub | pbcopyIf you want to customize your instance after it has launched, you can add a customization script in the Configuration step.
You can type in the script in Customization Script.
Or you can upload your script via Load script from a file.
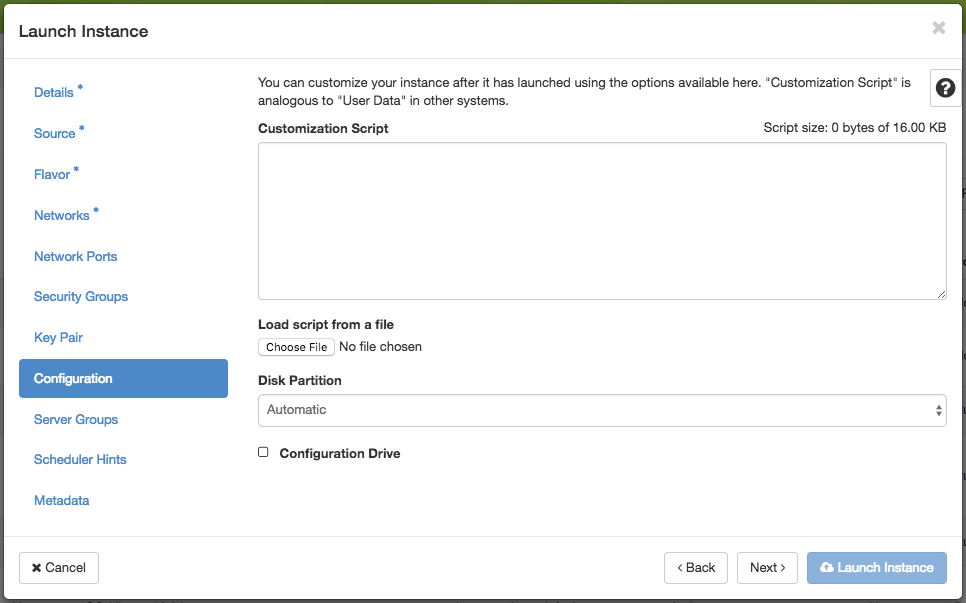
Adding a Customization Script
Tip
You can disable and turn off appliance agents using a customization script.
Finish configuring and start launching the instance by clicking on the Launch Instance button. The instance will show up in the instance list, at first in Build status. It takes a few minutes to deploy the instance on bare metal hardware and reboot the machine.
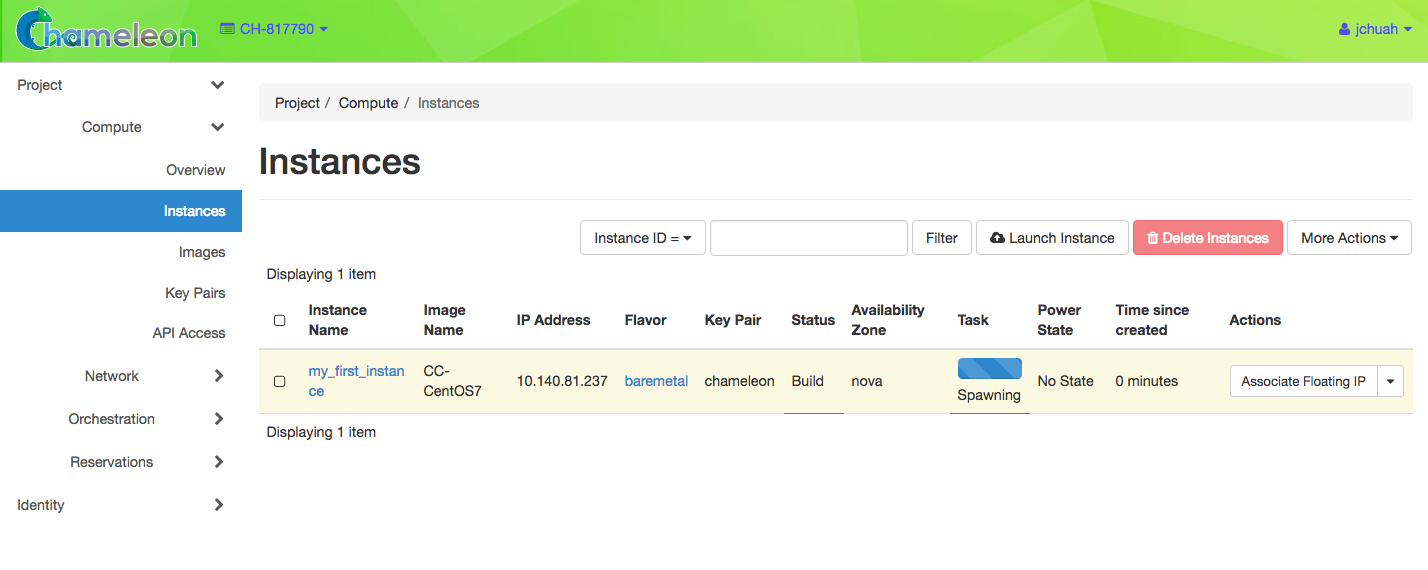
An Instance with the Build status
After a few minutes, the instance should become Active. The power state will show as Running. You can now Associate a Floating IP.

An Instance with the Active status
To view instance details, click on the instance.
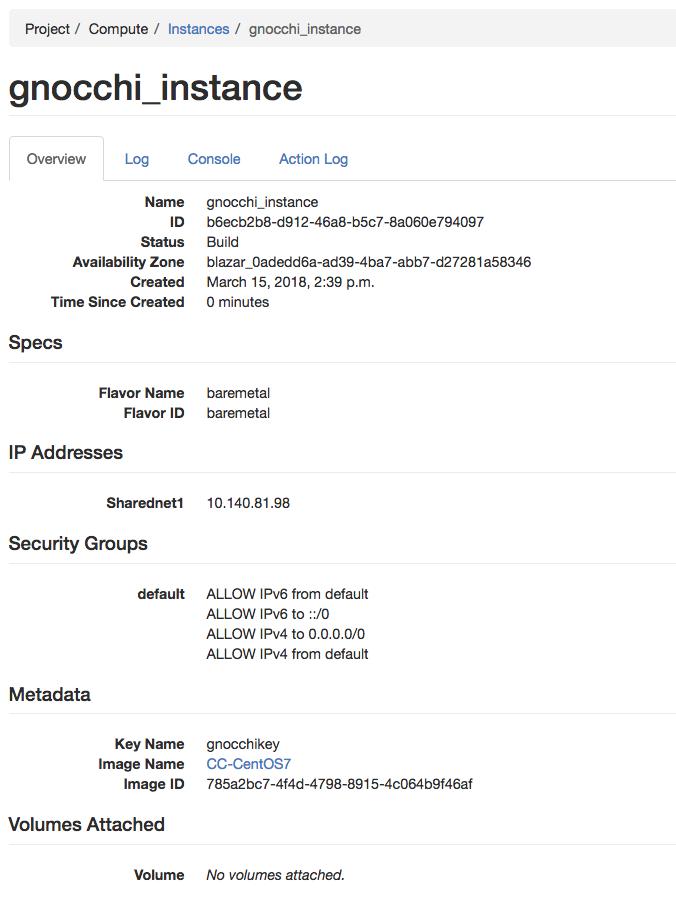
Instance details
Associate a Floating IP
To make your instance publicly accessible over the Internet, you must associate a Floating IP Address to it.
On the Floating IPs page (under the Network section in the left-hand sidebar), ensure that there is a free Floating IP available in your project. If there is not, click the Allocate IP to Project button to bring up the Allocate Floating IP dialog. In this dialog, you may simply click Allocate IP. You can optionally specify a description for the IP for your convenience.
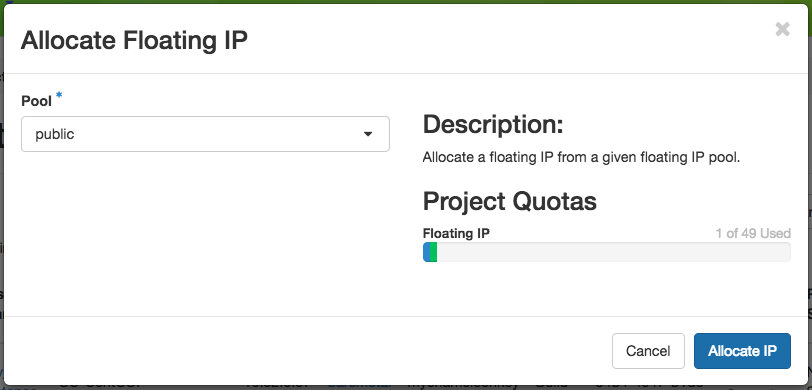
The Allocate Floating IP dialog
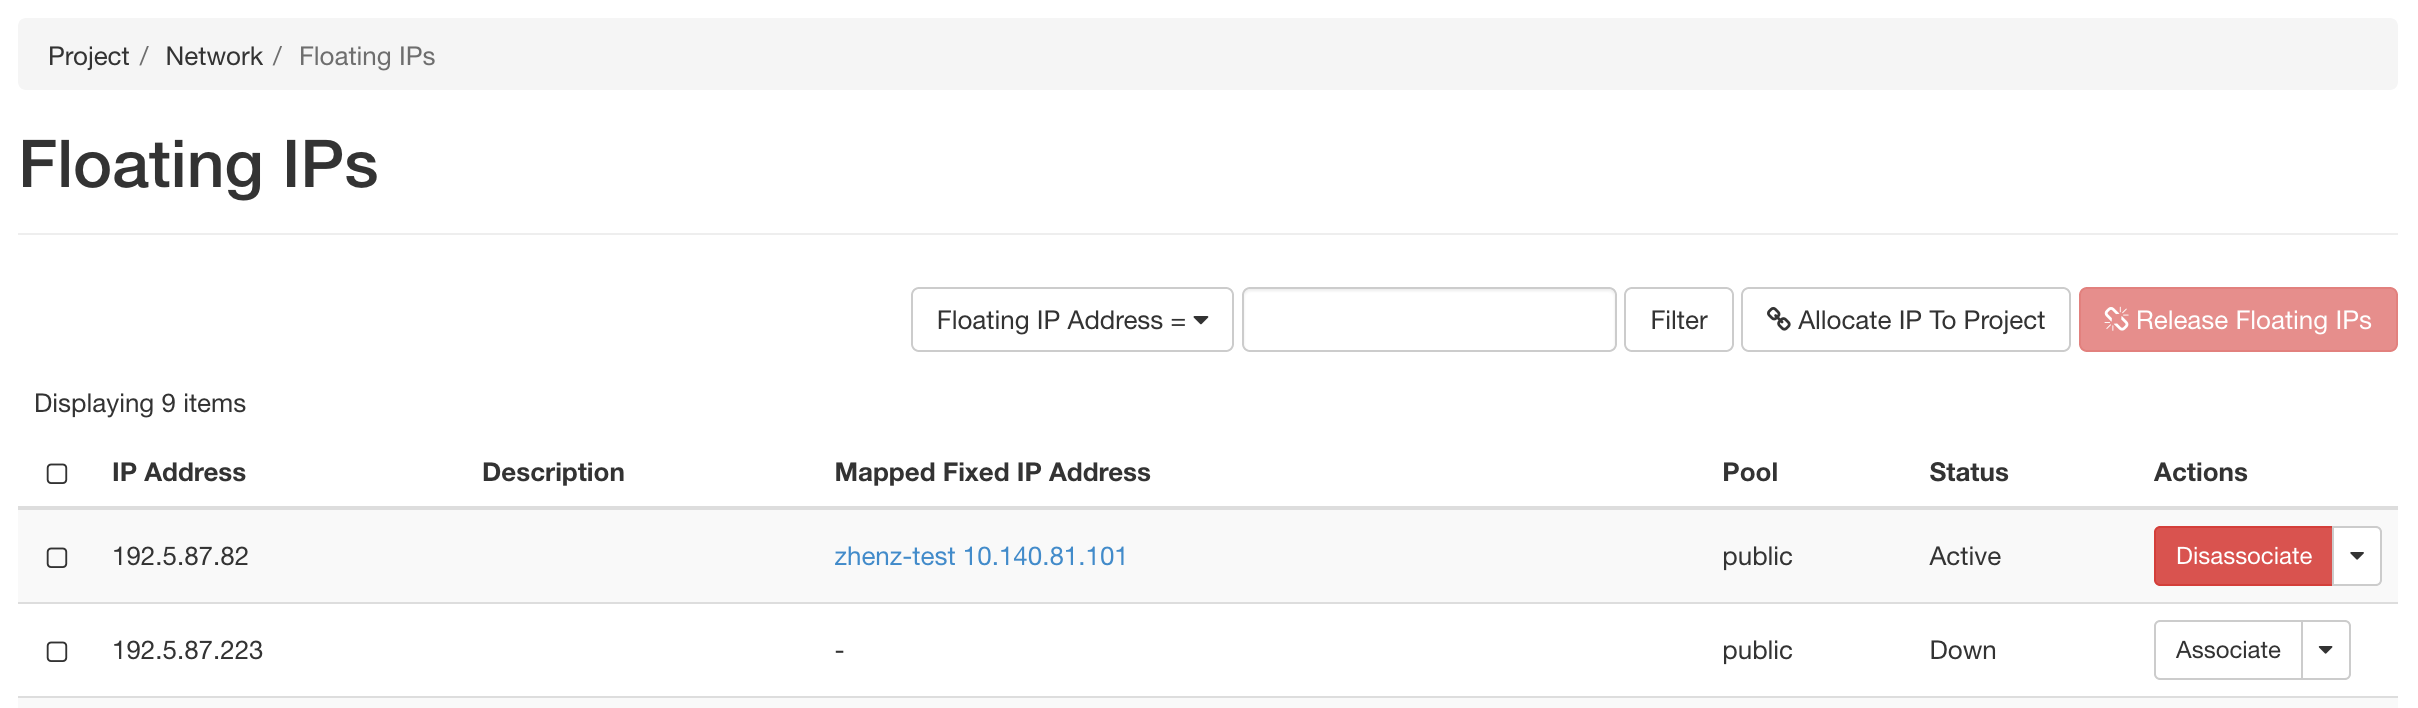
Once a Floating IP is allocated to your project, it will display in the list view, and you can click the Associate button for the Floating IP to assign it to a running or spawning instance. This button will bring up the Manage Floating IP Associations dialog.
The Floating IP list view with a Floating IP available
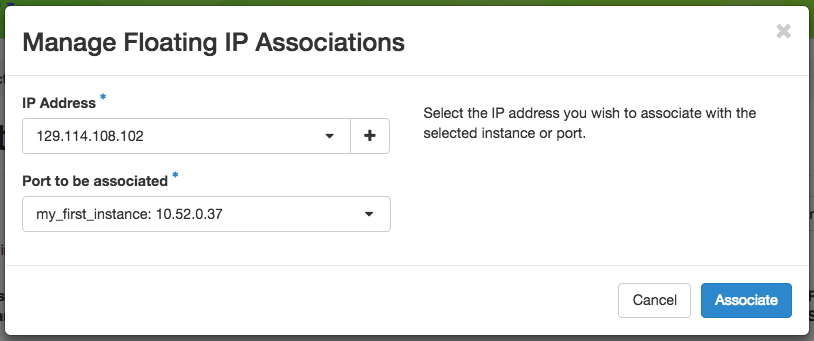
In the dialog, select an instance from the “Port to be associated” dropdown. Your instance’s display name will be displayed here. Click Associate to complete the process of assigning the IP to your instance.
The Manage Floating IP Associations dialog with an IP selected
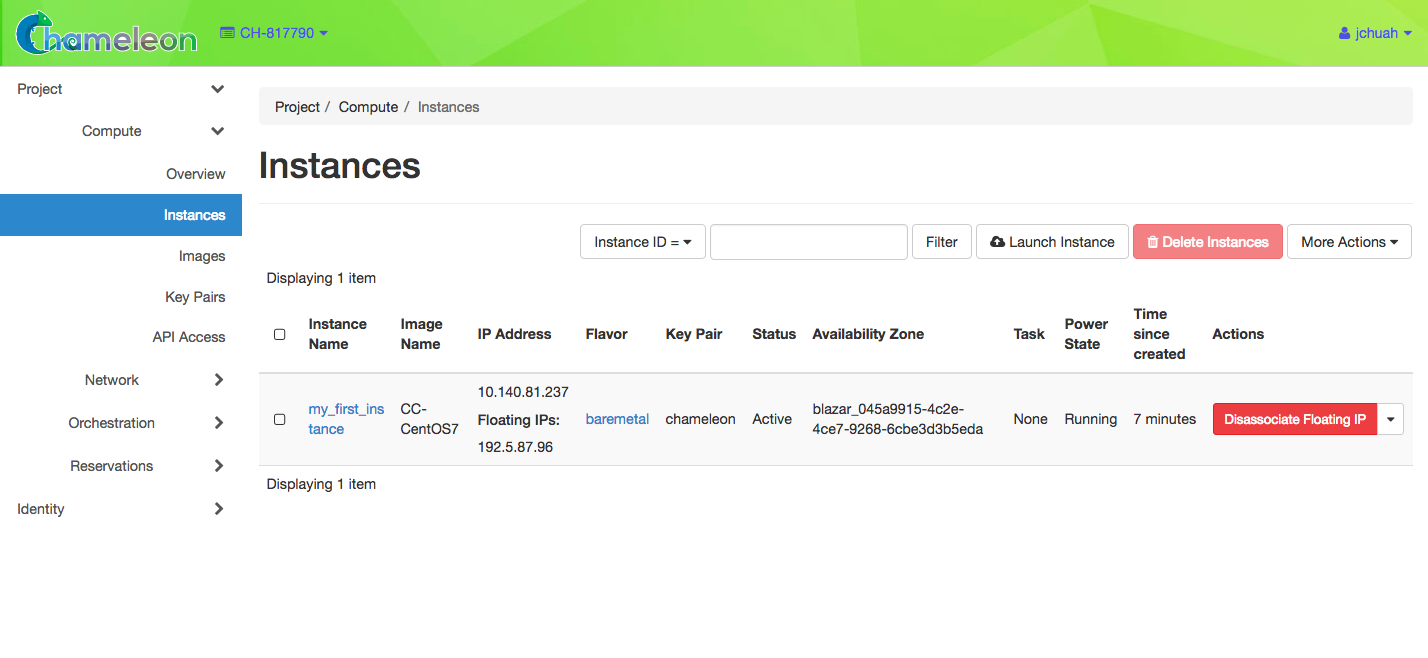
If you go back to the Instances page, you should now see the floating IP attached to the instance.
An instance with an allocated Floating IP