The Hardware Catalog on the Chameleon Portal
You may use the Hardware page at the Chameleon Portal to see the different hardware resource types available at each Chameleon site.
Availability
The CHI@TACC and CHI@UC buttons in the Availability section of the Resource Browser allow you to open the Lease Calendars at the Chameleon sites. You must login using your Chameleon account to view these lease calendars.

Resource availability links to the lease calendars
Chameleon Resource Browser
The Chameleon Resource Browser allows you to filter Chameleon resources by node type and view details of each node.

The Chameleon Resource Browser
You may filter for specific node types by selecting the checkboxes that match your filter criteria or by clicking the buttons such as Compute and Infiniband Support. The numbers printed next to the node types indicate the total number of nodes of that certain type. After you have selected filter criteria, you can click the View button to see details of individual nodes that match your filtering criteria.
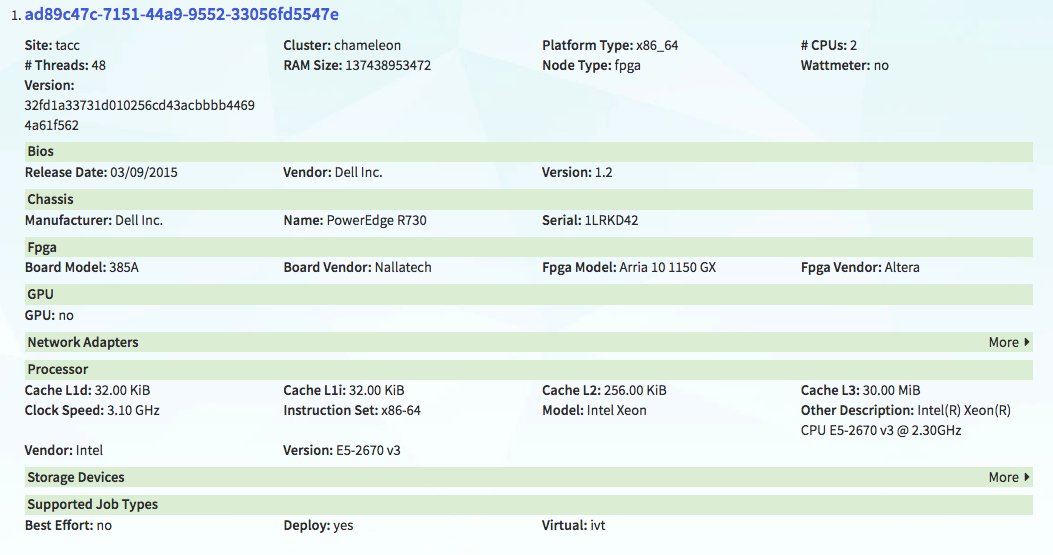
Node details
Tip
To get more precise characteristics of the selected node, search the node at Intel’s CPU database.
Note
All the nodes in Chameleon is identified by their UUIDs. You will need the UUID of a node for making reservations and for power monitoring. In addition, each node also has a Version UUID, which is used for retrieving its maintenance history.
Attention
When we replace faulty hardware on a node, the replacement part typically has the same hardware characteristics. For example, a node with a faulty 250 GB hard drive would be replaced with the same 250 GB hard drive model. However, it may be important for your experimental reproducibility to know about those hardware replacement events, in case it affects your metrics.
Generating a Reservation Script
The Chameleon Portal does not support a direct reservation from the Hardware page. However, you may generate a script for reserving the selected nodes by clicking on the Reserve button and use the auto-generated script later for the reservation.

Generating a reservation script
After the form is submitted by clicking the Generate Script button, a new dialog that contains the auto-generated command line will show.
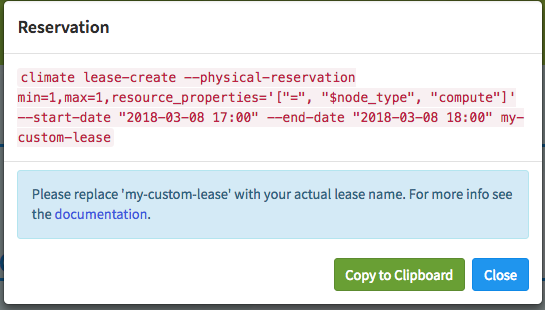
An auto-generated reservation script
For node reservation using auto-generated command, see Provisioning and Managing Resources Using the CLI.