Next Steps: JupyterHub and python-chi
In the getting started guide, we walked through how to find hardware, reserve resources, and launch an instance using the Chameleon web interface. In this guide, we’ll accomplish the same thing programmatically using a Jupyter Notebook connected to the testbed.

Jupyter on Chameleon
Chameleon is integrated with JupyterHub, so you can launch a Jupyter server (on KVM) with an environment pre-configured with python-chi and authentication to the testbed. JupyterHub on Chameleon allows you to create Jupyter Notebooks with your experiment and analysis code, collaborate with other project members in a common testbed workspace, and share files as Trovi artifacts with the Chameleon community.
To read more about the Jupyter interface, see our docs on the interface.
To launch the Jupyter interface on Chameleon, go to the Chameleon home page, click on the “Experiment” tab, and select the “Jupyter Interface” item. This will launch a new window which will begin loading the Jupyter server. It will then launch the JupyterHub interface. This interface should be familiar if you’ve ever worked with Jupyter tools before. From the launch page, we can create new notebooks, open consoles, and even open a terminal.
The work that you do in this space is persistent, so if you create a new notebook and then exit the interface and relaunch it, the notebook will still appear in your file system.

Jupyter Interface will start a server.
You can also download and import files from Jupyter as well as integrate with git.

Trovi
One benefit of having an interface like Jupyter available is that users can use it to package their project materials, scripts, code, and datasets as artifacts that others can replicate and extend. So, how does Chameleon facilitate this sharing?
Chameleon provides the Trovi service as a repository to share and access artifacts from other users on the testbed. Trovi is integrated with the Jupyter Interface, so you can launch Trovi artifacts directly onto the Jupyter Interface and start using them. You can also take your Jupyter artifacts and upload them to Trovi from Jupyter, allowing others to see and use them.
To get to the Trovi repository from the Chameleon home page, go to the “Experiment” tab and click the “Trovi” menu item. Here, you can see all the public artifacts available on the testbed.

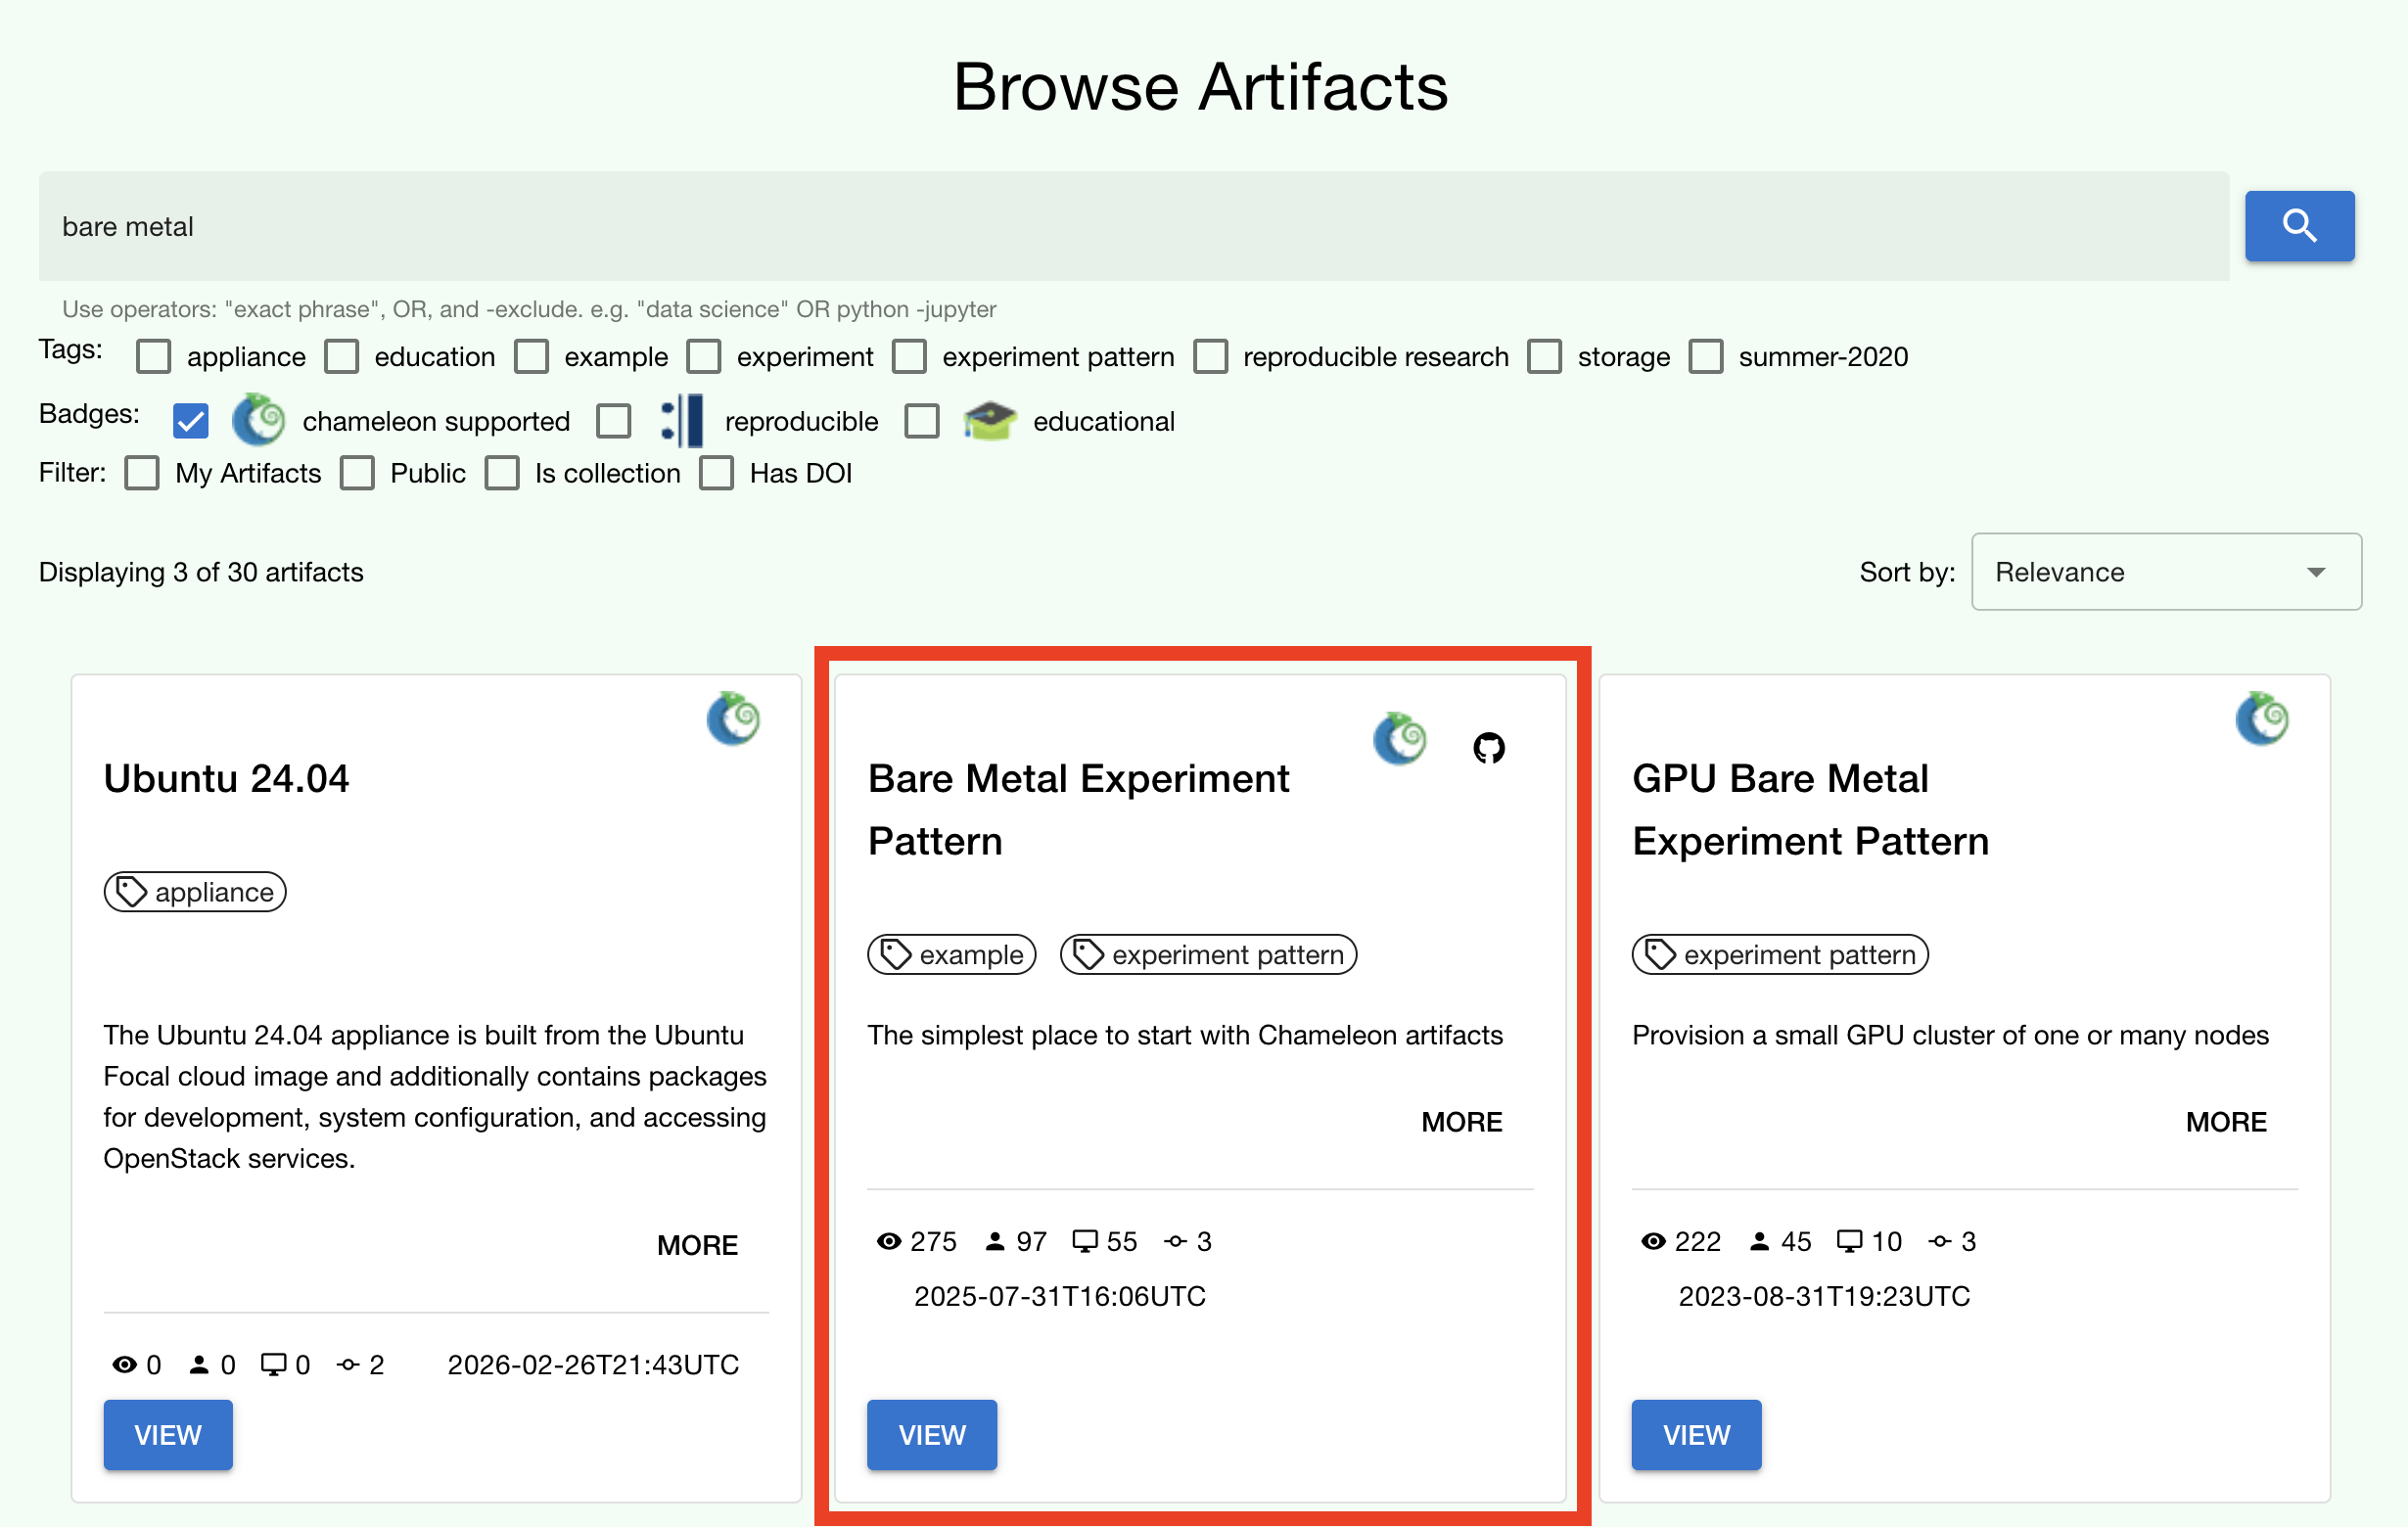
Chameleon offers tutorials and experimental pattern notebooks on Trovi (see collection here). We’ll use one now to see how we can accomplish the same basic set up on Chameleon that we achieved in our previous section.
Go to the Trovi repository (after logging in to the site if you aren’t
already). The artifact we will use today is called the Bare Metal Experiment
Pattern. You can type “Bare Metal” in the search bar to filter the results.
You can also filter for this artifact by selecting the Chameleon badge icon
(![]() ) on the side bar to view all of the Chameleon-supported
artifacts. We can also filter by tag, for example the “experiment pattern” tag.
) on the side bar to view all of the Chameleon-supported
artifacts. We can also filter by tag, for example the “experiment pattern” tag.
Tip
Want to publish your own experiment on Trovi or import an existing GitHub repository? See our Trovi tips blog post for a step-by-step walkthrough of the full artifact lifecycle, from packaging to publication.
Be sure to check out our additional templates with more advanced topics on Trovi. The best part about these templates is that you can easily reuse the code to start writing your own artifacts.
To launch the artifact, click on the title. On the next page, you will see the following:

Click on the “Launch on Chameleon” button to start Jupyter. This loading page should look familiar to the loading page when we launched the Jupyter Interface above.
Once Jupyter has loaded, we will have the artifact directory available in our workspace. Your directory should include the following files:
$ ls
README.md             Experiment.ipynb            scrips
We can click on the directory and open the README.md file, which
provides some documentation on this artifact, including approximately how long
it takes to run and any additional requirements.
Let’s now open the Experiment.ipynb file.
Getting started with python-chi: bare metal experiment pattern

Jupyter Notebook allows developers to mix text (rendered as Markdown) and code in one file. This mixture of content enhances the experience of running code, because documentation can be provided to clarify the code blocks that run. We can see at the start of the notebook a few blocks of text. If we scroll down to the “Configuration” section, we will see our first block of code. Let’s dive in!
Setting the Site and Project
As required when working through the Chameleon GUI, we need to set our active project and pick a testbed site to use before we can continue. This requires a Chameleon account and membership to an active project.
Once we have our project and site, we can use python-chi to set these
parameters via the chi.context module.
import chi

chi.use_site("CHI@UC")
chi.use_project("CHI-XXXXXX")  # Replace with your project name
This code imports the python-chi module, calls use_site to target a
Chameleon site, and use_project to set the active project. All subsequent
API calls — leases, instances, networks — will be sent to that site and billed
to that project. You can call these again at any point to switch context.
Tip
In a Jupyter Notebook, you can use chi.context.choose_site() and
chi.context.choose_project() for interactive dropdown menus instead
of hard-coding the values. See the chi.context module docs for the
full API, and our python-chi 1.0 blog post for a walkthrough of all
the new Jupyter widget features introduced in that release.
Discover Hardware
python-chi now supports hardware discovery via the chi.hardware module,
mirroring what you can do on the Hardware Discovery web page. This is
useful for finding available nodes and checking when specific hardware is free
before committing to a reservation.
from chi import hardware

# Display an interactive, filterable table of all nodes at the current site
hardware.show_nodes()

# Or filter programmatically — e.g. only GPU nodes with at least 32 CPUs
nodes = hardware.get_nodes(gpu=True, min_number_cpu=32)
To check when a specific node is next available, use next_free_timeslot:
node = hardware.get_nodes(node_type="compute_cascadelake_r")[0]
start, end = node.next_free_timeslot(minimum_hours=3)
print(f"Next free slot: {start} → {end}")
See the chi.hardware module docs for the full list of filter options and
methods available on Node objects.
Create a Reservation
After we set our site and project code, we can now create a lease. The code
below uses the Lease class to create a reservation for one floating IP
and one bare metal host with the node type compute_cascadelake_r. Notice
that we are setting the same parameters that we had to include in the form we
used to create a lease on the GUI.
import os
from chi import lease
from datetime import timedelta

l = lease.Lease(
   name=f"{os.getenv('USER')}-power-management",
   duration=timedelta(hours=3)
)
l.add_node_reservation(node_type="compute_cascadelake_r", amount=1)
l.add_fip_reservation(amount=1)
l.submit(wait_for_active=True)
See the chi.lease module docs for advanced options, including network reservations, KVM flavor reservations, and setting explicit start/end times for advanced scheduling.
Create an Instance
We can now configure and launch our instance on the node that we reserved.
from chi import server

s = server.Server(
   name=f"{os.getenv('USER')}-power-management",
   reservation_id=l.node_reservations[0]["id"],
   image_name="CC-Ubuntu24.04"
)
s.submit(wait_for_active=True)
This code uses the Server class to spin up an instance. We can specify
which image we want to use by referring to its name (in this case
CC-Ubuntu24.04). (To see the name of an image, you can look it up in the
Appliances Catalog on Trovi by filtering for the appliance tag.) We
also need to provide the reservation ID from our lease, which we can access
from the lease’s node_reservations list. See the chi.server module docs
for the full Server class API, including flavor_name, network_name,
and keypair parameters.
Note
We are not specifying a key pair here, because when you use Chameleon through
the Jupyter Interface, a key pair is automatically generated in the Jupyter
environment and associated with your Chameleon account. By default, the
Server class will include this key pair in any instance you create
from the Jupyter Interface and will use it in other methods that allow you to
SSH to the instance. You can specify a different key pair using the key_name
parameter.
Connecting to and Running Scripts on the Instance
After our server is running (remember, this can take up to 20 minutes in some
cases; now is a good time to take a coffee break), we will association our
instance with the reserved floating IP and then check our connectivity to the
node based using the Server class check_connectivity method.
floating_ip = l.get_reserved_floating_ips()[0]
s.associate_floating_ip(floating_ip)
s.check_connectivity(host=floating_ip)
We have now associated our floating IP and verified our connection to the
instance via the floating IP. We can then use execute method to upload
scripts to our instance for setting up our experiment, running it, and storing
the results in Chameleon object storage.
# Clone git repo with experiment source code
my_server.execute("git clone https://github.com/ChameleonCloud/bare_metal_experiment_pattern")

# Run setup script
my_server.execute("bash bare_metal_experiment_pattern/scripts/setup.sh")
# Run experiment script for N iterations
iterations = 1
for i in range(iterations):
   my_server.execute("bash bare_metal_experiment_pattern/scripts/run_experiment.sh 10")
From this point, the remaining code blocks in this notebook will download the
data locally from object storage and then plot figures using the experiment
data. As an exercise, try to see if you can replicate the experiment in this
tutorial on a different node type like a skylake or one of our many nodes
with a GPU!
Congratulations! You just created your first lease and instance on Chameleon without ever leaving the comforts of your Jupyter Notebook!
Note
This guide covers bare metal instances via the chi.server module.
python-chi also supports container-based edge computing on CHI@Edge
via the chi.container module —
see the CHI@Edge docs for details.
Be sure to check out our additional tutorials on Trovi to continue your learning!