Project Management
Overview
Projects are the fundamental organizing unit for research on Chameleon. Each project provides:
Resource allocations measured in Service Units (SUs) for computational time
User management with role-based access control (PI, Manager, Member)
Resource isolation with dedicated security groups, networks, and storage
Usage tracking and billing management for fair resource sharing
Publication tracking to record research outputs associated with the project
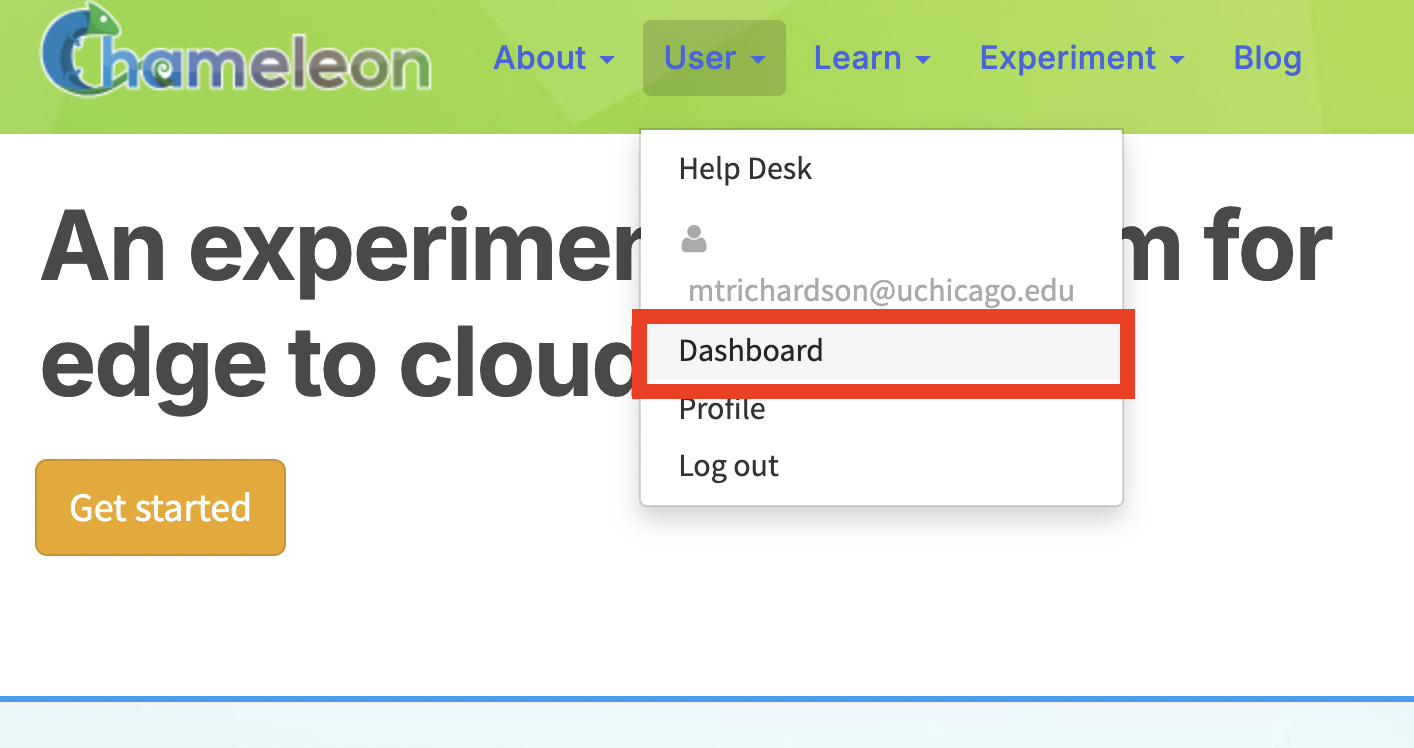
All project management tasks are performed through the Chameleon portal. Log in to the portal and go to your User Dashboard. You can access your Dashboard via the dropdown list on the top right of the screen.
Quick Navigation
Dashboard overview - View projects, tickets, and outages
Creating a project - Start a new research or education project
Managing users - Add/remove team members and set roles
Allocation management - Request renewals and recharges
Publications tracking - Maintain research output records
Related Documentation
PI eligibility requirements - Criteria for creating projects
User authentication - Login and account configuration
Getting help - Support channels and community resources
Dashboard
The Dashboard’s Overview page consists of thre control panels - the Active Projects control panel, the Ongoing Outages panel, and the Open Tickets panel.
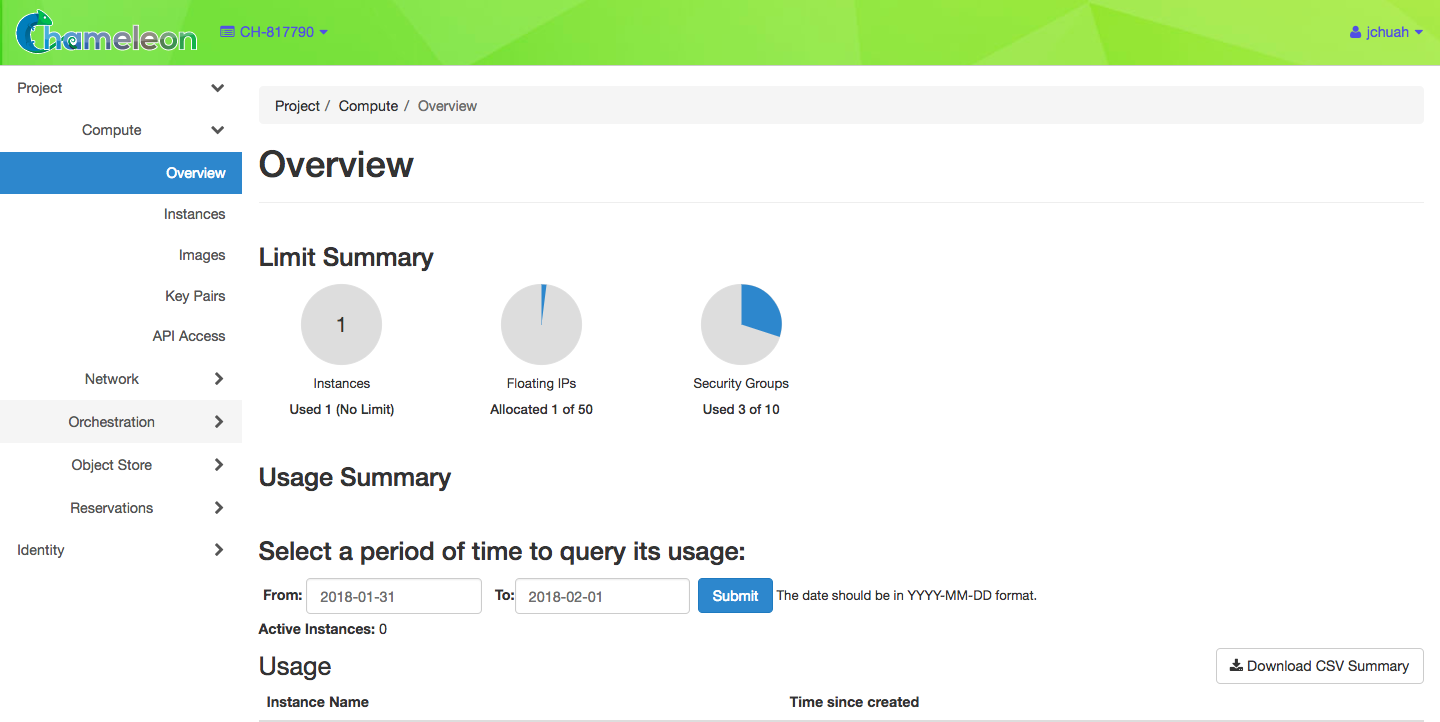
The project dashboard
The Active Projects control panel allows you to view all your active projects and their current usage. You may click on a project to view details.
The Open Tickets panel lists all your active help desk tickets. In addition, you can Open a Ticket via the Open Tickets panel.
The Ongoing Outages panel displays information about ongoing outages on the system. Learn more about Outages.
Projects
The Dashboard’s Projects Page shows a list of all your active and inactive projects.
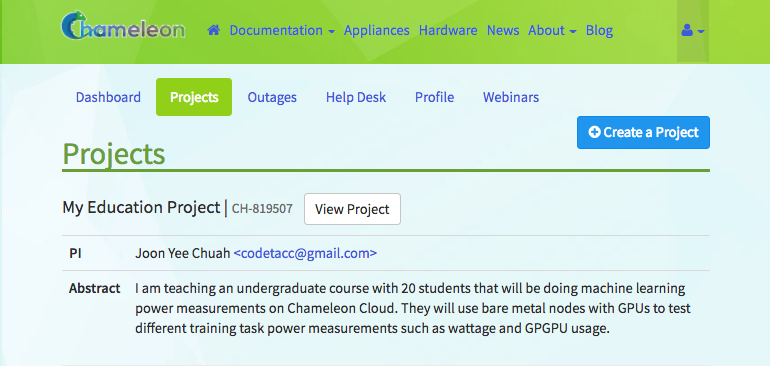
Project list
Each individual Project has its own:
Service Unit allocations
Users that have access to the project
System resources such as Security Groups, Floating IP Addresses and Instances
Assets such as snapshots, object containers, metrics and network configuration
Creating a project
To create a project, click the +Create a Project button. After filling out and submitting the request form, a system administrator will review your request and notify you once your project gets approved. Project durations are six months with a default allocation of 20,000 Service units.
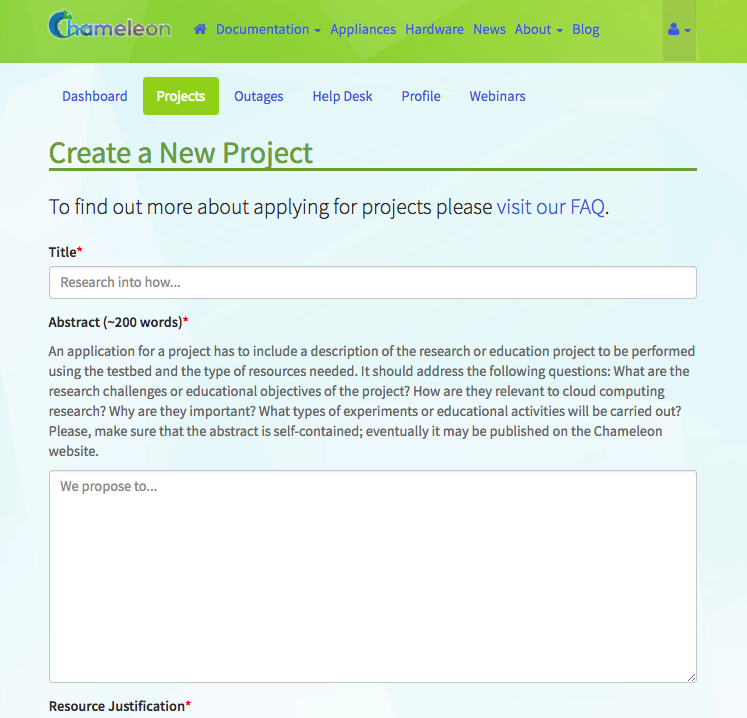
The Create a New Project form
Service units
One Service Unit (SU) is equivalent to one hour of wall clock time on a base bare metal server. For full details on SU rates for specialized hardware and KVM instances, see our FAQ.
Project details
Clicking on a project from either the Dashboard main page or the Projects page will allow you to manage one of your approved Projects.
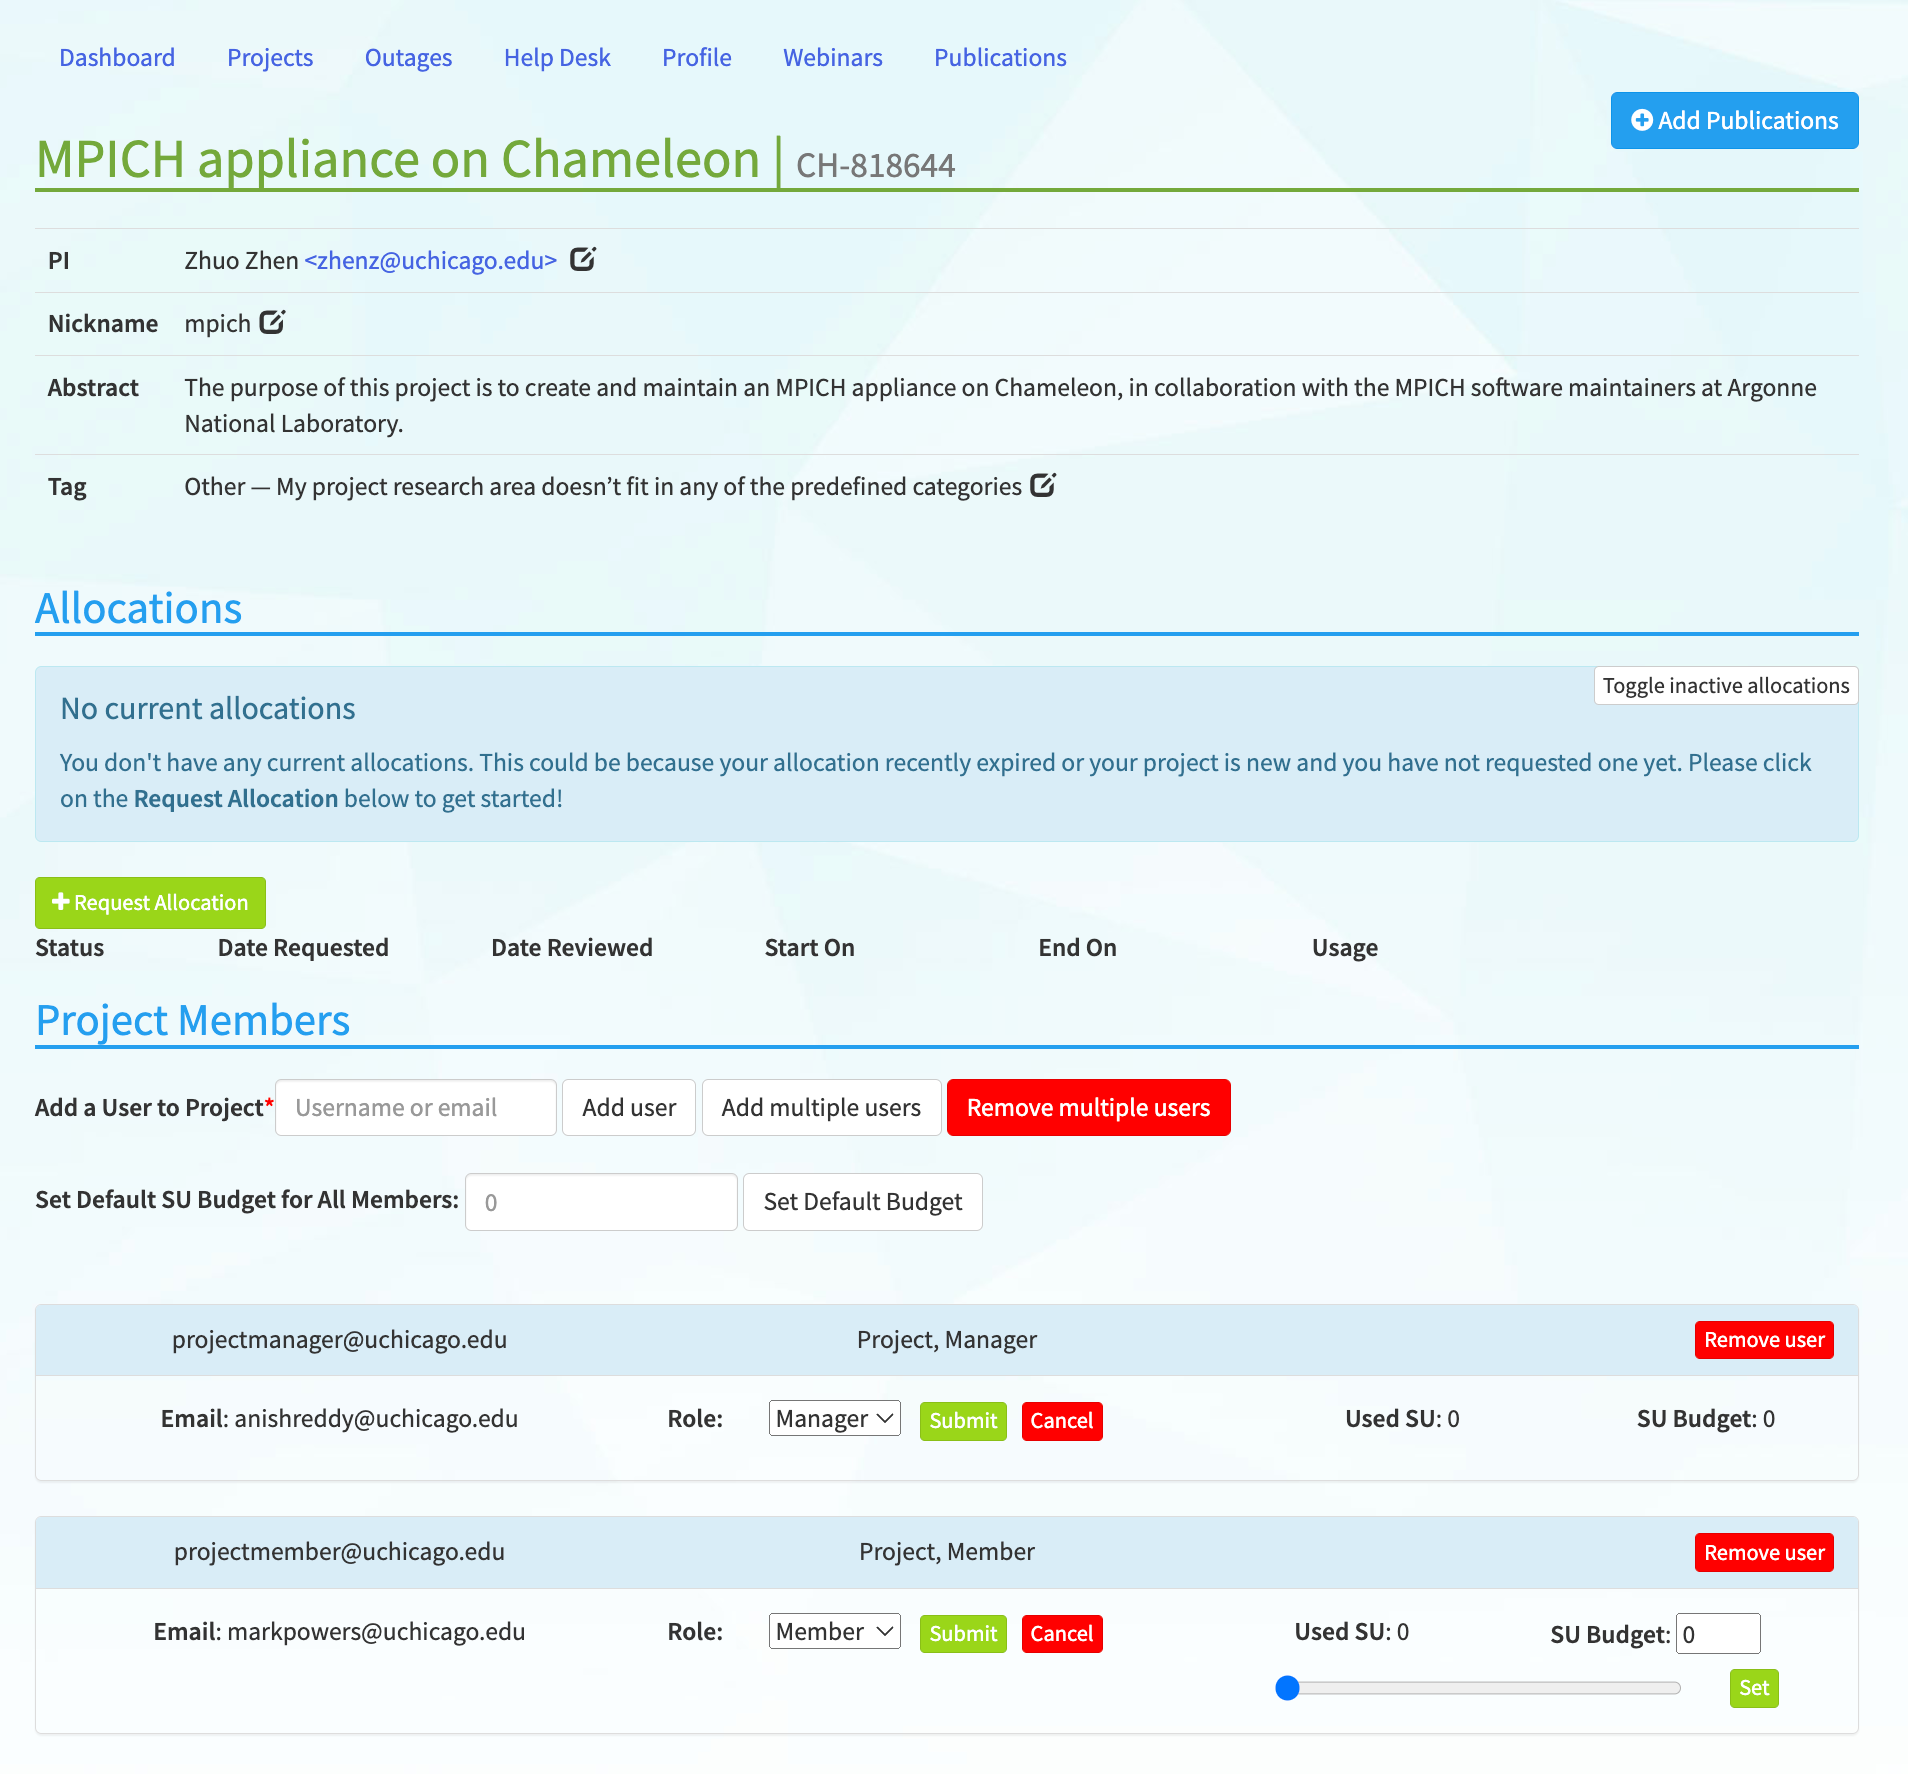
Project details
In the details page of your project, you may recharge or extend your allocation, view allocation usage details, and manage users of your project.
Recharge or extend your allocation

Allocation actions
In the Allocations section of your Project details, you may view your project start and end dates, current Service Unit usage and request a Service Unit recharge or project extension. To request a Service Unit recharge or Project extension, click the gear button at the end of the allocation row, and then click Recharge/Extend Allocation. When requesting renewal or recharge of the allocations, we may ask you to update your publications dashboard, so keeping it up to date now can save you time later! For questions about allocation management, visit our Community Forum or contact the Help Desk.
View allocation usage details
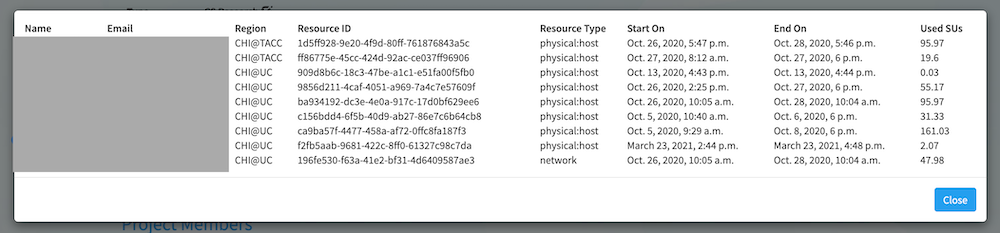
Allocation usage details
To view the allocation usage details, in the Allocations section, click the gear button at the end of the allocation row, and then click View Charge. This will open a modal displaying a list of all charges against your allocation, including who initiated the charge, how many Service Units were charged, and what type of charge it was.
Manage users
In the dashboard, you can add or remove users (or “members”) from your projects, manage your project members’ user roles, and allocate how many SUs each project member can consume on your project allocation.
User roles
To manage user roles for a Project, scroll down to the Project Members section in the Project details page of your dashboard. The table below shows the types of roles that members can have and their privileges.
Role |
Description |
|---|---|
PI |
Each project has only one PI. PI can manage roles of the project members. |
Manager |
Each project can have multiple Managers. Managers can manage project membership and renew allocations of the project. |
Member |
Members can only view the list of the project members. |
To change the role of a project member, choose a new role from the dropdown and click the Submit button to apply the new role to the user, or use the Cancel button to cancel the action.
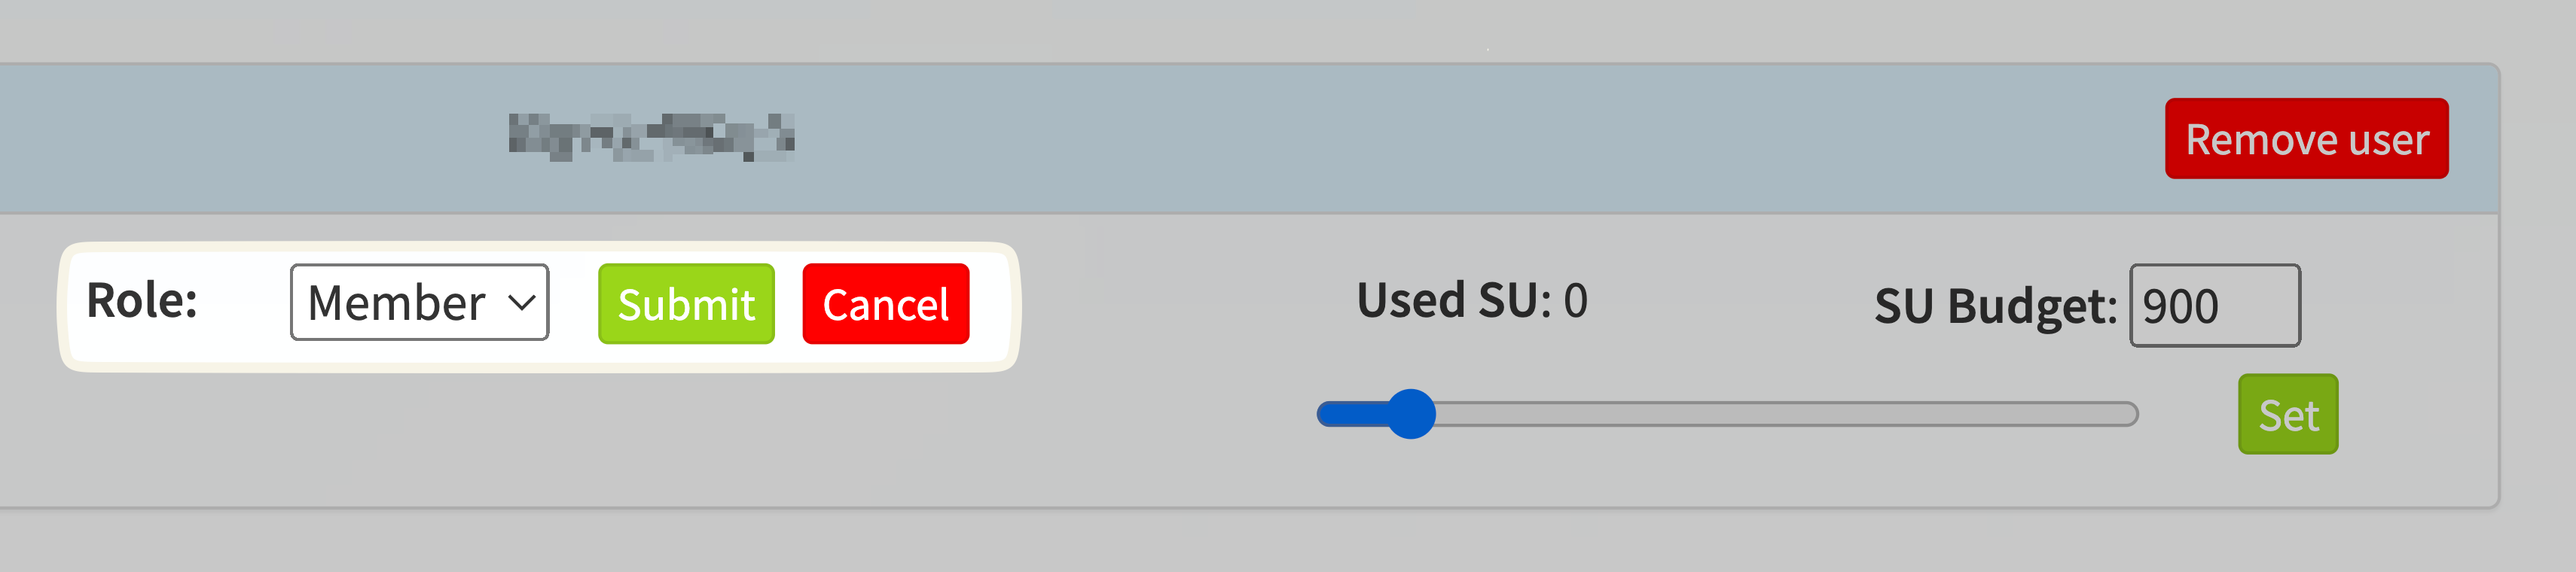
Manage Role of a User
Set SU budgets for project members
The PI or project managers can set a service unit (SU) budget for each project member. This budget limits the resources that a project member can utilize from the project’s total SU allocation. Managing these budgets ensures fair distribution of resources and effective utilization of project resources across multiple project members. Setting a user-specific budget can help when managing resources for a project with lots of members (a large collaborative research project or a classroom project, for instance) and ensure that project allocations are shared effectively between project members.
Project managers (including PIs) can set a default SU budget that is applied to all project members except managers. All new users added to the project will receive the same default SU budget upon joining.
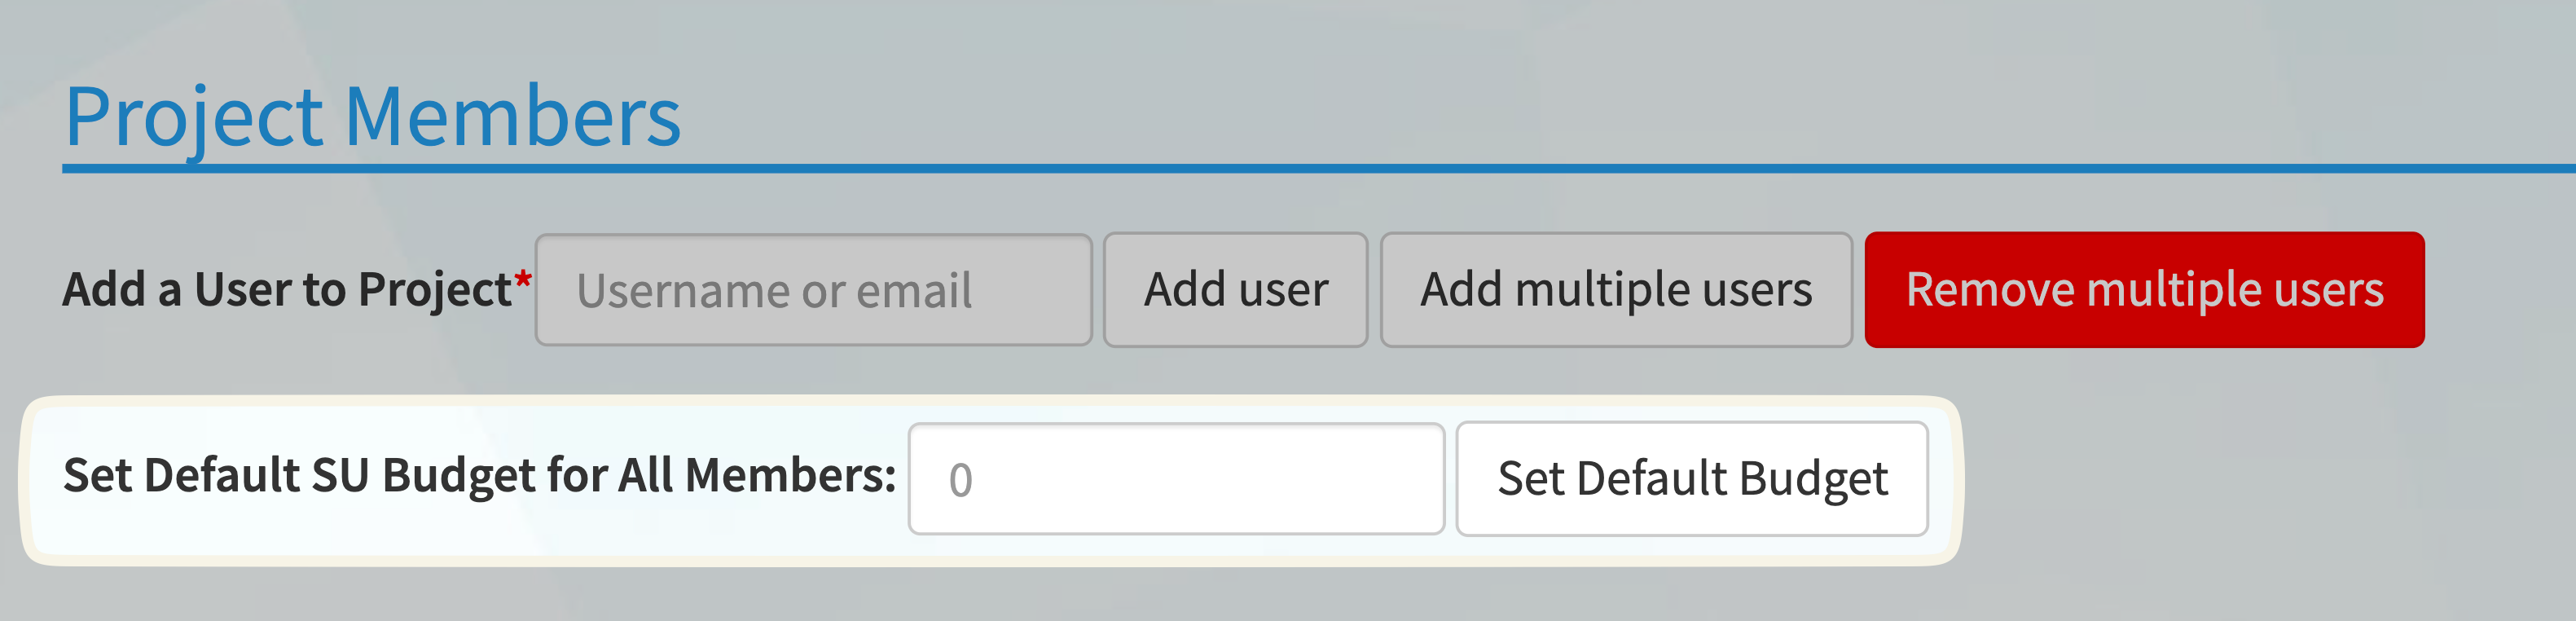
Set project default budget
Viewing User SU Budgets - Project members will have their SU budget displayed next to their name in the Project Members table. This represents the allocation of resources that they can utilize within the project.
Project managers may also set different limits for different users. To adjust the SU budget for a specific user, use the slider or the SU Budget field to Set the new budget for an individual user.
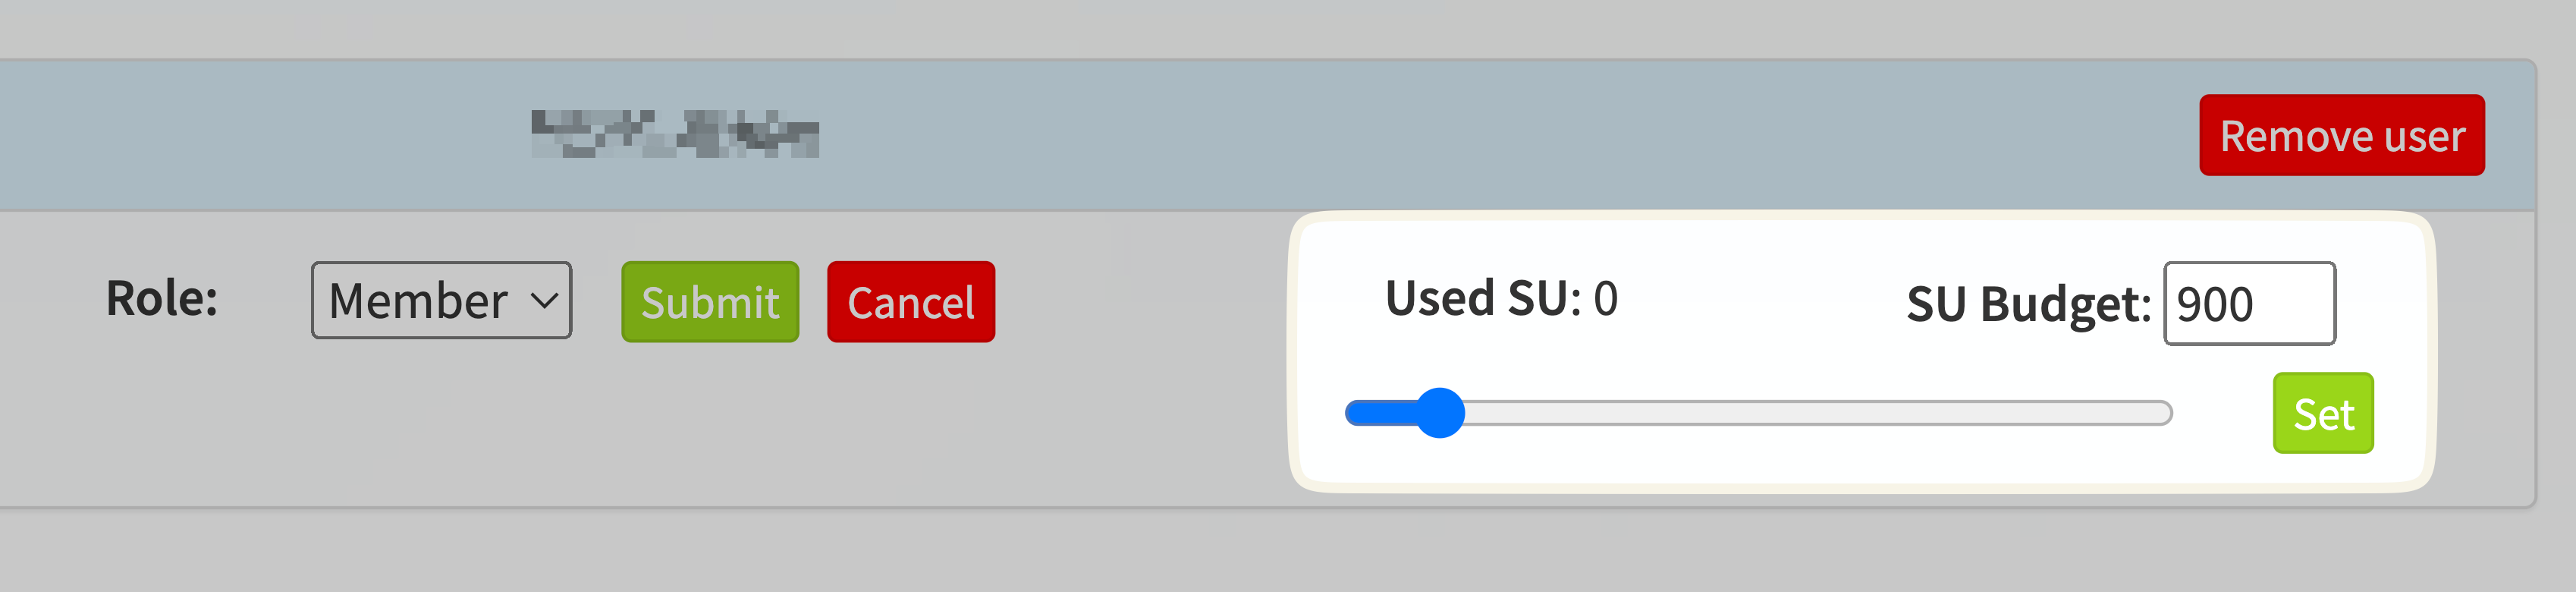
Adjust SU budget for user
Adding and removing new members
To add or remove users of a Project, use the Project Members section in the Project details page on your dashboard.
You may add a user to your project by filling out their username or email address and clicking the Add user button. While each user has their own Chameleon User account independent of your project, they may be added to one or more projects. Being a user of a Project does not require PI eligibility (see our PI eligibility guide for details on project creation requirements).
You may remove a user from your project by locating the user in the user list; clicking the gear button at the end of the row; and clicking Remove user.
It is also possible to bulk-add a large list of users by clicking the “Add multiple users” button, or remove all users without the Manager role by clicking the “Remove multiple users” button. Additionally, under this option there is a link that you can send to users that will allow them to request to join your project after they sign in to Chameleon. Once a request is made, the managers of a project will be notified, and will need to approve the request.
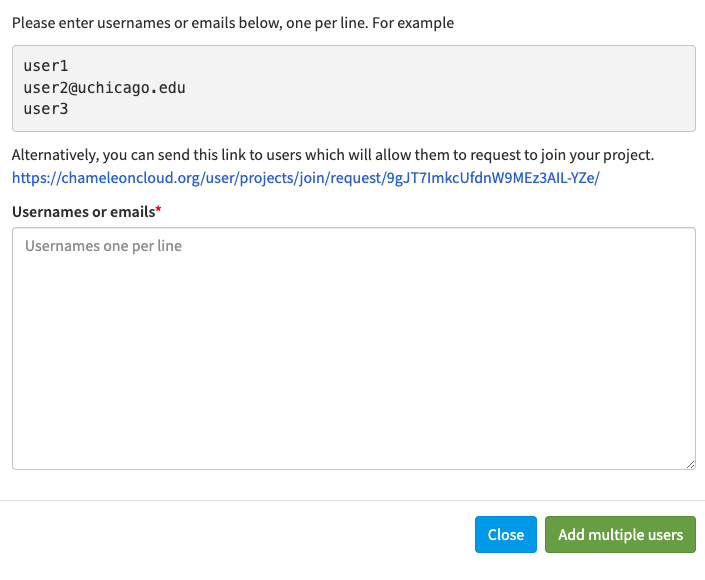
Adding multiple users
If there is no user associated with an email address, an invitation will be sent with a link. When someone clicks on this link, they will be prompted to sign in or create an account, and are then automatically added to the project. Invitations show up at the bottom of the members list, and can be deleted or resent if needed. After an invitation is accepted, the user will show up under the Project Members section.
Manage publications
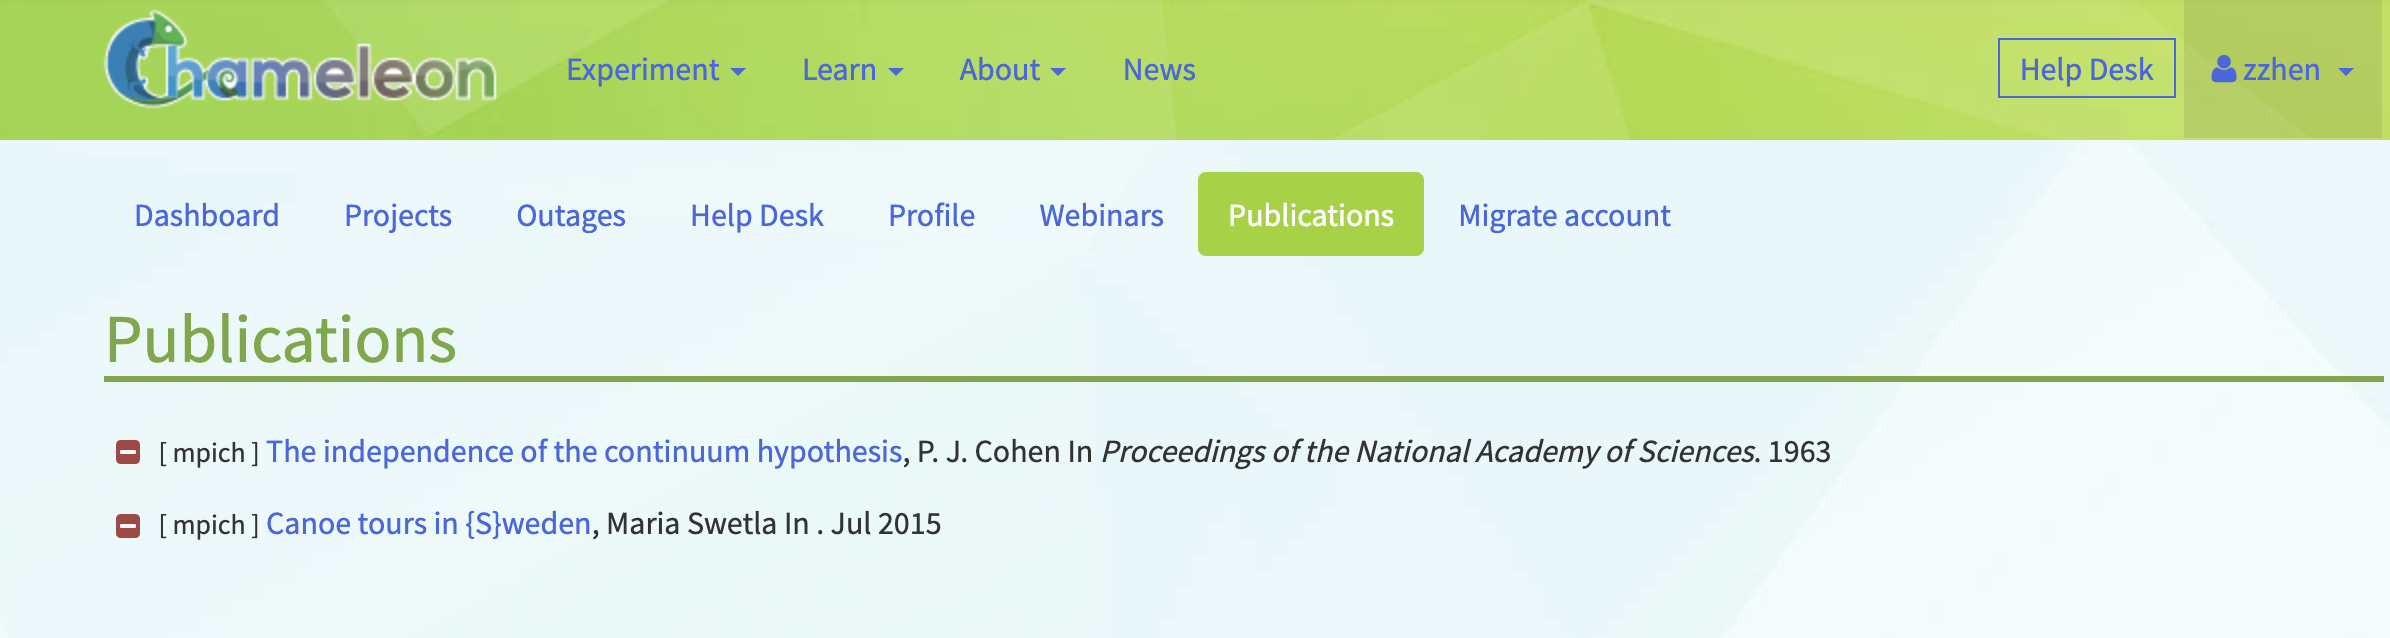
To add publications to a project, click the Add Publications button in the Project details page. Enter the publications in BibTeX format. All regular BibTeX publication types are supported. If you can provide a link, enter it as note or howpublished using the url package.
To manage the publications you have entered, use the Publications Dashboard.
Publications Dashboard
In the dashboard, you may remove a publication from a project by clicking the - button next to the publication text.