Command Line Interface (CLI)
Introduction
The Command Line Interface (CLI) provides a way to interact with Chameleon resources using shell and scripting tools. Chameleon uses the OpenStack Client to provide CLI functionality. This documentation section provides an overview on how to install the client and configure your shell environment to access Chameleon features.
Attention
Some of the Chameleon features are only accessable via the CLI, such as the Gnocchi metrics and the advanced networking features.
Note
Chameleon Cloud is primarily designed to support Unix-like environments. Threfore, it is highly recommended using CLI in a Unix-like system. For Windows 10 users, you may want to enable Windows Subsystem for Linux to get better experience with the Chameleon CLI.
Installing the CLI
Prerequisites
Python - Check if you have Python installed.
pip - If you’re using Python 3.4 (or greater), then pip comes installed with Python by default.
OpenStack Client Installation
Install the CLI by typing
pip install python-openstackclientin the terminal.Verify that it has installed correctly by typing
openstack. You will enter the Openstack Client in interactive mode and your prompt should change to(openstack).Exit the client by typing
exit.There are some clients with new features or bugfixes not yet in the upstream release branches, notably the Blazar CLI client. If you want to make reservations via the CLI, you should install that here:
pip install git+https://github.com/chameleoncloud/python-blazarclient@chameleoncloud/xena
CLI authentication
When using the CLI, you have to provide some credentials so the system trusts that the operations are really being executed by your user account. There are two ways of doing this.
Setting a CLI password
You can set a CLI password via the Chameleon Authentication Portal. The password you associate with your account can not be used to log in to the GUI or Jupyter interfaces and can only be used to authenticate a command-line client.
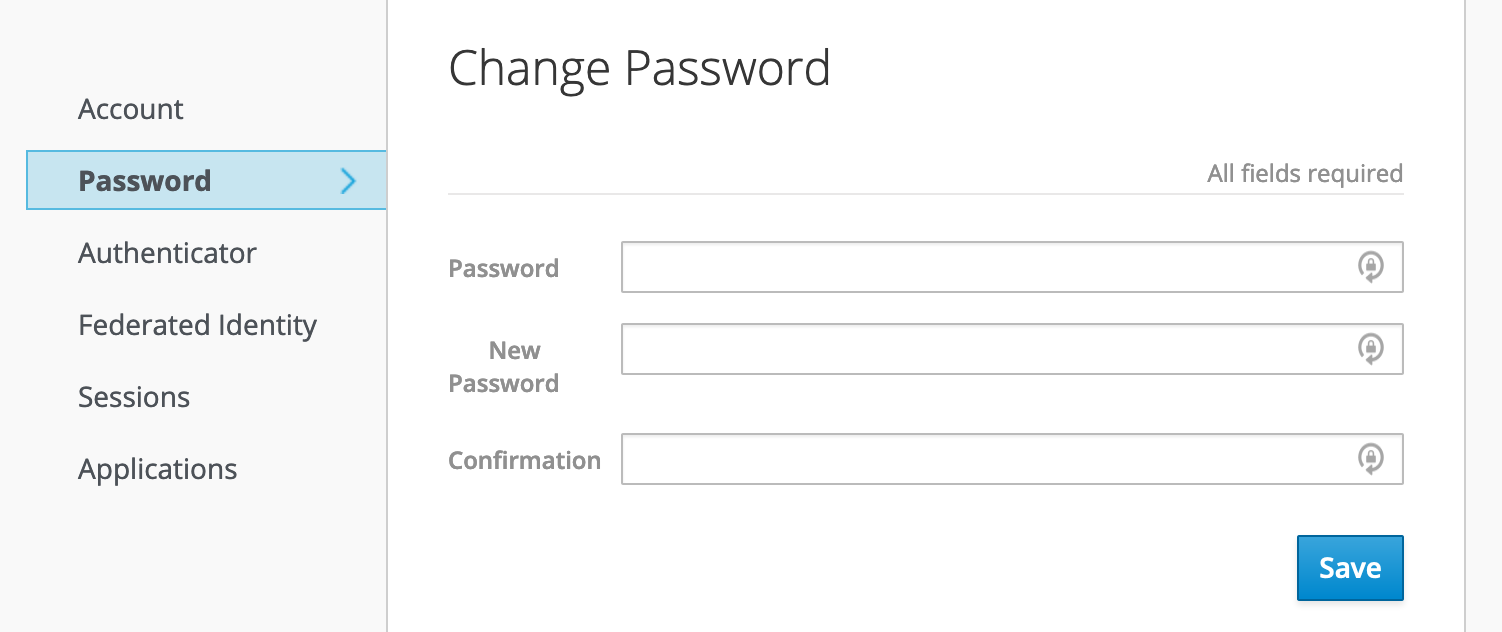
Setting a password in the Chameleon Authentication Portal
The benefit of this method is that this password will work on any Chameleon site.
Note
You should set a strong password for your CLI password, and it should not be a password you use elsewhere. Otherwise, your account risks being compromised by an attacker who has possibly obtained your password from another breached service. We highly recommend using a password manager e.g., BitWarden, LastPass <https://www.lastpass.com/password-manager>, or 1Password to assist.
Creating an application credential
You can also generate application credentials, which act as dedicated one-off passwords that are authorized with the same permissions as your user account, within a single project. If you work on multiple projects simultaneously, you will need to generate one application credential for each project.
To create an application credential, navigate to the “Identity” dashboard in the Graphical User Interface (GUI), and go to the “Application Credentials” panel. Create a new application credential and name it something meaningful (such as “CLI access for project CH-XXX”). You will also need to check the “unrestricted” checkbox in order to use the CLI to make leases in Blazar. If you do not need to make reservations via the CLI, you can leave the box unchecked, as it is the safer option.
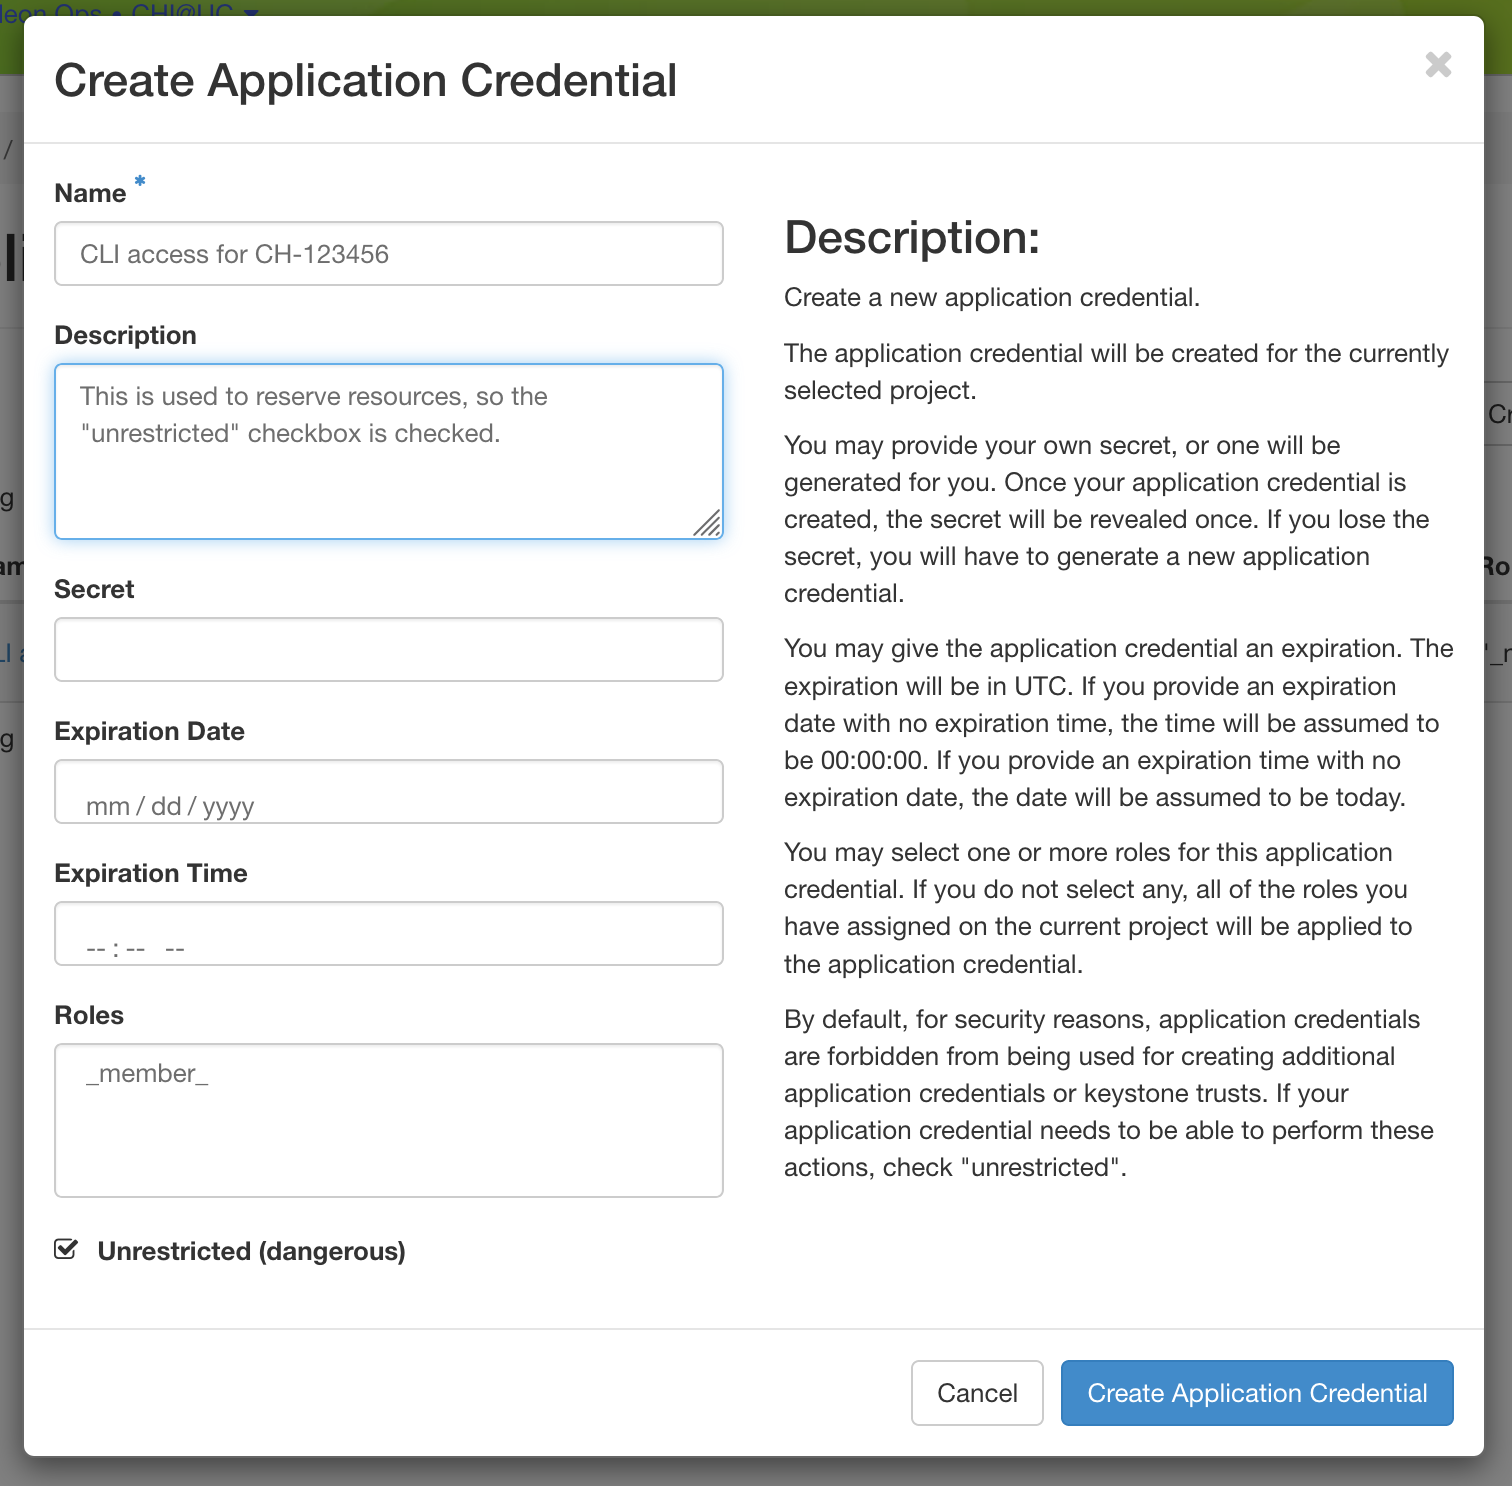
Once the system generates the credential, you will be given the option to download an RC file that configures the CLI to use the application credential for authentication. You will only see the secret credentials once, so make sure to save the RC file or the secret somewhere, as if it’s lost, you will have to delete the credential and create a new one.
The OpenStack RC Script
You must use the OpenStack RC Scripts to configure the environment variables for accessing Chameleon features. You can downloaded the script from the Chameleon GUI at the API Access.
Hint
If you use the Chameleon supported (CC) images, you’ll find an openrc
file with a service token in the home directory for the cc user. The file
will be auto-sourced when you login, so you can use the
openstack and the swift CLI
directly, as well as the
cc-snapshot and the
cc-cloudfuse tools.
Log in to the GUI at CHI@TACC or CHI@UC.
Important
Download the RC file from the site you would like to interact with. The RC files are different for each site.
Select the project you wish to access via Project and Site Menu.
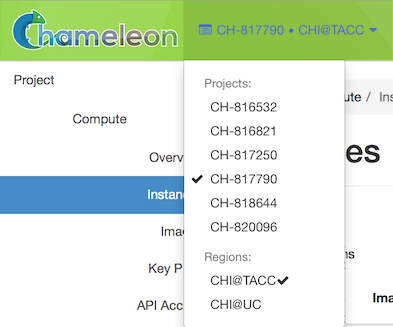
The Project Dropdown
Download OpenStack RC Script using User Menu by clicking on Openstack RC File v3.
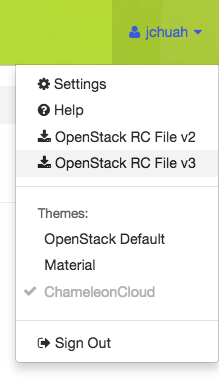
The OpenStack RC File v3 link in the User Dropdown
Run the following command in the terminal:
source <path/to/openstack_rc_file>
Note
The command will not work for Windows users. Skip this step and the next step if you are using Windows system.
Enter your password when prompted.
For macOS/Linux users, your current terminal session has been configured to access your project. Now type
openstackin your terminal session.For Windows users, you have to provide the environment variables in the OpenStack RC script as
openstackcommand parameters. Run the following command in your Windows prompt:openstack --os-auth-url <OS_AUTH_URL> \ --os-project-id <OS_PROJECT_ID> \ --os-project-name <OS_PROJECT_NAME> \ --os-user-domain-name <OS_USER_DOMAIN_NAME> \ --os-username <OS_USERNAME> \ --os-password <OS_PASSWORD> \ --os-region-name <OS_REGION_NAME> \ --os-interface <OS_INTERFACE> \ --os-identity-api-version <OS_IDENTITY_API_VERSION>
Replace values of the parameters by reading from the OpenStack RC script.
Another way to configure the OpenStack client for Windows users is to add/edit environment variables manually via System Properties window. Then, click on Environment Variables… button and manually add/edit the environment variables in OpenStack RC Script to Environment Variable window.
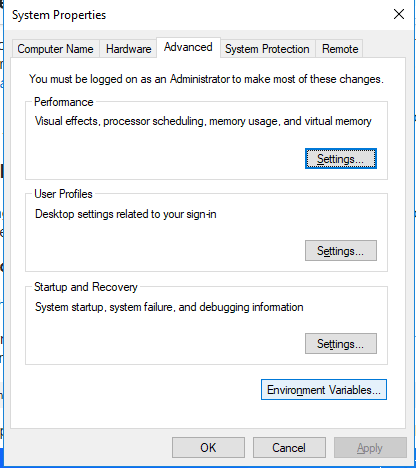
System Properties Window of Windows System
Note
For macOS/Linux users, every time when open a new terminal, you have to run the
sourcecommand to access the OpenStack client.Error
If you get authentication error, check if you input your password correctly.
Type
project listat the(openstack)prompt. You should see a list of the projects you belong to.Error
If you get permission error at this step, please check that:
the terminal session has been configured correctly with the environment variables
the OpenStack RC script you
sourceis v3the OpenStack client version is the latest. To check the OpenStack client version, use
openstack --versioncommand. Some older versions may cause errors.
Error
If you get the
Missing valueerror when using a command, it is likely that your terminal session has not been configured correctly and completely with the environment variables. The error may be fixed by re-running thesourcecommand over the OpenStack RC Script or using the command line switches.
Using the CLI
You can use the CLI in either Interactive Mode or Shell Mode. In either mode,
the OpenStack client has to be configured by using the OpenStack RC Script or
by providing the command line switches. For more information about the usage of
the OpenStack client, run openstack --help.
Interactive Mode
The Interactive Mode allows you to use the openstack commands through an
interactive prompt. To start the Interactive Mode, type openstack in the
configured terminal. Once entering the Interactive Mode, you will see a
(openstack) prompt. Type the command you would like to run at the prompt. To
find out the commands, type help.
Shell Mode
Each CLI command can be used in your terminal exactly the same way that it
appears in the Interactive Mode, simply by preceding the command with
openstack. For example, the command image list in the Interactive Mode
is equivalent to the command openstack image list in the Shell Mode.