Packaging shared artifacts
You can publish new artifacts to Trovi either from your primary Jupyter server or by editing a previously-shared artifact. In the latter case, you are effectively creating a new “forked” artifact owned by you.
When you’ve finished creating or making changes to an experiment, in the Jupyter interface, select the directory (not a single file) you wish to package. Then, click on the “Share” tab and select “Package as a new artifact”. Your artifact is now packaged and uploaded to Chameleon file storage, and you’ll be prompted to fill out descriptions about the artifact. Don’t worry if you want to change this later—you will be able to edit them on the Trovi portal or within Jupyter.
Congratulations! Your artifact is now uploaded to Trovi—but to make it accessible to others you need to adjust its sharing settings.

Saving new versions
If you make changes to your artifact, you can submit an updated version. Within Jupyter, you navigate to the “Sharing” tab, but this time you click “Create new artifact version”. The different versions are viewable on the Trovi portal after clicking on the artifact.

Editing artifacts
You can edit an artifact’s metadata, including its title, description, and list of authors at any time via the Jupyter interface. To delete single artifact versions, click the “trashcan” icon next to it in the edit view. To delete the entire artifact, click the red “Delete All” button.
Note
Any artifacts published to Zenodo cannot be deleted.

This edit view is also available from Trovi via the “Edit” button.
Creating a version from Git
Under an artifact’s edit settings, you will also see a button for creating a new version from Git. This will allow you to enter a Git URL, the same one used to clone your repository, and also a reference (lease as HEAD for the latest commit). When a user launches your artifact, their notebook will checkout the specified commit.
Editing related artifacts
From the artifact edit page on the Trovi dashboard, you can also add links to other related artifacts on Trovi. This can be useful if you have multiple artifacts that are part of a related project, or if you’d like to showcase a collection of artifacts on a broad topic, e.g., a series of assignments supporting a course on machine learning operations. All artifacts that you link to your artifact will appear under “Related Artifacts” after the artifact’s description.
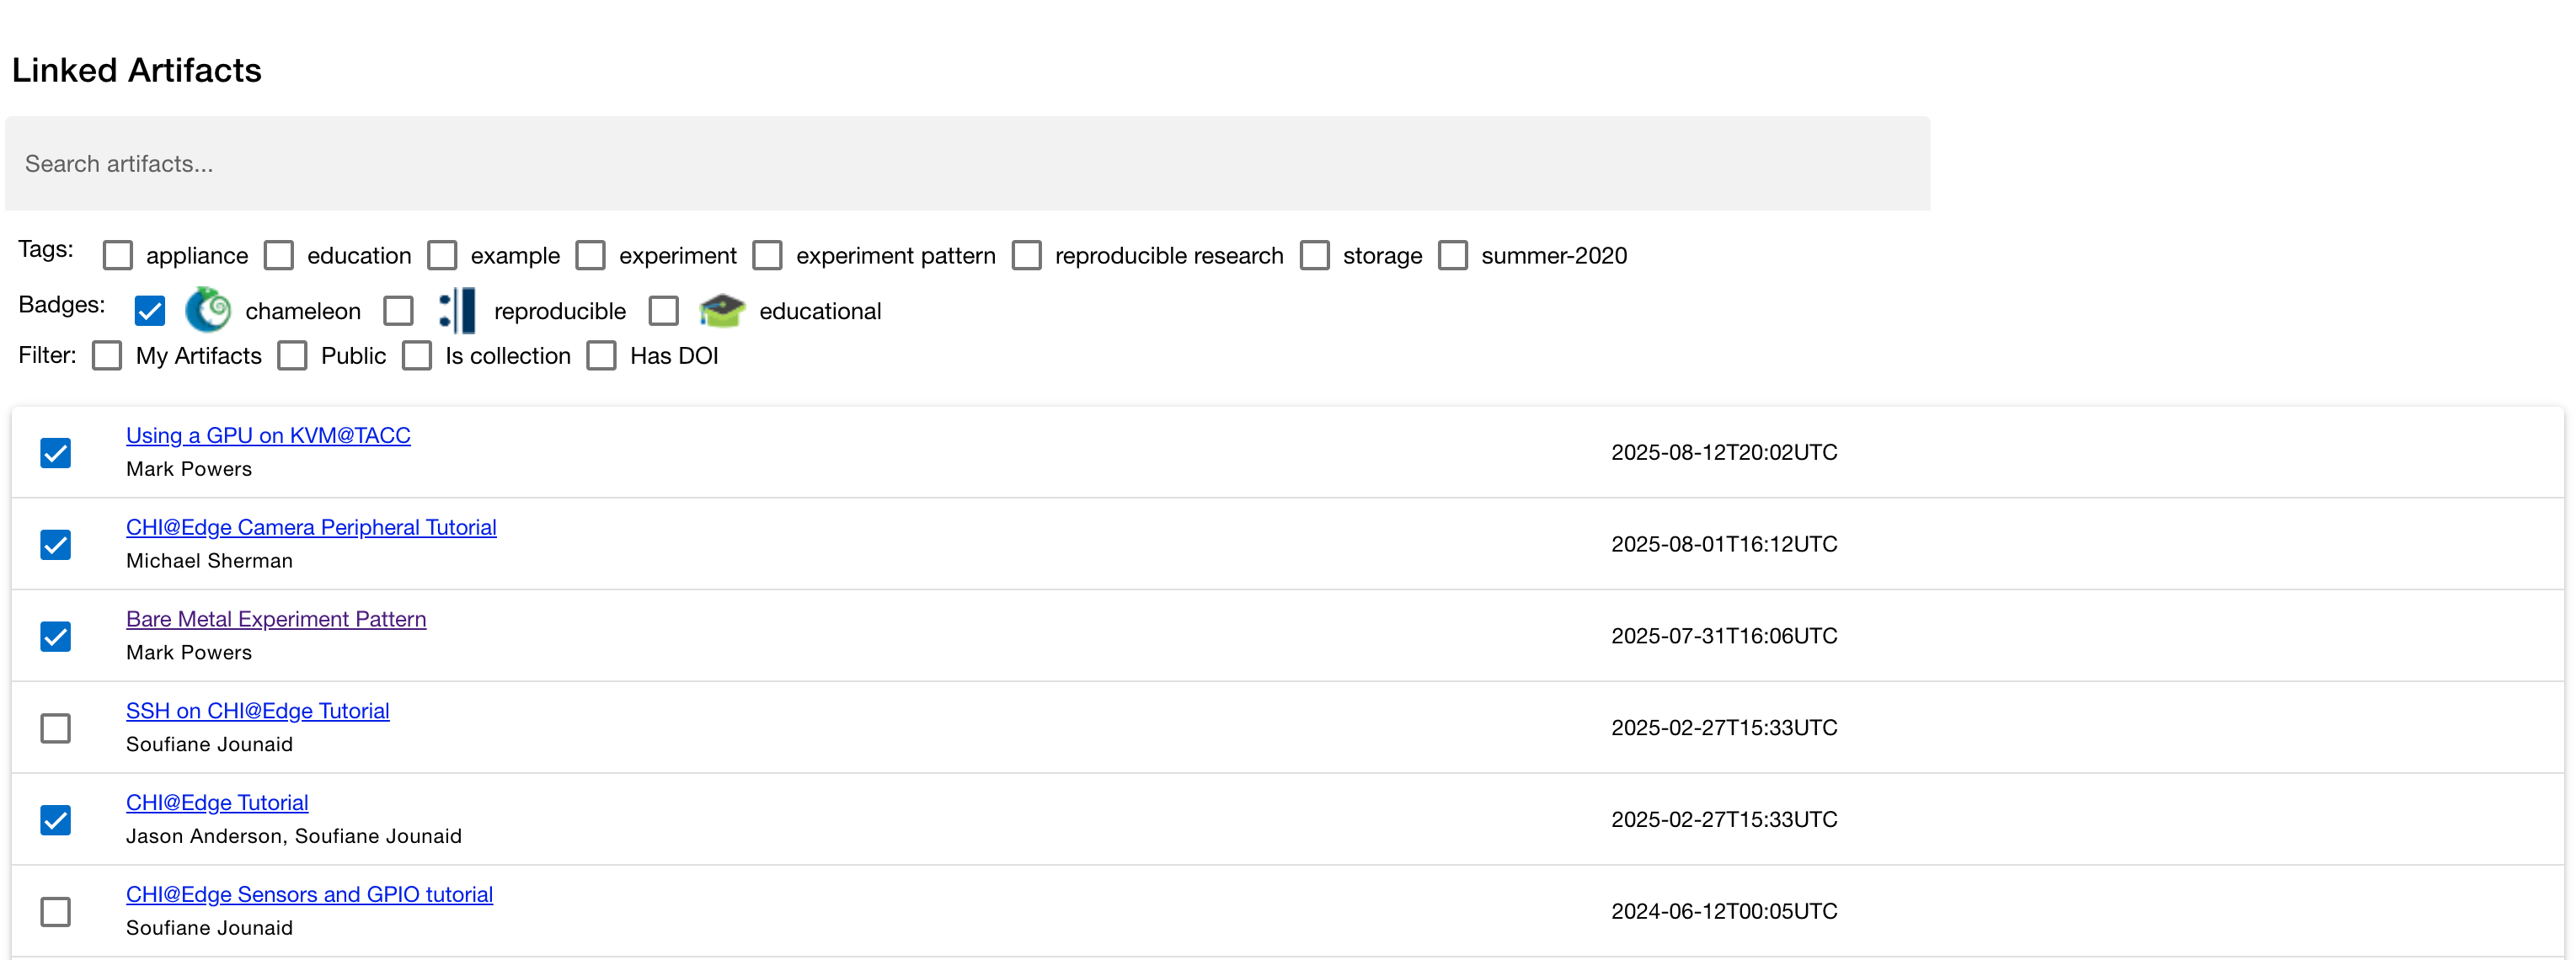
While editing an artifact, under “Linked Artifacts”, you will see a table of all artifacts. Search or scroll to find the artifact you wish to link, and click the checkbox next to it. Below this table, you can rearrange the order of linked artifacts by dragging and dropping them. Click “Save Links” to save your changes.
Adding videos and publications
From the artifact edit page on the Trovi dashboard, you can also add videos, such as a recorded talk or demo, and publications that describe or use your artifact. They appear after the artifact’s description, in the order listed.
Under Videos, click Add Video and paste the video’s URL. YouTube and Vimeo videos will be embeded on the artifact’s page automatically.
Under Publications, either click Add Publication fill in the form fields or add from BibTex.
If you import your artifact from GitHub, you can also list videos and
publications in the repository’s trovi.json, using the RO-Crate video
and citation properties.
Adjusting sharing settings
When you first upload your packaged artifact to Trovi, its visibility is set as private, meaning only you can see or launch it. There are multiple options to change the visibility of the artifact, and you have the option to decide how visible you want it to be.
Publish with DOI: this option allows you to publish a version of your artifact to Zenodo and receive a DOI, which you can use to cite your artifact in, e.g., an academic paper.
Publish without DOI: this option allows any Chameleon user to find and launch your artifact. It can be useful if you want to distribute the artifact widely but do not necessarily wish to publish it to Zenodo and get a DOI for citation.
Share via private link: this option allows you to share the experiment with select people, like individual colleagues, advisors, or students. Anybody in possession of the link can view and launch any version of the artifact.
To make your artifact public (options 1 or 2), open the artifact in Trovi, click
Edit, and change the Visibility dropdown from private to public.
Publishing to Zenodo and receiving a DOI is a separate step described in
Publishing to Zenodo.
To share a private artifact via secret link (option 3), open the artifact in Trovi, click Edit, and copy the Shareable Secret Link shown beneath the Visibility field. Anyone with this link can view and launch the artifact without needing explicit role assignment.
Assigning roles to other users

You can assign roles to other users which allow them to collaborate on your artifacts. There are two roles: Collaborator and Administrator.
Collaborators are allowed to edit artifact metadata, upload new versions, delete old versions, and share private artifacts.
Administrators have full control over the artifact, including assigning roles to other users.
Artifact owners cannot have their Adminstrator privileges removed.
Moderating comments on your artifact
Comments are published immediately, without prior review. The artifact’s owner and any user with the Administrator role can hide a comment after the fact with the Flag button, and restore it with Approve. When flagging, you may record a reason, which only the comment’s author and the artifact’s administrators can see. Administrators can also delete any comment on their artifact.
Publishing to Zenodo
Attention
You can only request a DOI for artifacts uploaded via the Jupyter interface. You cannot request a DOI for an artifact version uploaded via git.
Trovi is intended for sharing work in progress with a limited group of “friends and family”. However, once you complete your experiment package you may want to publish it so that you can reference it from your paper. To do that Chameleon supports integration with Zenodo, an open-access storage repository backed by CERN, for permanent artifact hosting. To share your artifact and store it on Zenodo, go to the “Share” page for the artifact. On the right-hand side you’ll see a list of all versions you’ve saved. Pick the version you want to publish to Zenodo and check “Request DOI”, then click “Save.”
Important
Once published, Zenodo artifacts cannot be deleted and are additionally publicly available. Your artifact will appear in Trovi in the “Public” section, and any Chameleon user can access it, as can anybody on the Internet via Zenodo’s own listing.
If you wish to make your artifact public but don’t to publish it, use the “Publish without DOI” option. With this option it is possible to make the artifact private later on if you wish; this is not possible when publishing to Zenodo.
You can only request a DOI one time per artifact. If you want to update your experiment files and request a second DOI, you should instead create a new artifact.
This also creates a DOI, which you can easily include in your paper. The artifacts shared on Zenodo also appear on Trovi.
Tip
Publishing to Zenodo is one way to keep your work available long-term. For a full rundown of how long Chameleon resources and artifacts are retained by default, and other options for extending their lifespan, see the Tips and Tricks post Extending Your Research Artifacts’ Lifespan.
Importing an artifact
Instead of creating an artifact inside Jupyterhub, you can package an existing Git repository into an artifact. When a user launches the artifact, the contents of the repository will be added to a Jupyter notebook.
To create an artifact, click “Import Artifact” on the sidebar of Trovi. You are first asked for the artifact’s metadata. At the bottom of the form, there is a button for “Import from Git.” After clicking this, you will need to enter a git remote URL, and choose which commit to tie the version to.
To update the artifact, you must create a new version. This ensures that a given version of your artifact always has the same contents.
Tip
You can also generate the artifact’s metadata ahead of time from the
command line using the troviclient tool, which produces a
trovi.json file to commit alongside your repository. See the Tips and
Tricks post Importing GitHub Repositories to Trovi: A Step-by-Step Guide
for a walkthrough.
Exporting via git
If you wish to move your code and notebooks outside of your Jupyter notebook, one option is to export it into a git repository.
Click the “+” button on the top left of your notebook, and choose “Terminal”.
Run the command
cd work. If there is a specific directory you wish to export, you cancdagain into it.Follow the instructions to set up a repository per your git host. For GitHub see this document.
After the repository is set up, you should be able to commit and push with the git CLI.