Load balancer as a service
Available on KVM@TACC is the OpenStack Octavia Load Balancer as a Service (LBaas). This service allows a single IP address to be used to distribute connections among a number of virtual machine instances. For the following description, it is assumed that there are already several virtual machines running an HTTP server on port 80, serving a page at the root path. To create a Load Balancer, click on Project > Network > Load Balancers in the navigation sidebar, then the Create Load Balancer button. This will open the Create Load Balancer dialog.
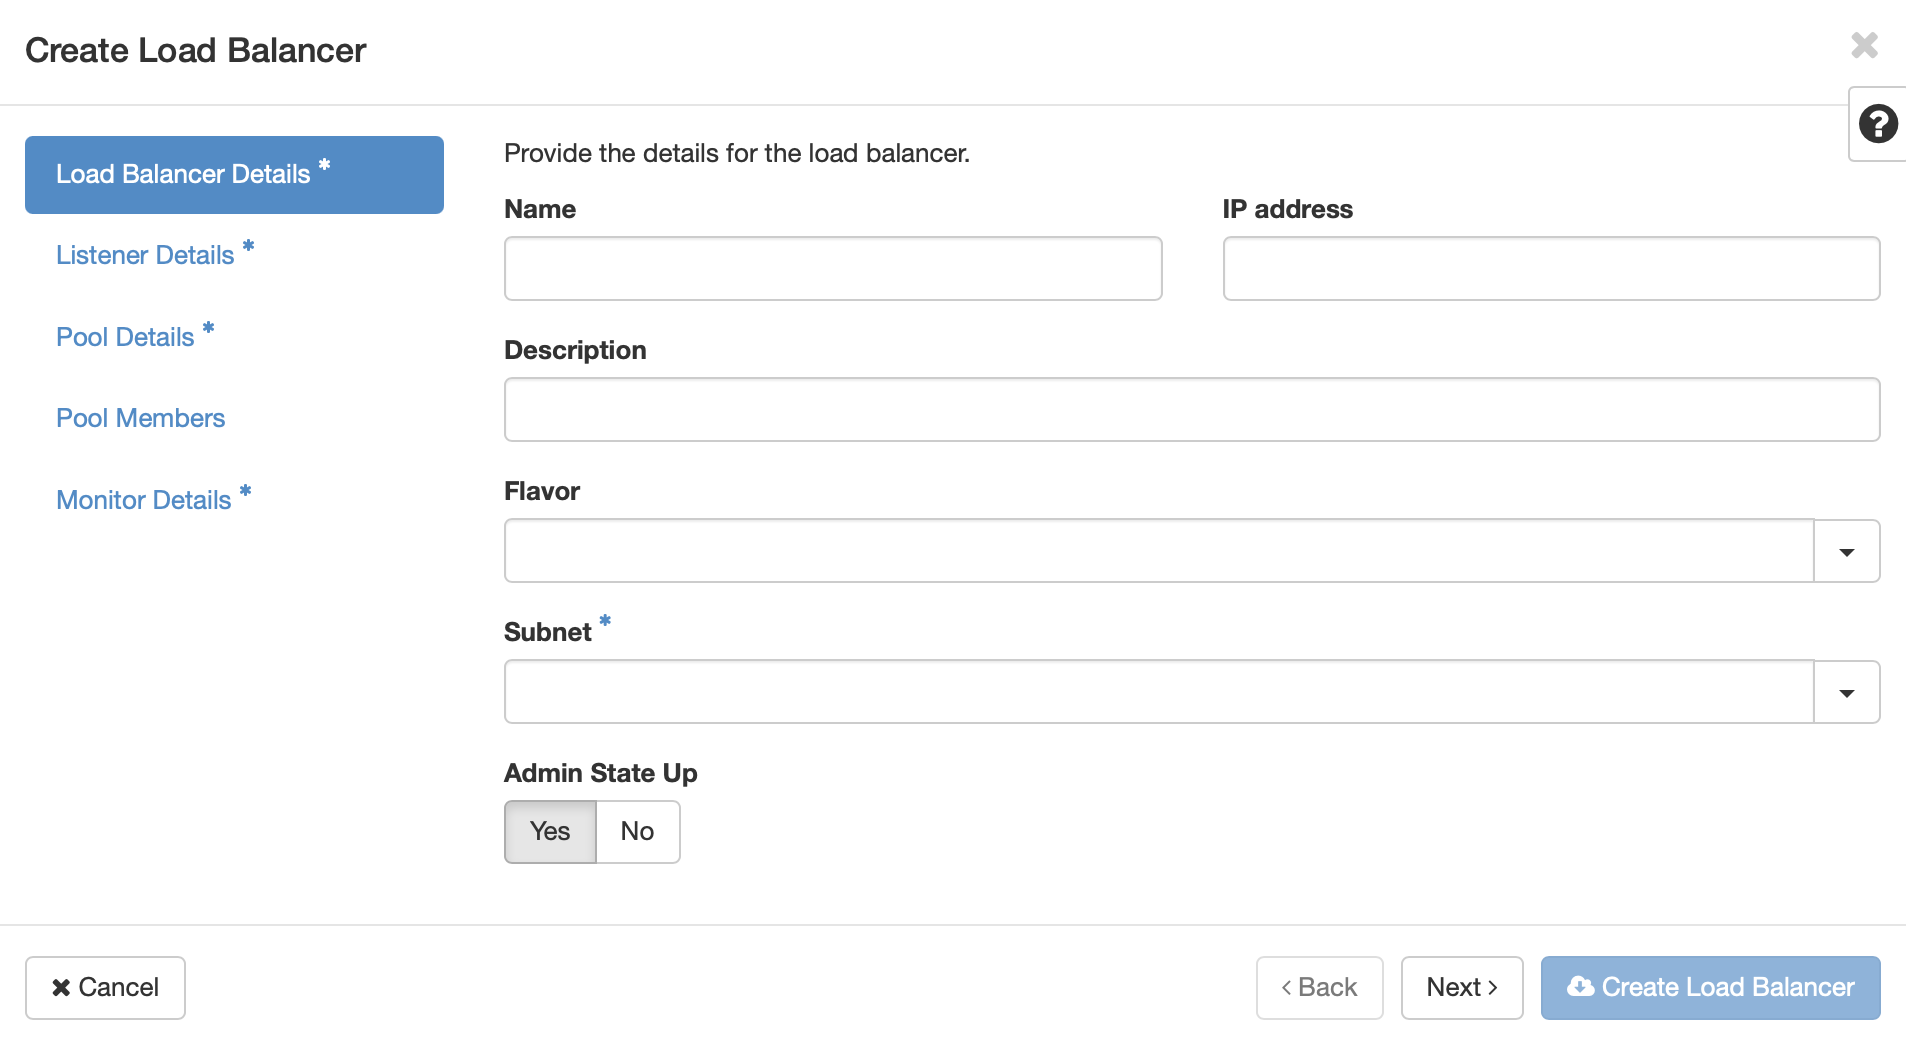
Give your load balancer a name, and select the subnet that corresponds to the one used by the virtual machines. Click Next, or Listener Details.
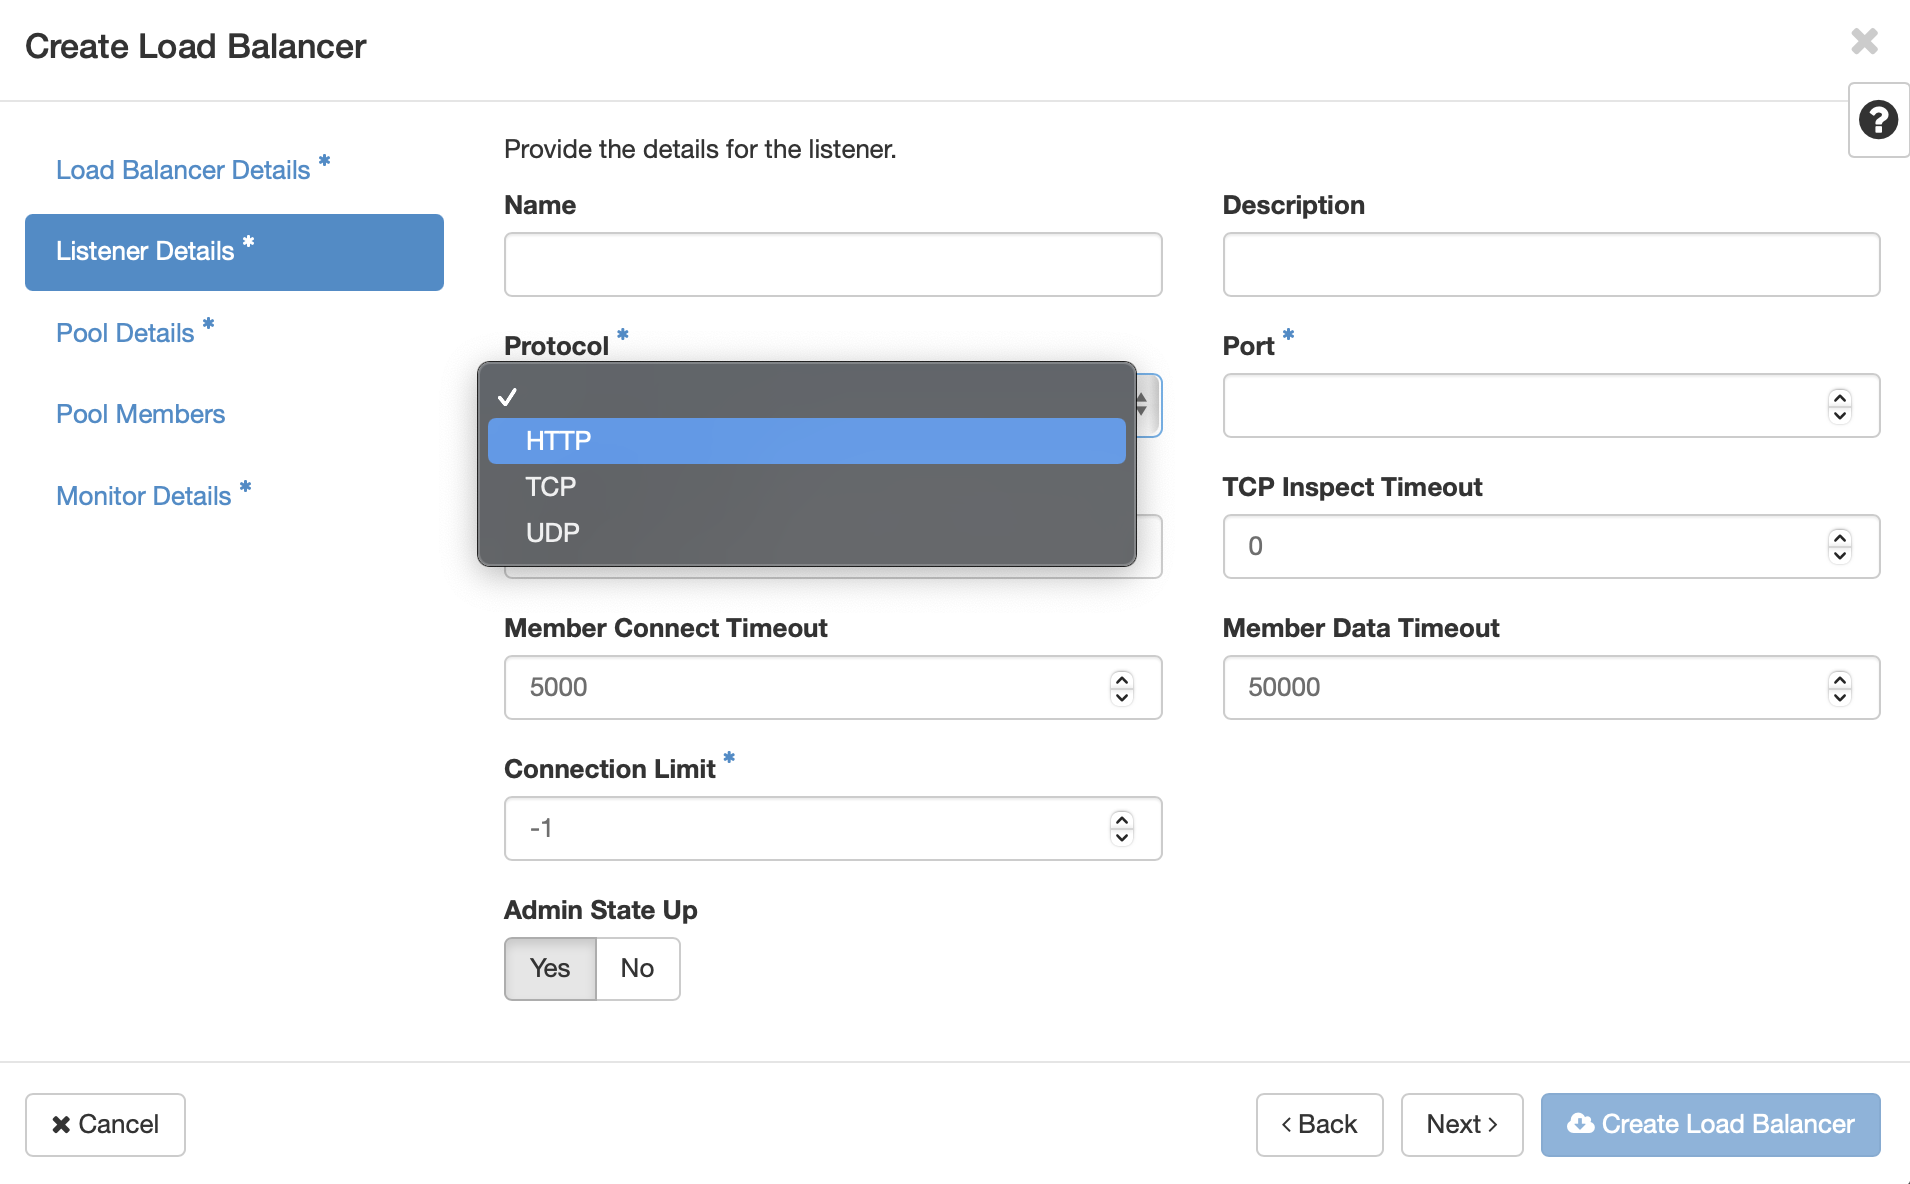
The listener is the port that will accept incoming connetions. Select the appropriate protocol for the service, in this case HTTP. If selecting TCP or UDP also provide the desired port. Click Next or Pool Details.
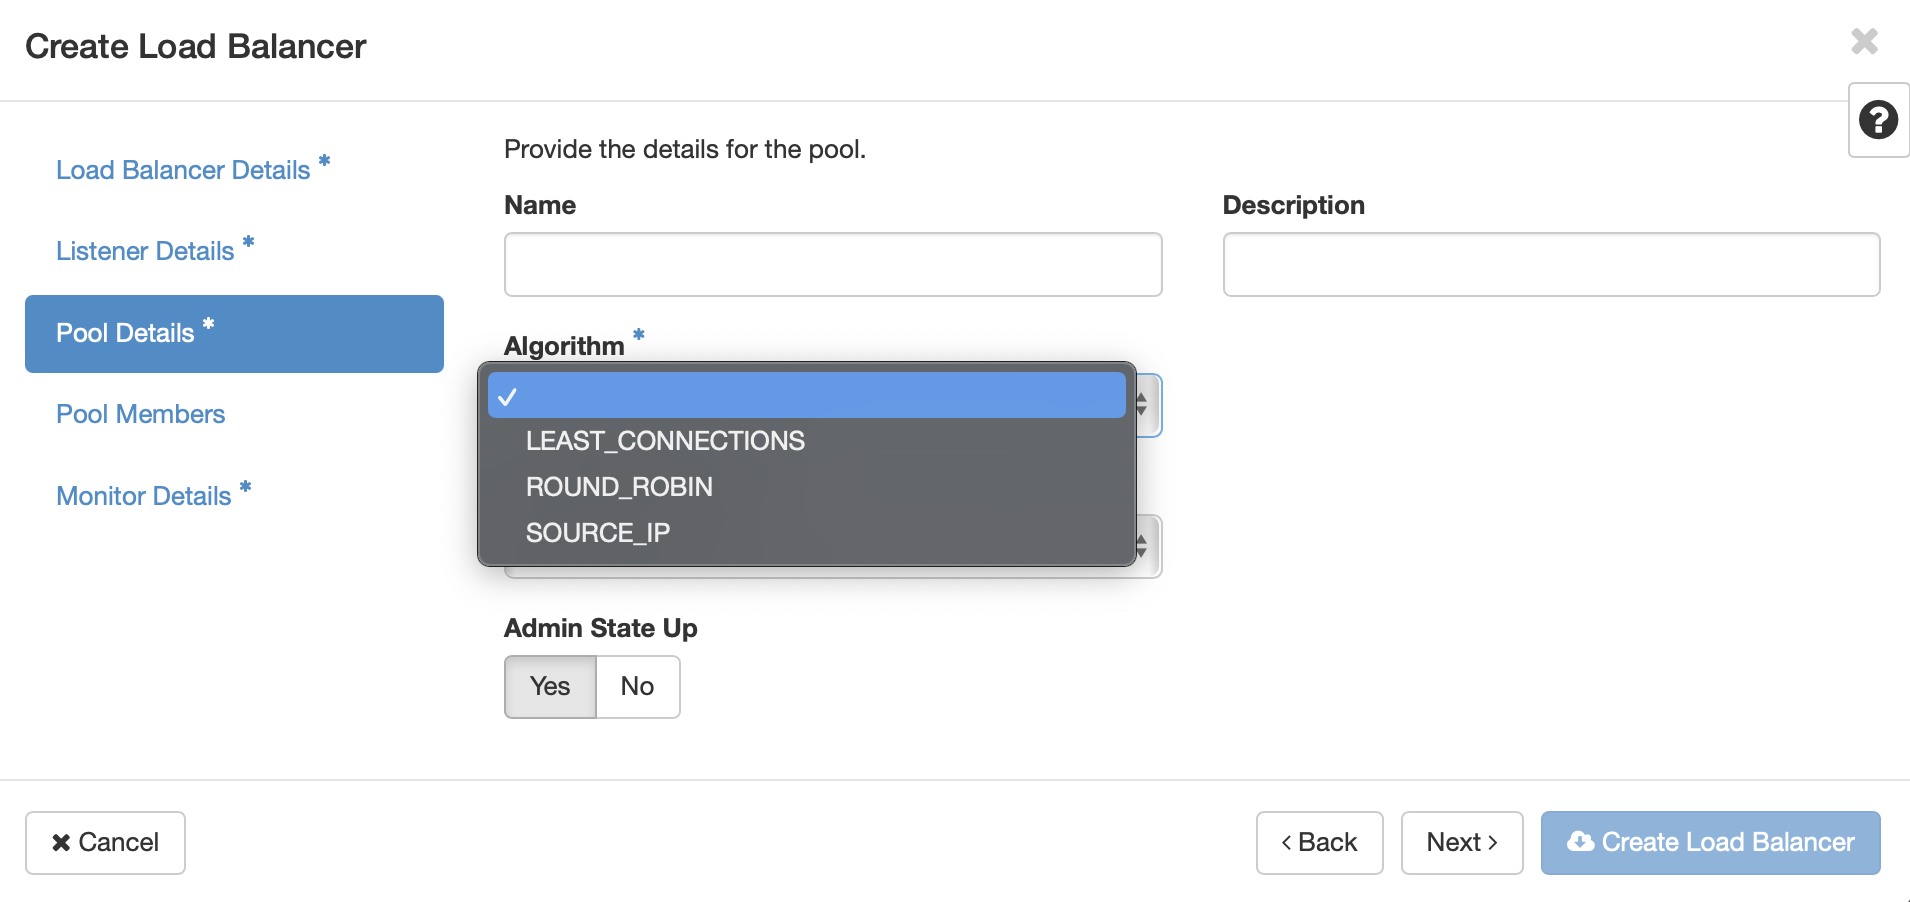
Choose the desired load balancing algorithm. This will determine the way in which the load balancer will select which VM receives incoming requests. Click Next or Pool Members.
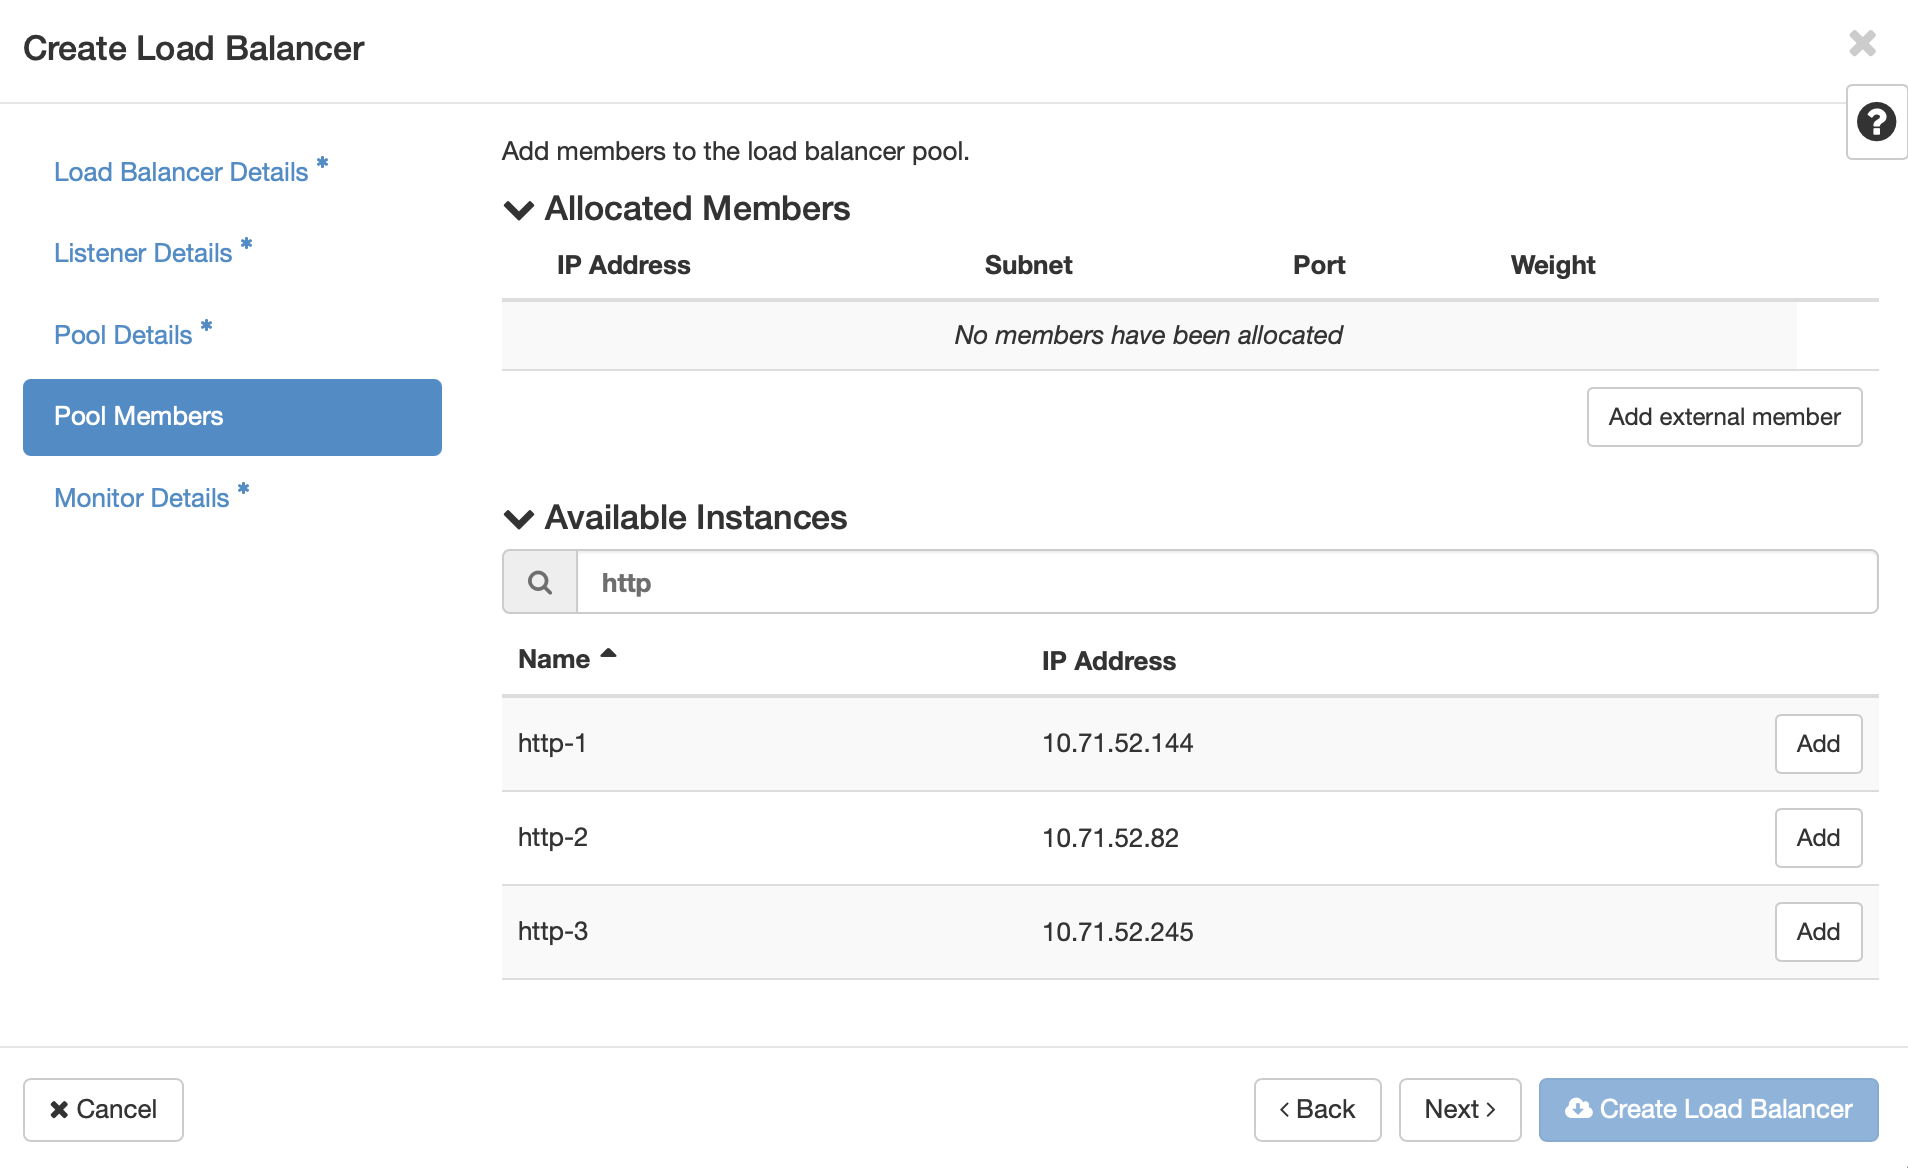
Here you will select the virtual machines that will participate in the load balacing. Click the Add button next to the instances, after which their IP address and subnet will be added to the Allocated Members list at the top. You will need to provide the port number for the hosted service for each member. For our HTTP servers, it is port 80. This does not need to match the port of the load balancer’s listener.

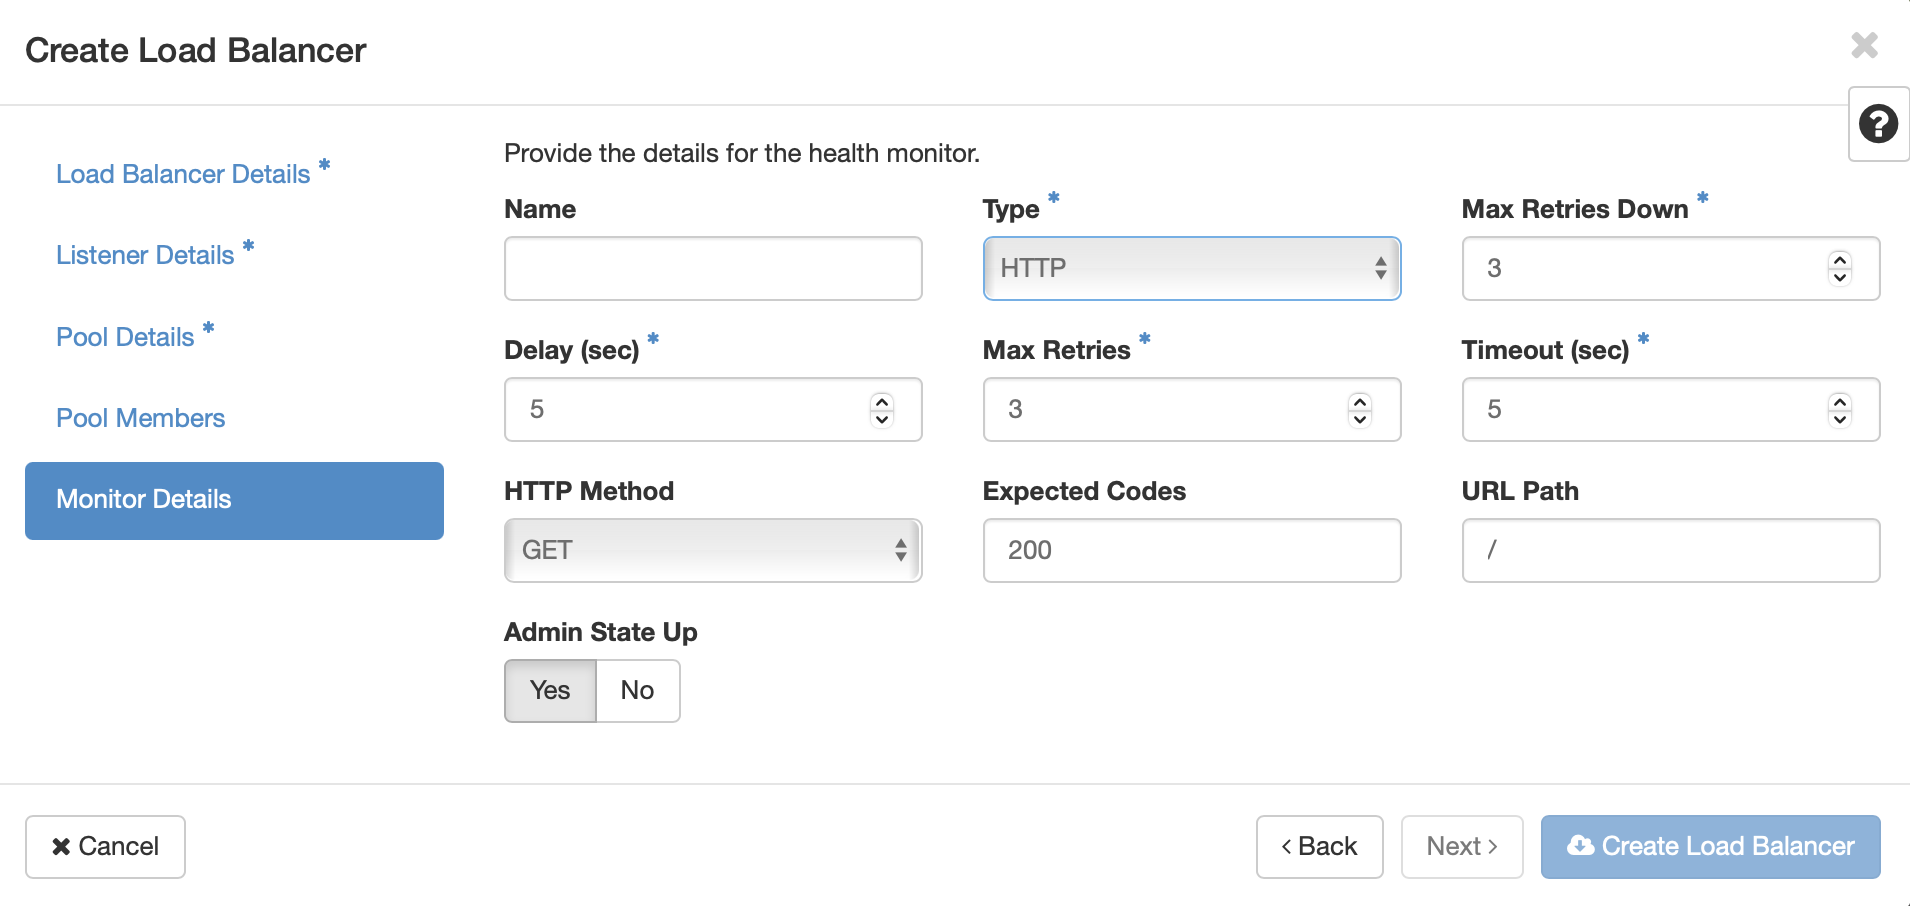
Once you’ve selected the pool members, click Next or Monitor Details. Here you will configure how the load balancer monitors the servies on the virtual machines to ensure that they are ready to receive traffic. In our example, selecting HTTP adds configuration options for HTTP Method, Expected Codes, and URL path. Since the HTTP services on the VMs in the pool members are configured to serve a page on the root path, the default values will work. Click Create Load Balancer
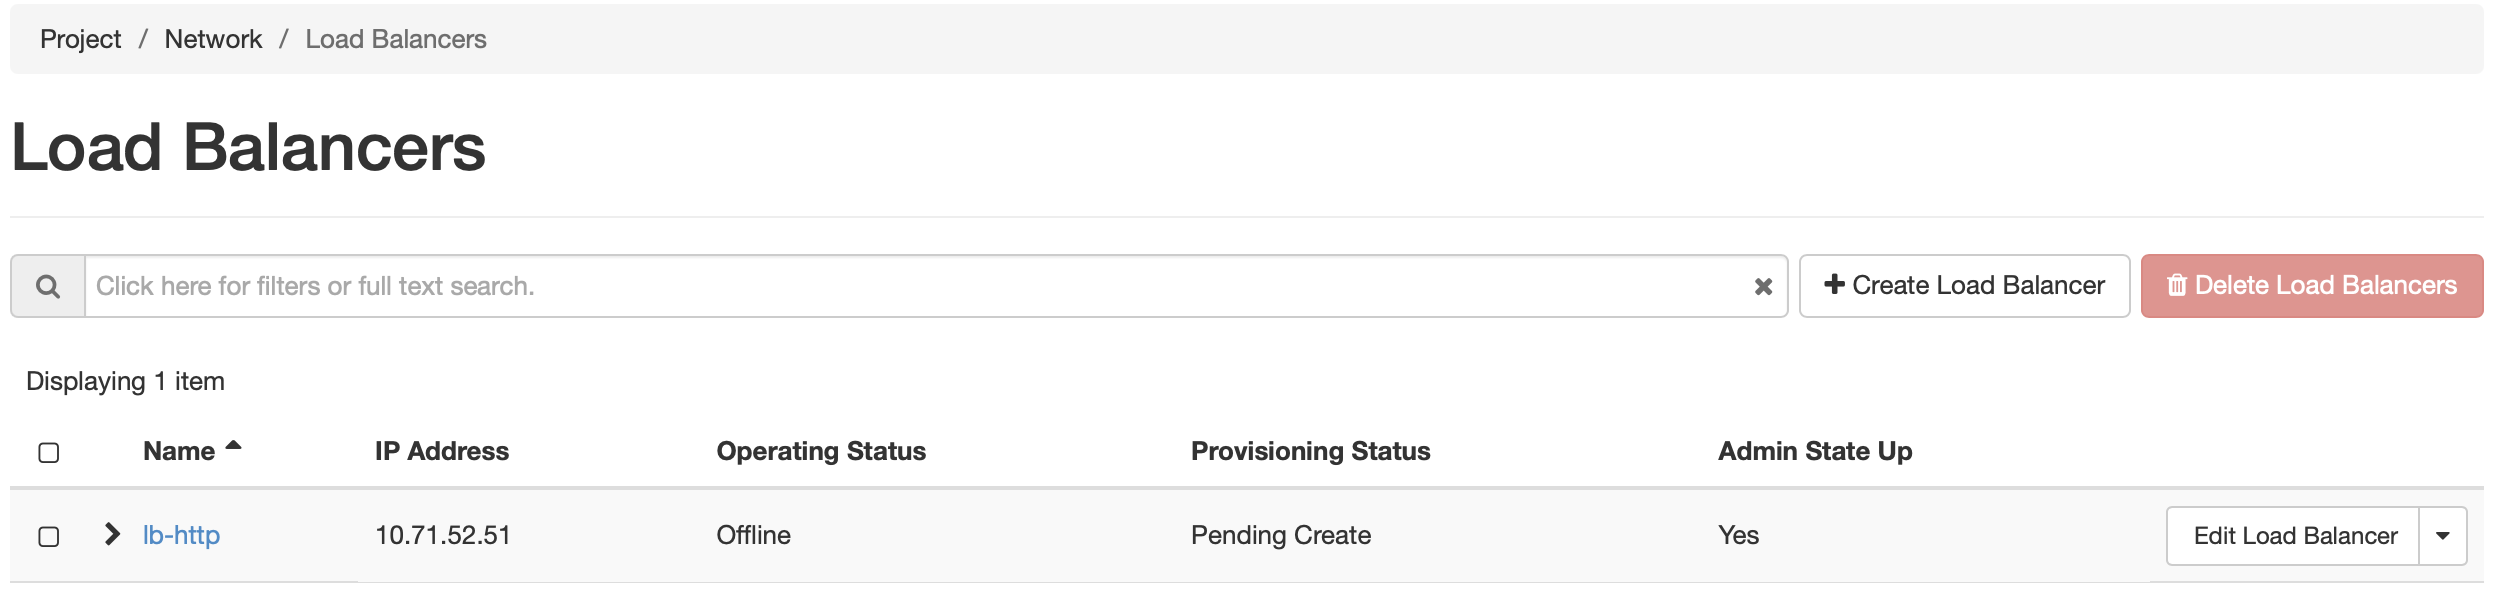
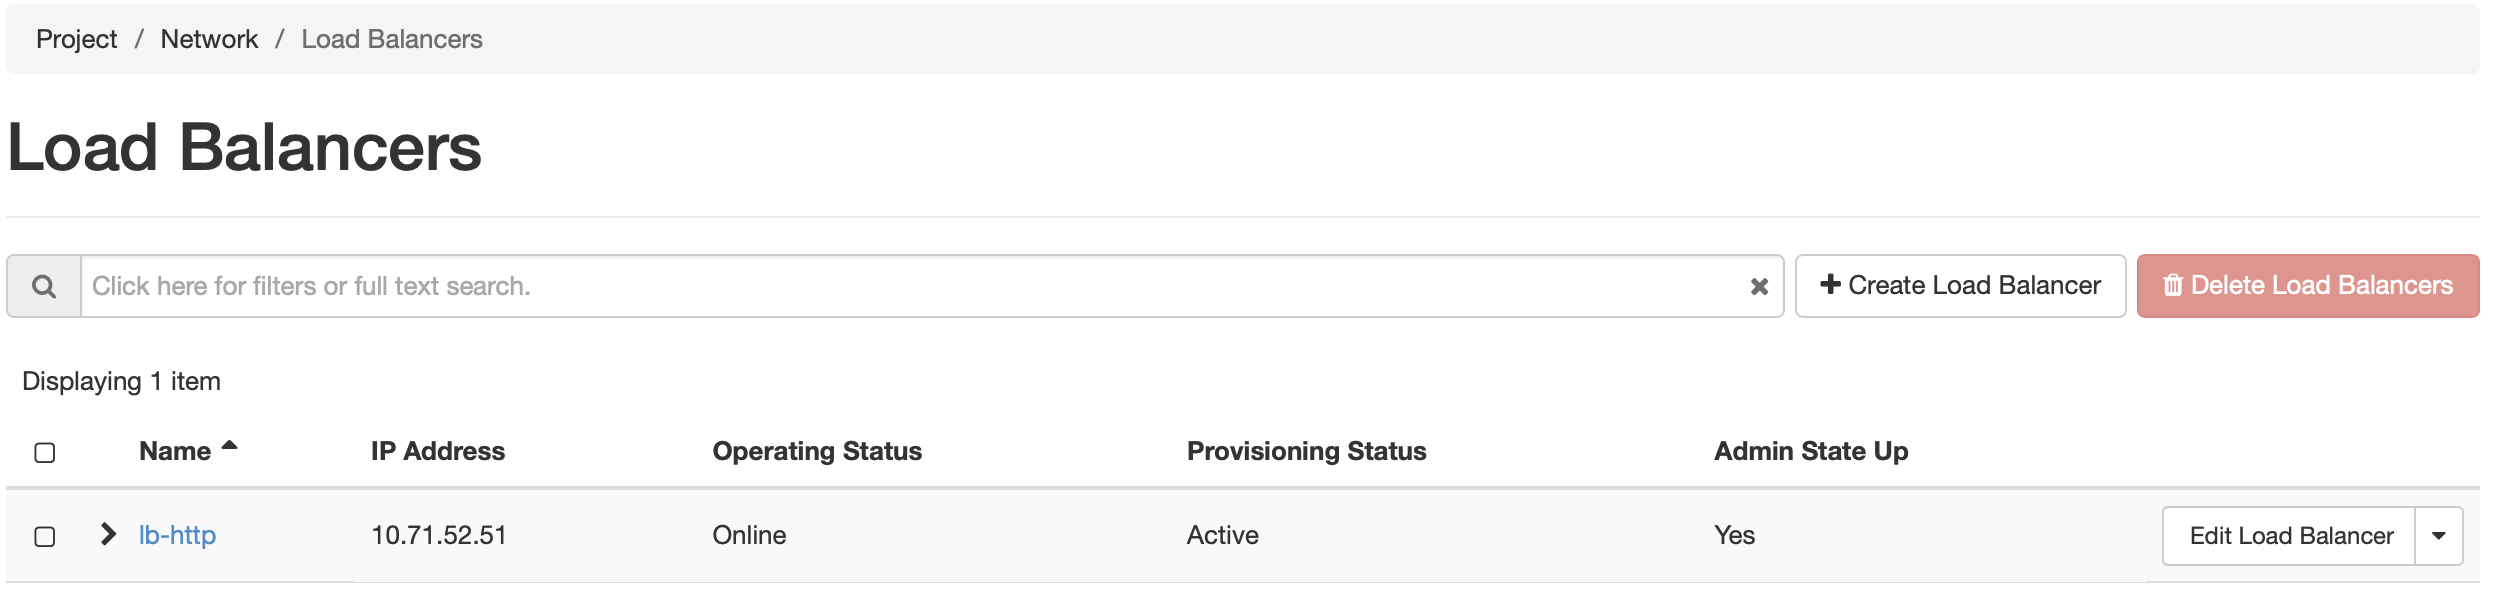
While the load balancer is being created, the dashboard will show a Provisioning Status of Pending Create . Once the process is complete, the status should be Active, and Operating Status should be Online. An Operating Status of “Offline” or “Error” indicates that the load balancer cannot satisfy the service check specified in Monitor Details. Ensure that the services are running on each VM, and that they return the expected status.
You can assign a Floating IP address to the load balancer by clicking on the down arrow button next to Edit Load Balancer, and selecting Associate Floating IP. This process is similar to associatig af Floating IP to a virtual machine instnace. Making changes to the various components of the load balancer by clicking on the blue-colord name of the load balancer in the list. From here, the listeners, pools, and health monitors can be updated, if needed.
To learn more about how to use the Octavia Load Balancer, refer to the Basic Load Balancing Cookbook on the official OpenStack documentation