Work with KVM using the GUI
An easy way to use OpenStack KVM on Chameleon is via the GUI, which is similar to the GUIs for CHI@TACC and CHI@UC. You log into the GUI using your Chameleon username and password.
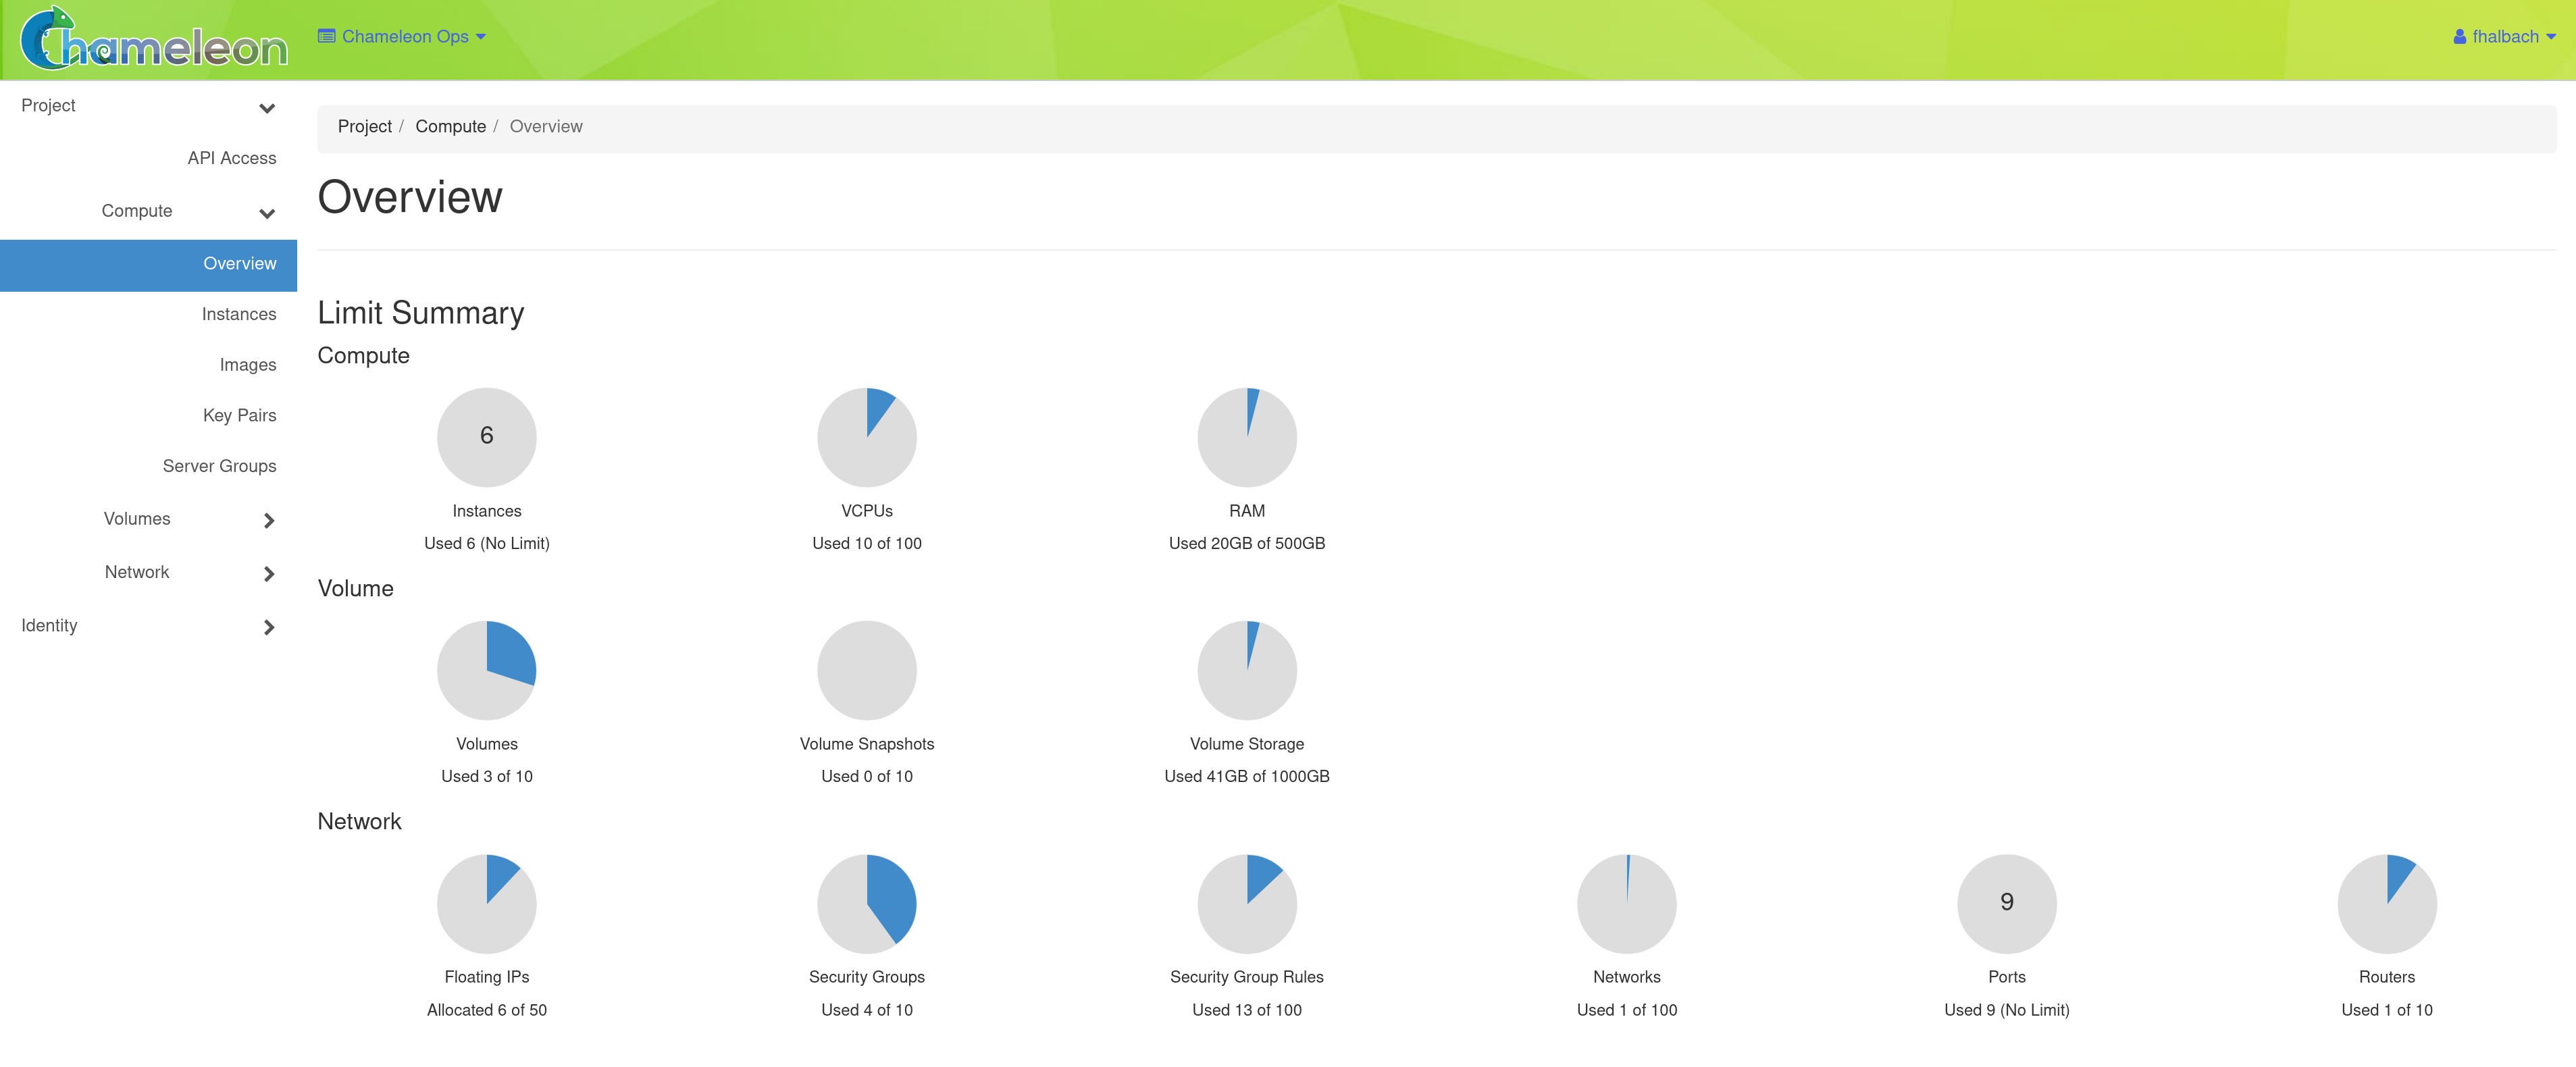
After a successful log in, you will see the Overview page as shown below. This page provides a summary of your current and recent usage and provides links to various other pages. Most of the tasks you will perform are done via the menu on the lower left and will be described below. One thing to note is that on the left, your current project is displayed. If you have multiple Chameleon projects, you can change which of them is your current project. All of the information displayed and actions that you take apply to your current project. So in the screen shot below, the quota and usage apply to the current project you have selected and no information about your other projects is shown.
Creating leases for VMs
Before launching an instance, you must have an active lease.
Checking availability
Before creating a lease, you can check availability using the Flavor Calendar. To access the Flavor Calendar:
Navigate to Project > Reservations > Leases in the navigation sidebar.
Click the Flavor Calendar button in the top right of the Leases table.

The Leases table with the Flavor Calendar button highlighted
The Flavor Calendar shows availability over time for flavors, allowing you to see when resources are available for reservation.

The Flavor Calendar displaying flavor availability over time
Creating a lease
Once you’ve confirmed availability, create a lease by navigating to the Reservations panel and clicking Create Lease. In the new lease form:
Complete the Lease Name and Description fields.
In the flavor tab, select a flavor.

Selecting a GPU-enabled flavor during lease creation
Confirm your reservation after submitting the lease request. If capacity is insufficient, the GUI will display an error message and the lease will not be created.
Note
Use the Flavor Calendar to check availability before creating a lease. If you are unable to create a lease, you may need to wait for resources to become available.
Note
KVM@TACC lease durations follow a different policy than bare metal — see the Chameleon FAQ for details.
Launching instances
To launch an Instance, click the Launch Instance button. This will open the Launch Instance dialog.
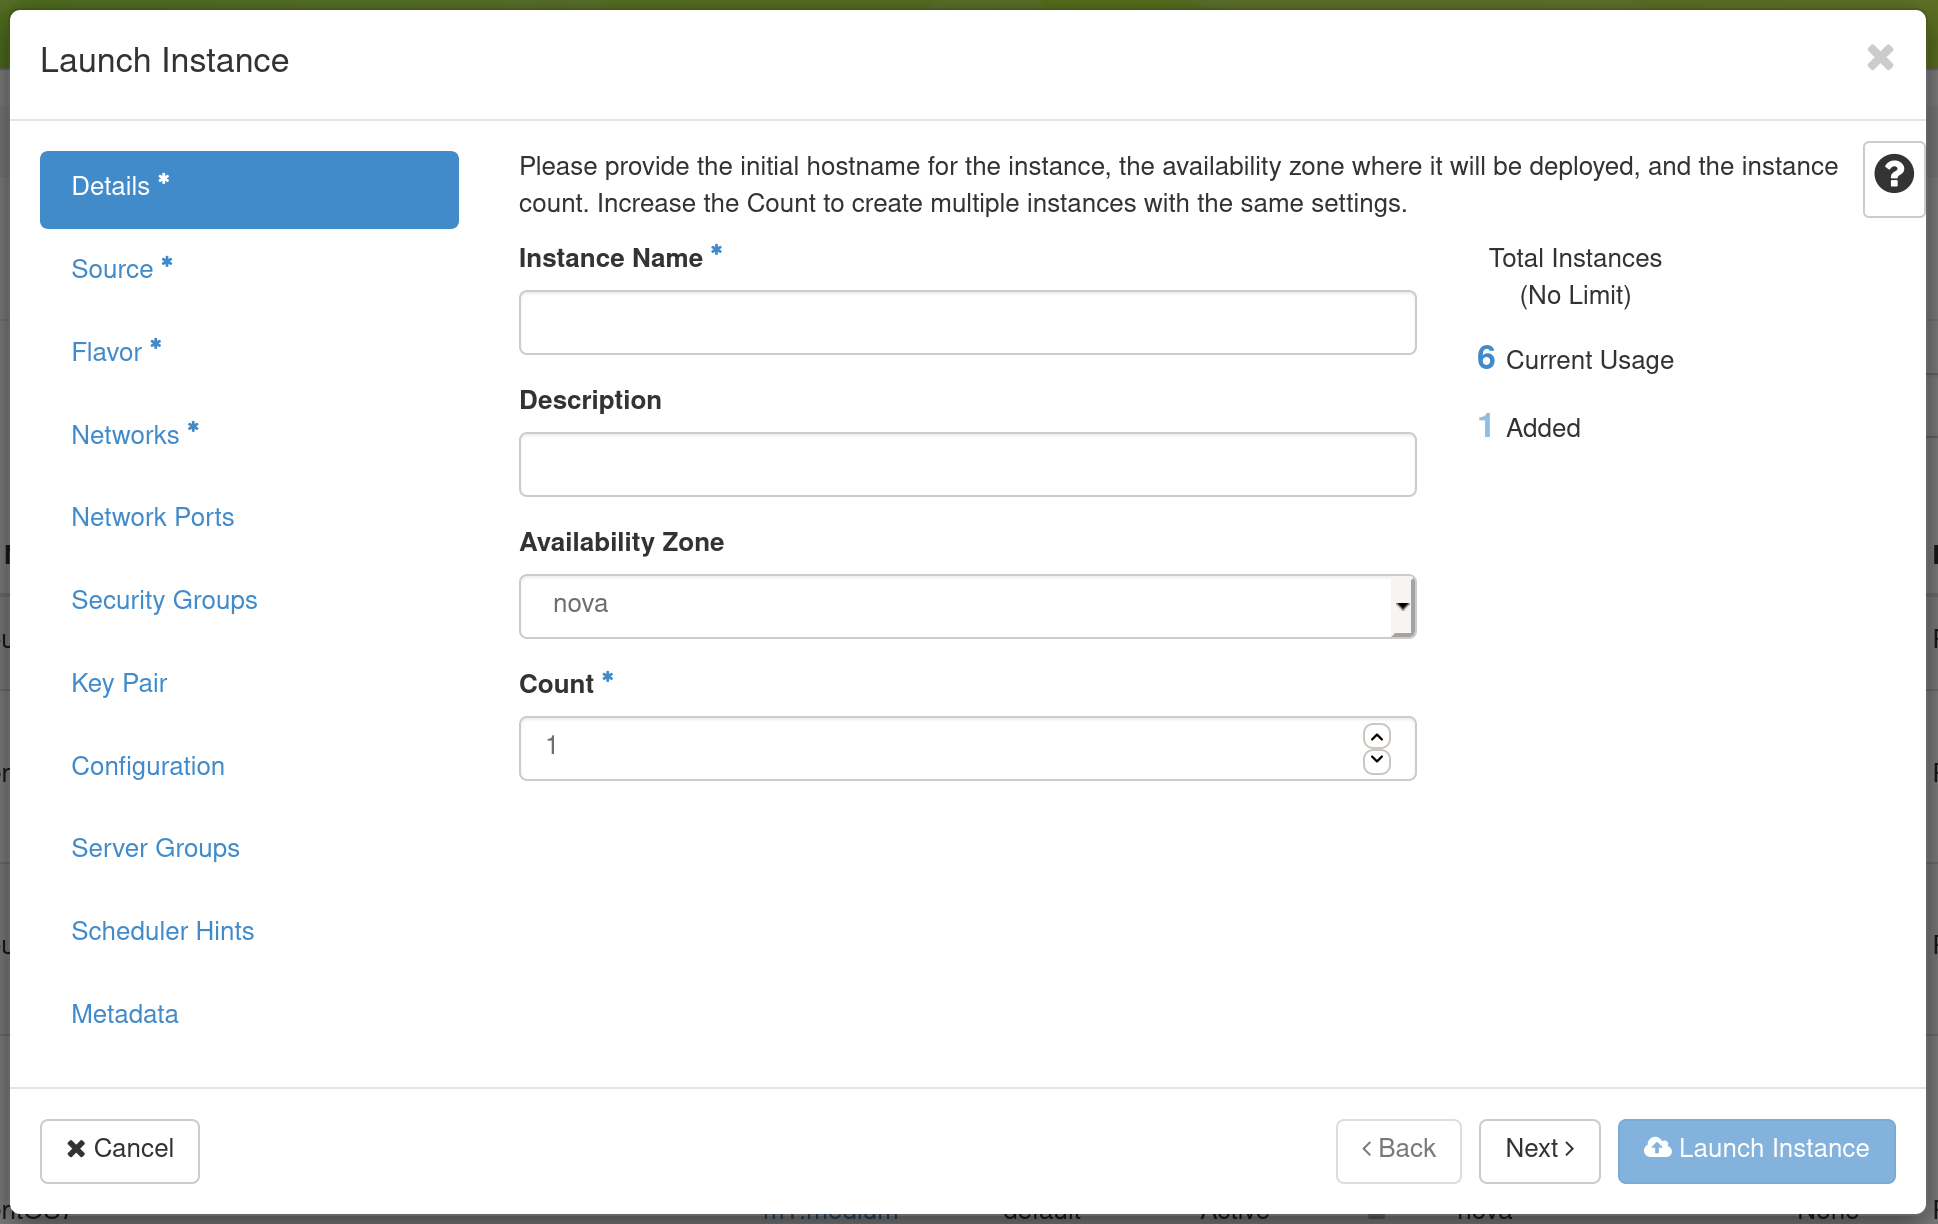
On the Details tab, provide a name for this instance (to help you identify instances that you are running).
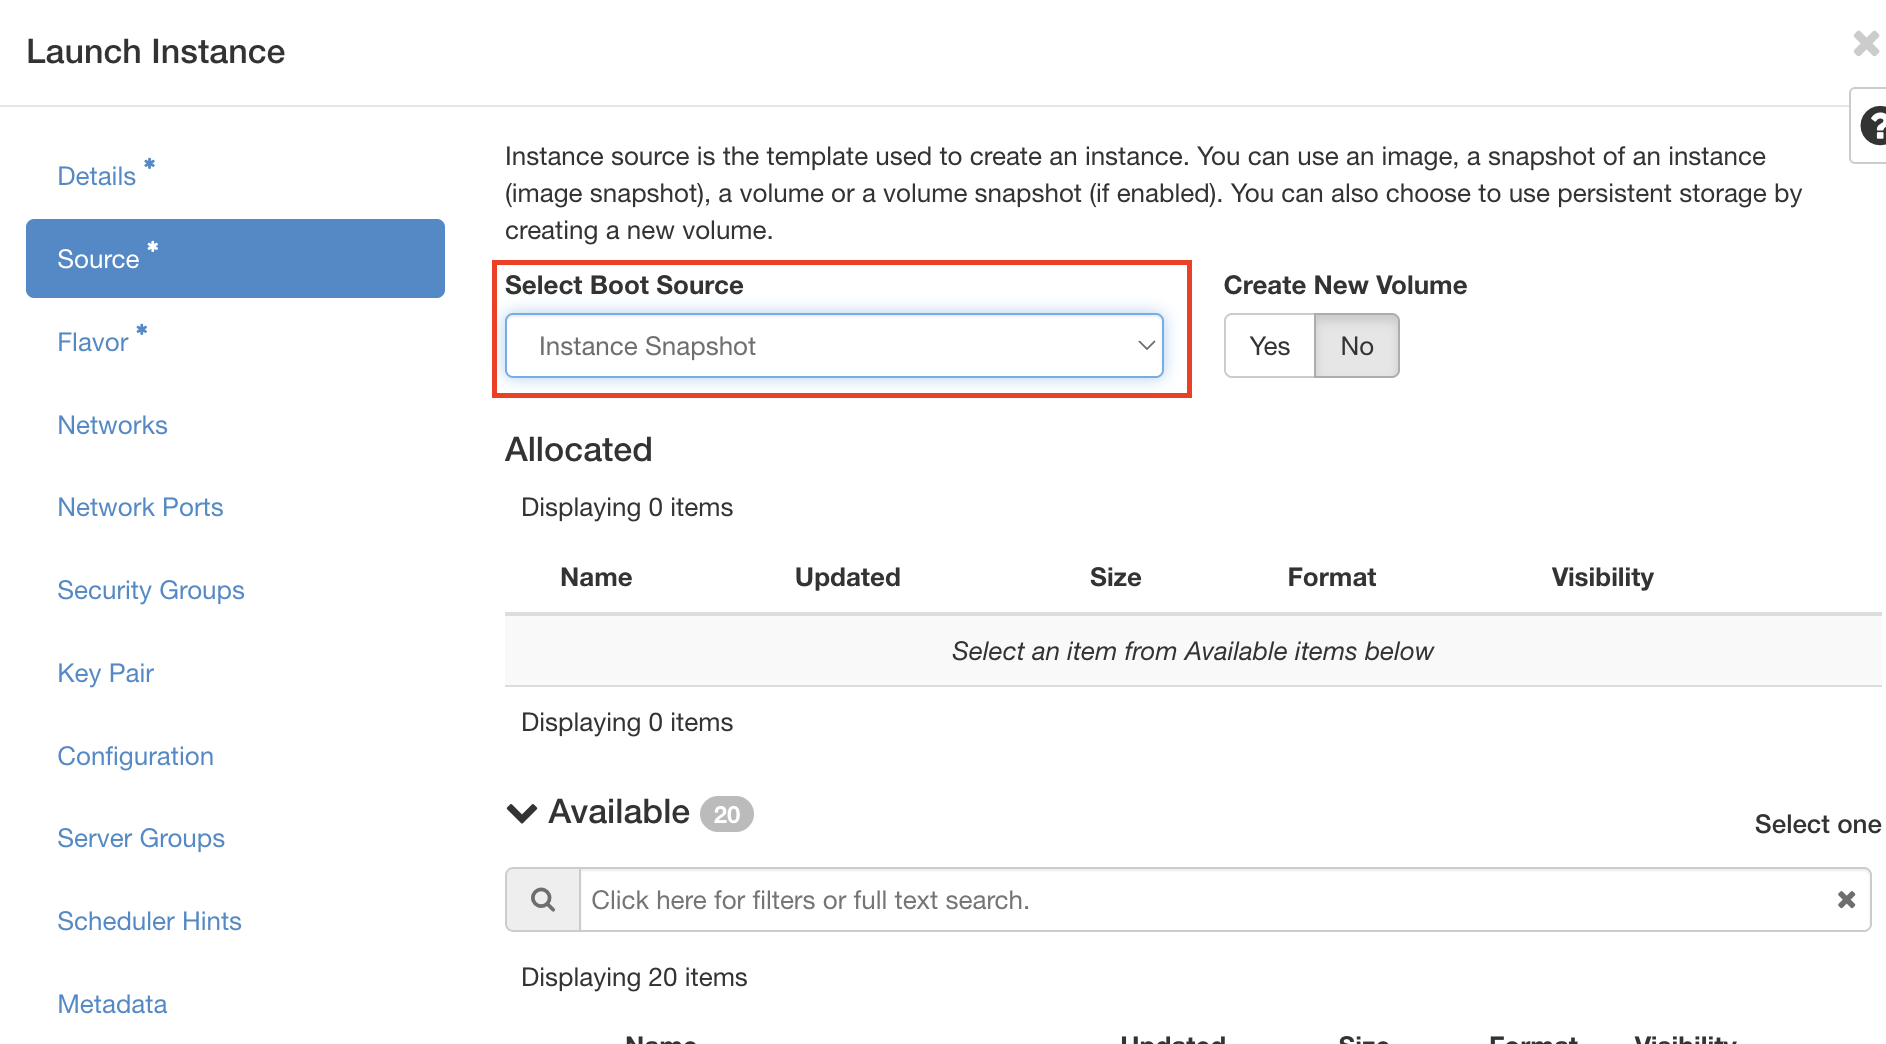
Next, go to the Source tab to select media to launch.
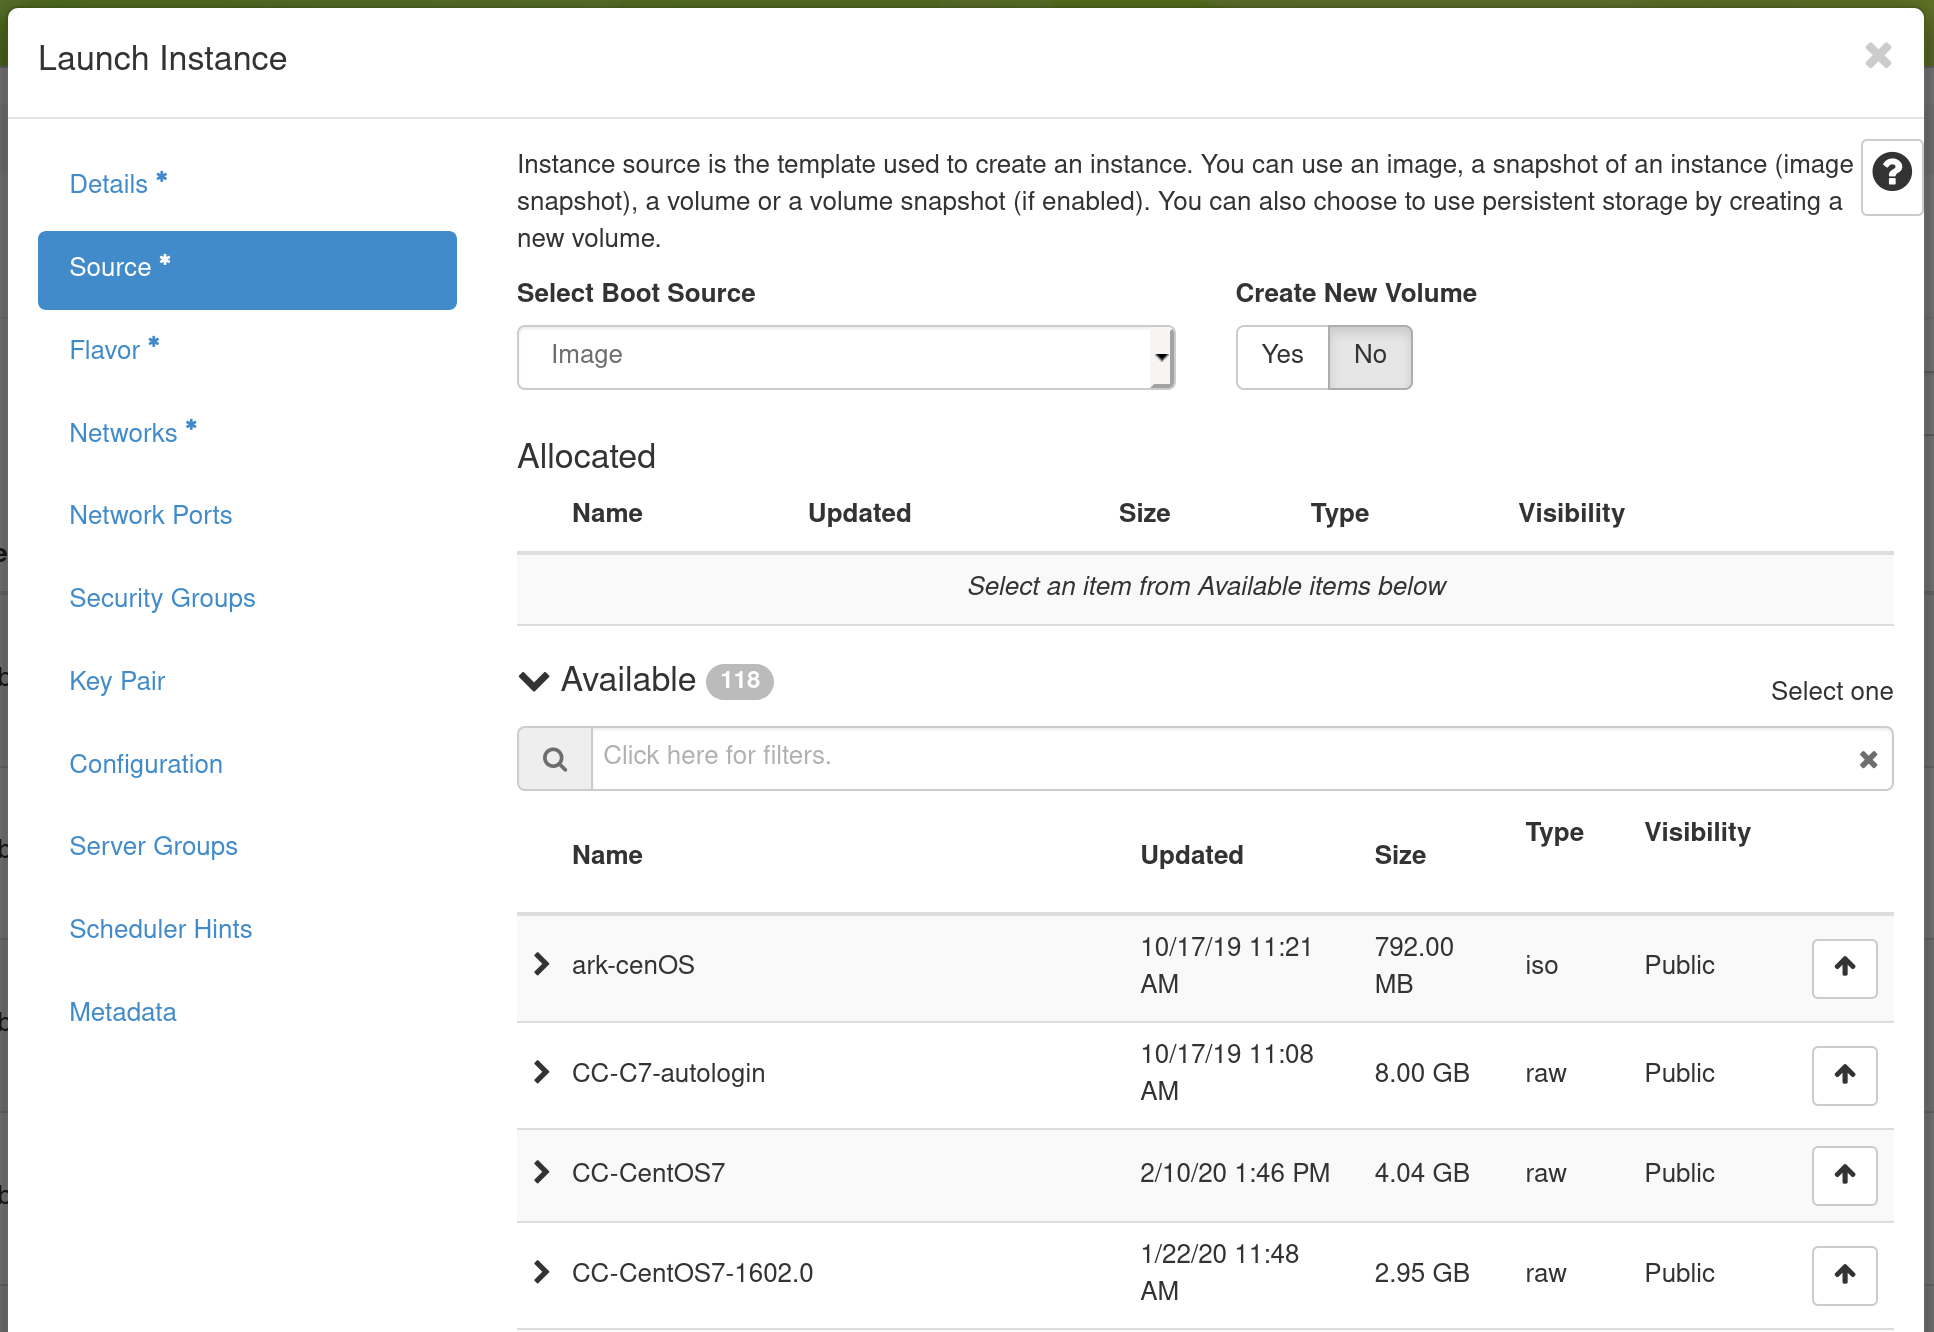
Select the Boot Source of the instance, which is either an Image, an Instance Snapshot (an image created from a running virtual machine), a Volume (a persistent virtual disk that can be attached to a virtual machine), or a “Volume Snapshot”. If you select “Image” as the Boot Source, the Image Name dropdown presents a list of virtual machine images that we have provided, that other Chameleon users have uploaded and made public, or images that you have uploaded for yourself. If you select Boot from snapshot, the Instance Snapshot dropdown presents a list of virtual machine images that you have created from your running virtual machines.
Go to the Flavor Tab and select the amount of resources (Flavor) to allocate to the instance.
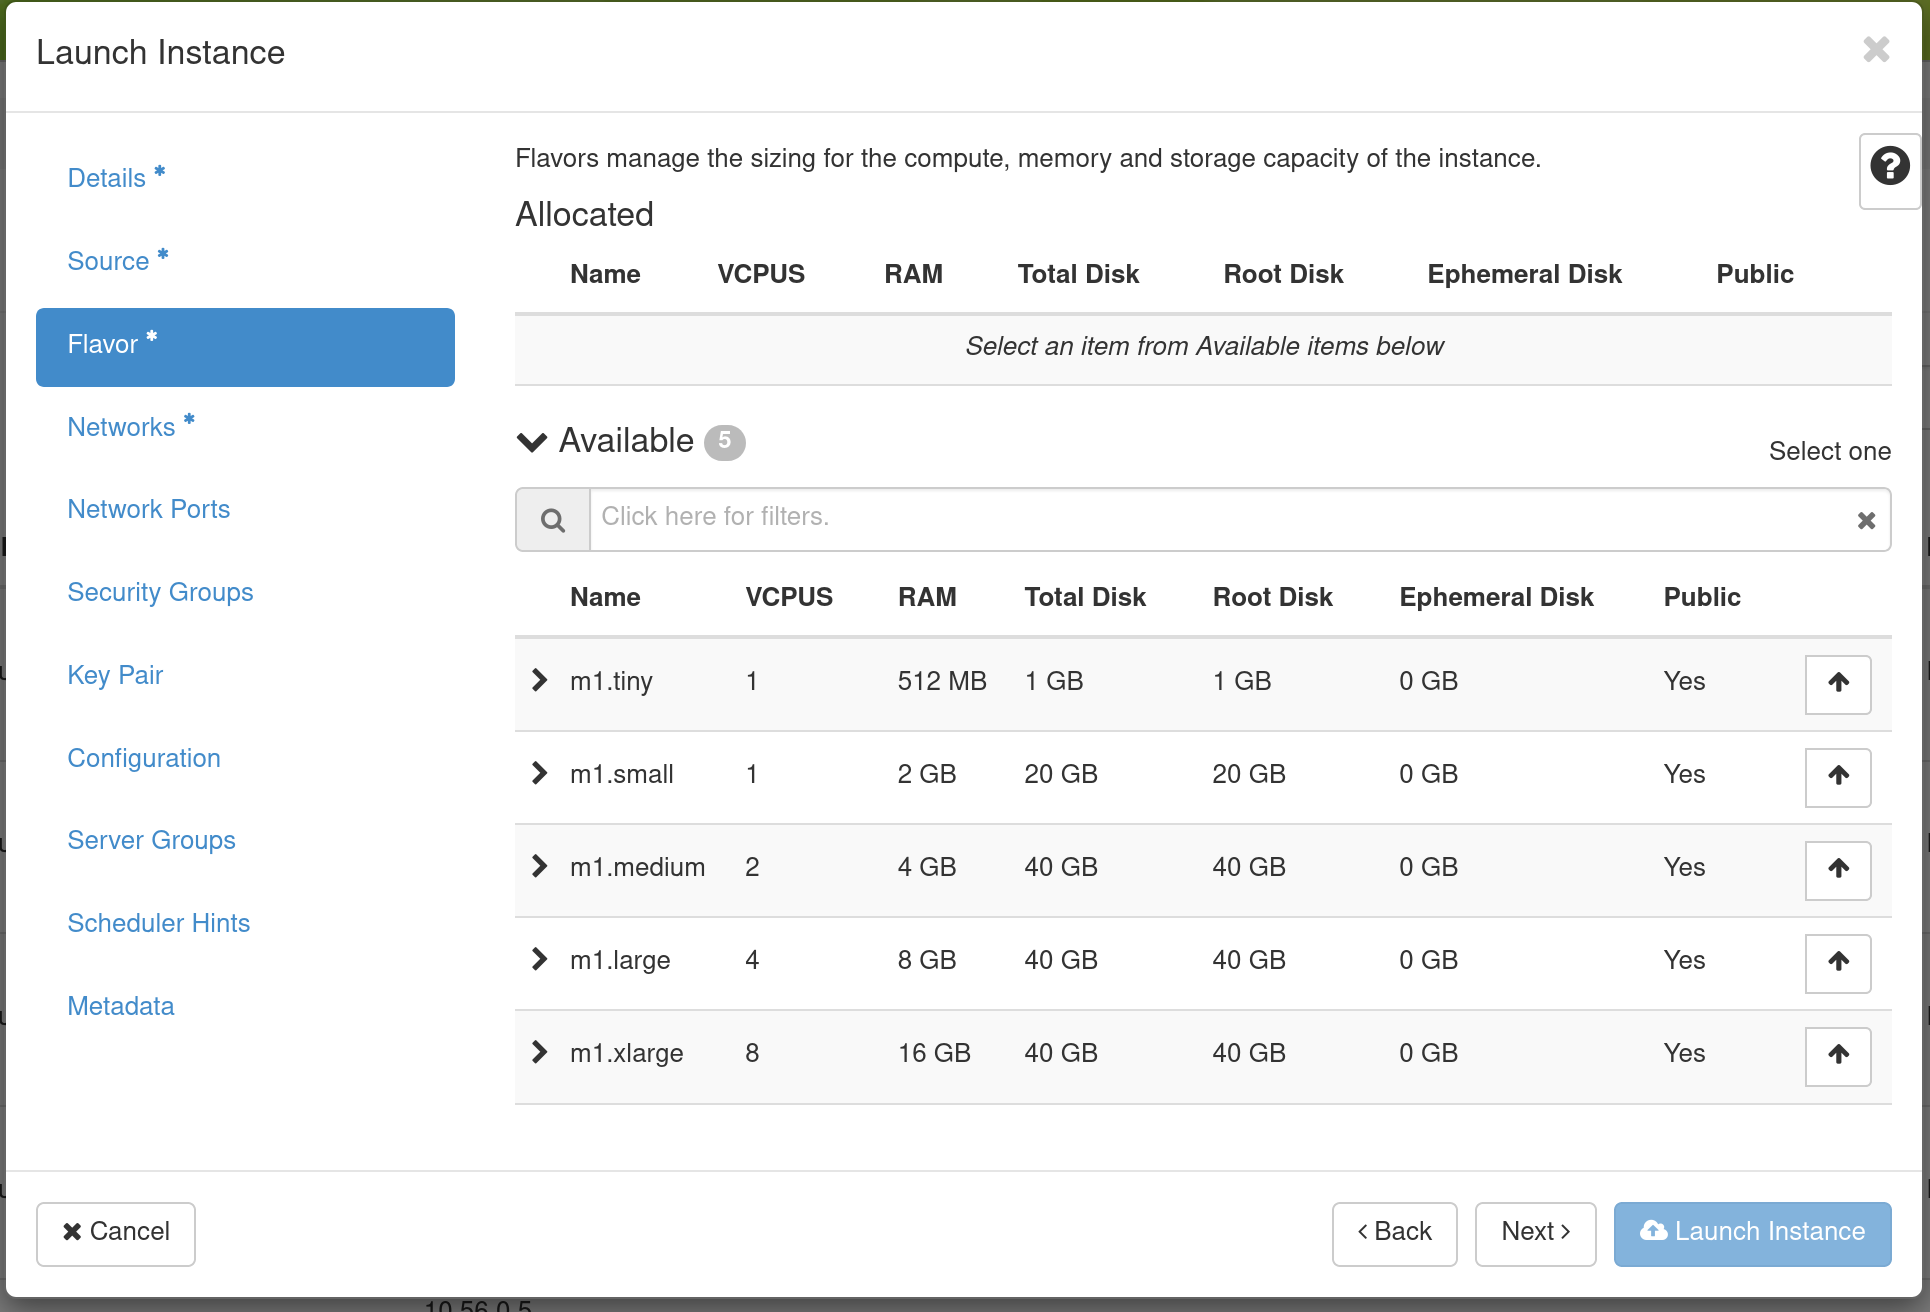
Flavors refer to the virtual machine’s assigned memory and and disk size.
Different images and snapshots may require a larger Flavor. For example, the
CC-CentOS7 image requires at least an m1.small flavor.
If you have a lease for a GPU-enabled flavor, you will see a special flavor
associated with your active lease in this menu. GPU-enabled flavors are displayed
with the prefix reservation: followed by the lease identifier (e.g.,
reservation:aa46132b-5d2a-4d13-b234-46684b02399f). Select this flavor to launch
your GPU-enabled instance. See the section on Creating Leases for VMs with
GPUs for more information.
Tip
If you select different flavors from the Flavor dropdown, their characteristics are displayed on the right.
If your VM needs differ from our defaults, you can request a custom flavor for your project from the help desk
When you are finished with this step, go to the Key Pair Tab.
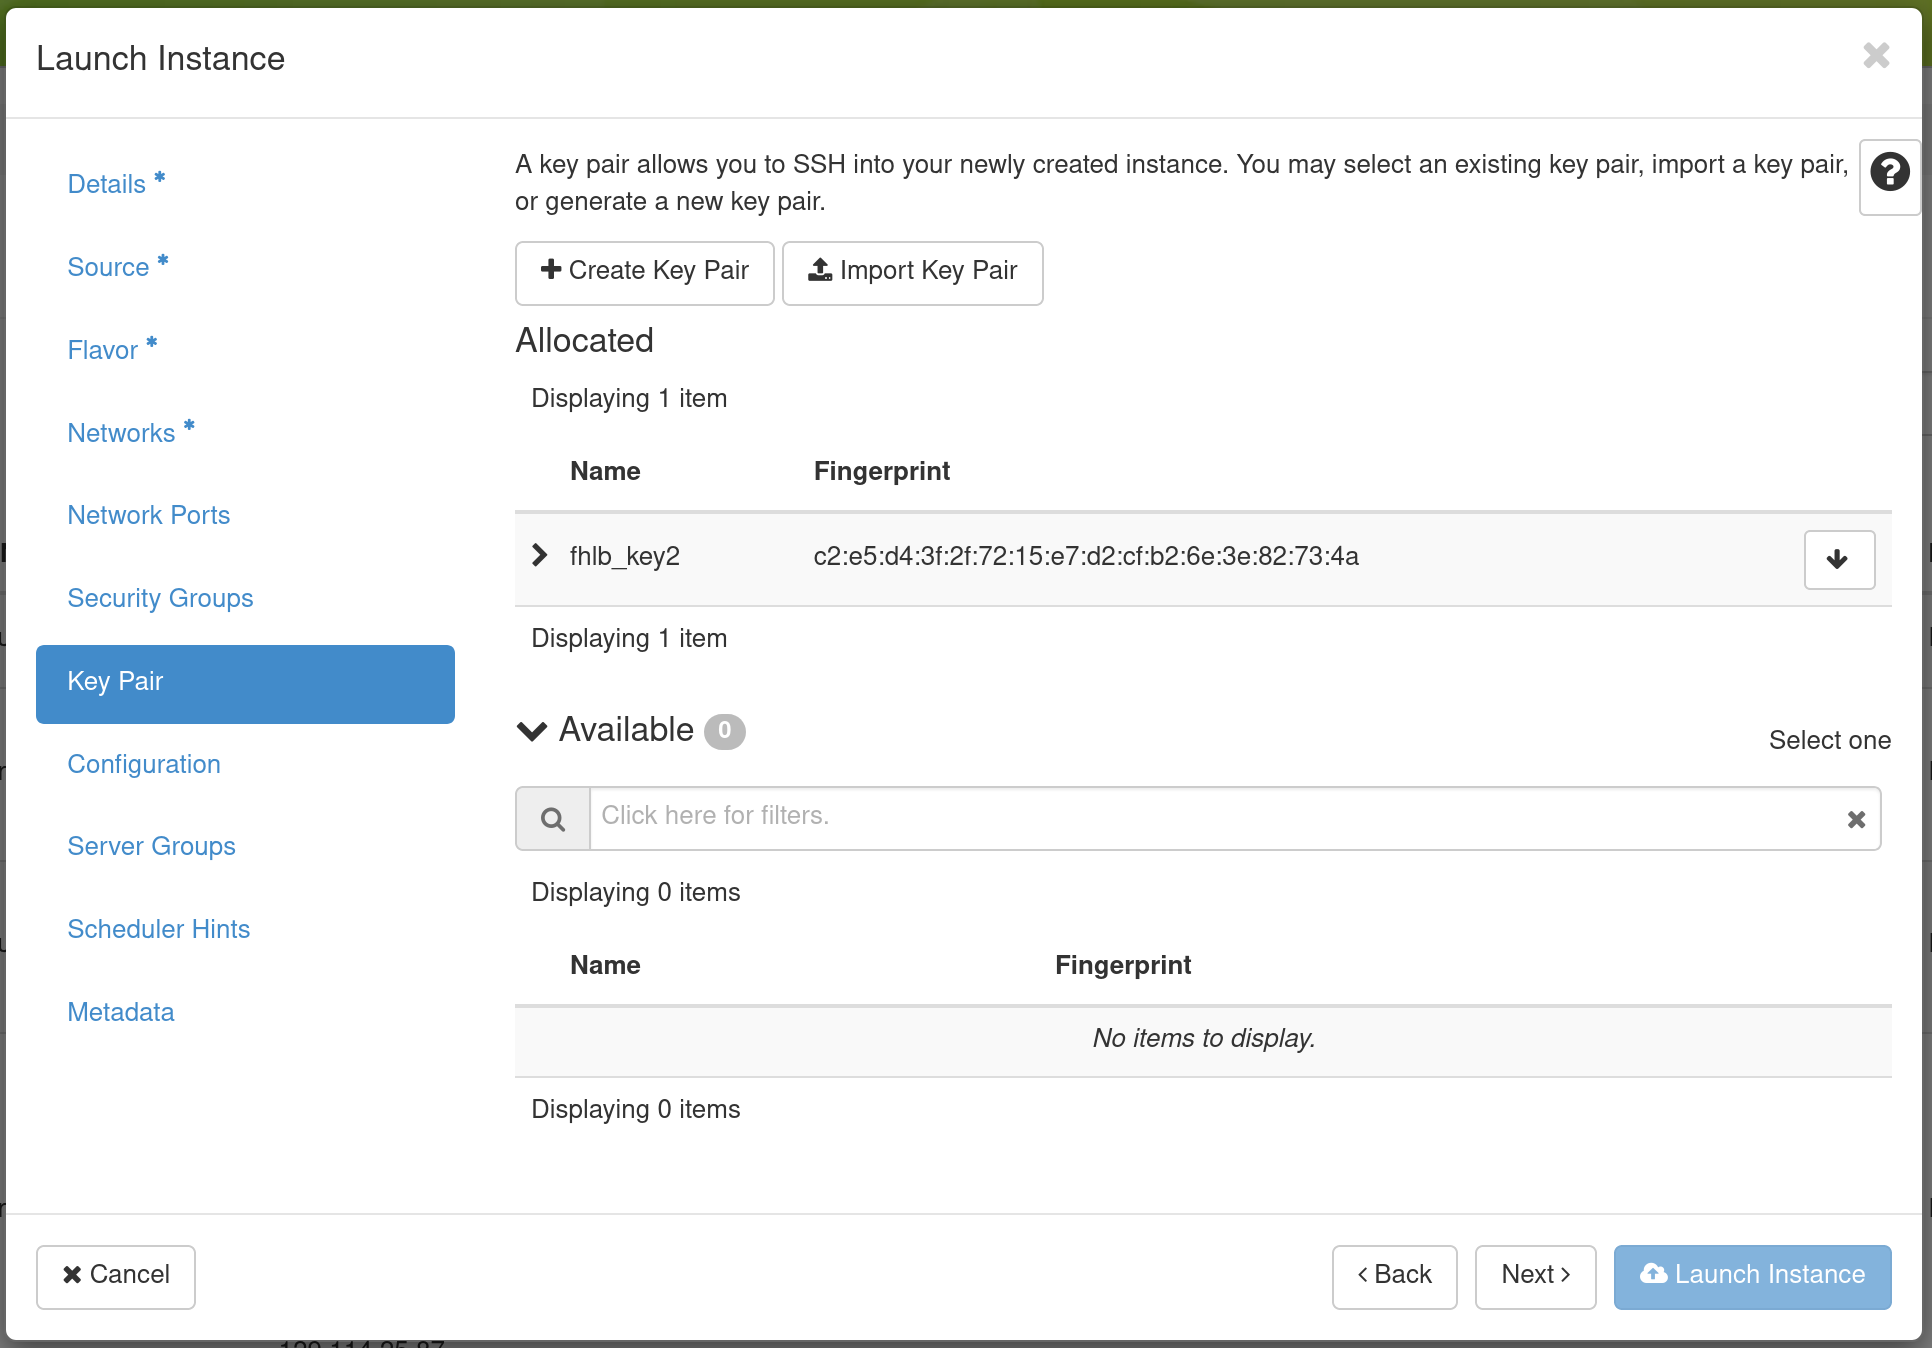
Select an SSH key pair that will be inserted into your virtual machine. You will need to select a key pair here to be able to access an instance created from one of the public images Chameleon provides. These images are not configured with a default root password and you will not be able to log in to them without configuring an SSH key.
Then, go to the Security Groups Tab.
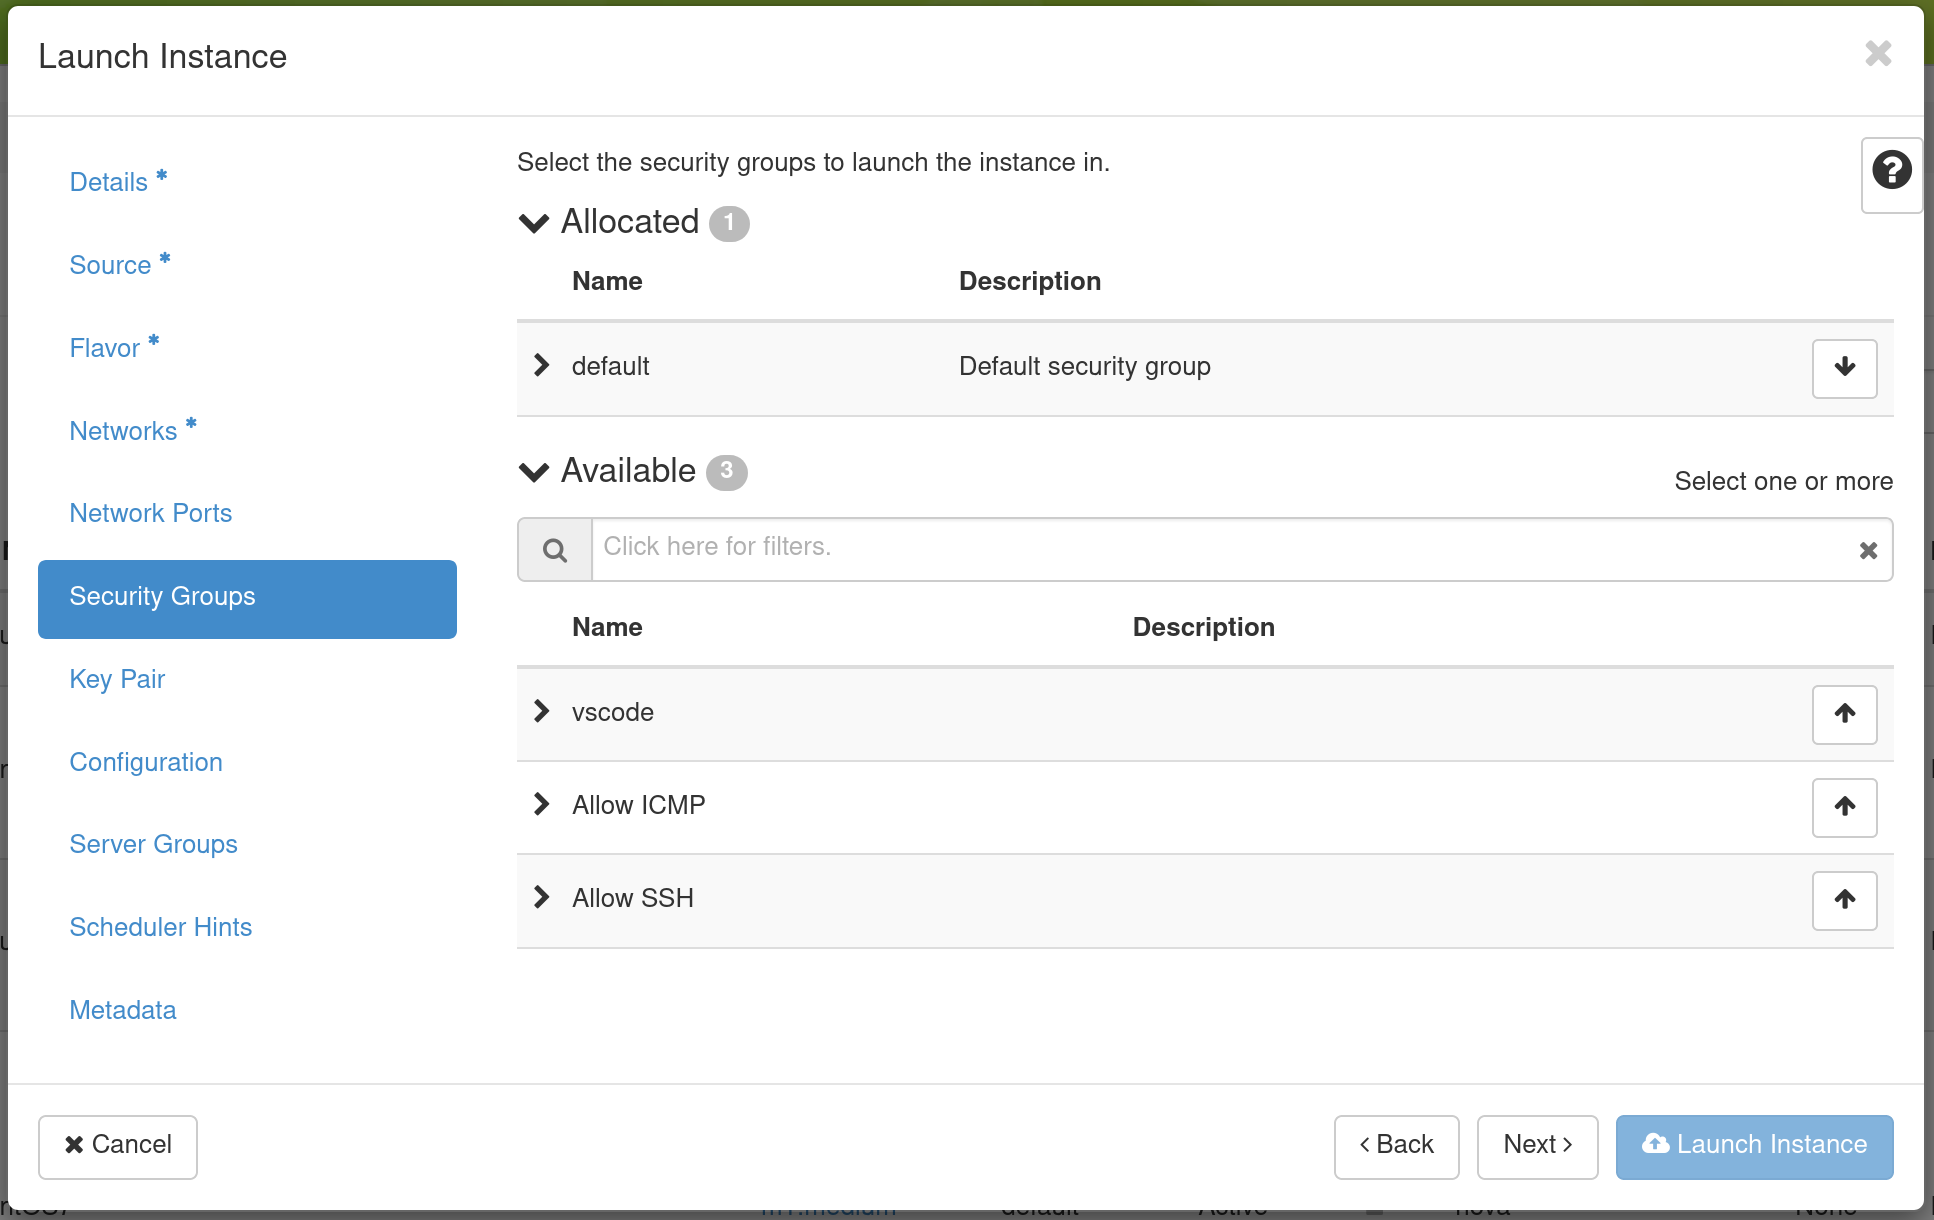
If you have previously defined Security Groups, you may select them here. Alternatively, you can configure them later.
Set up network using Network tab.
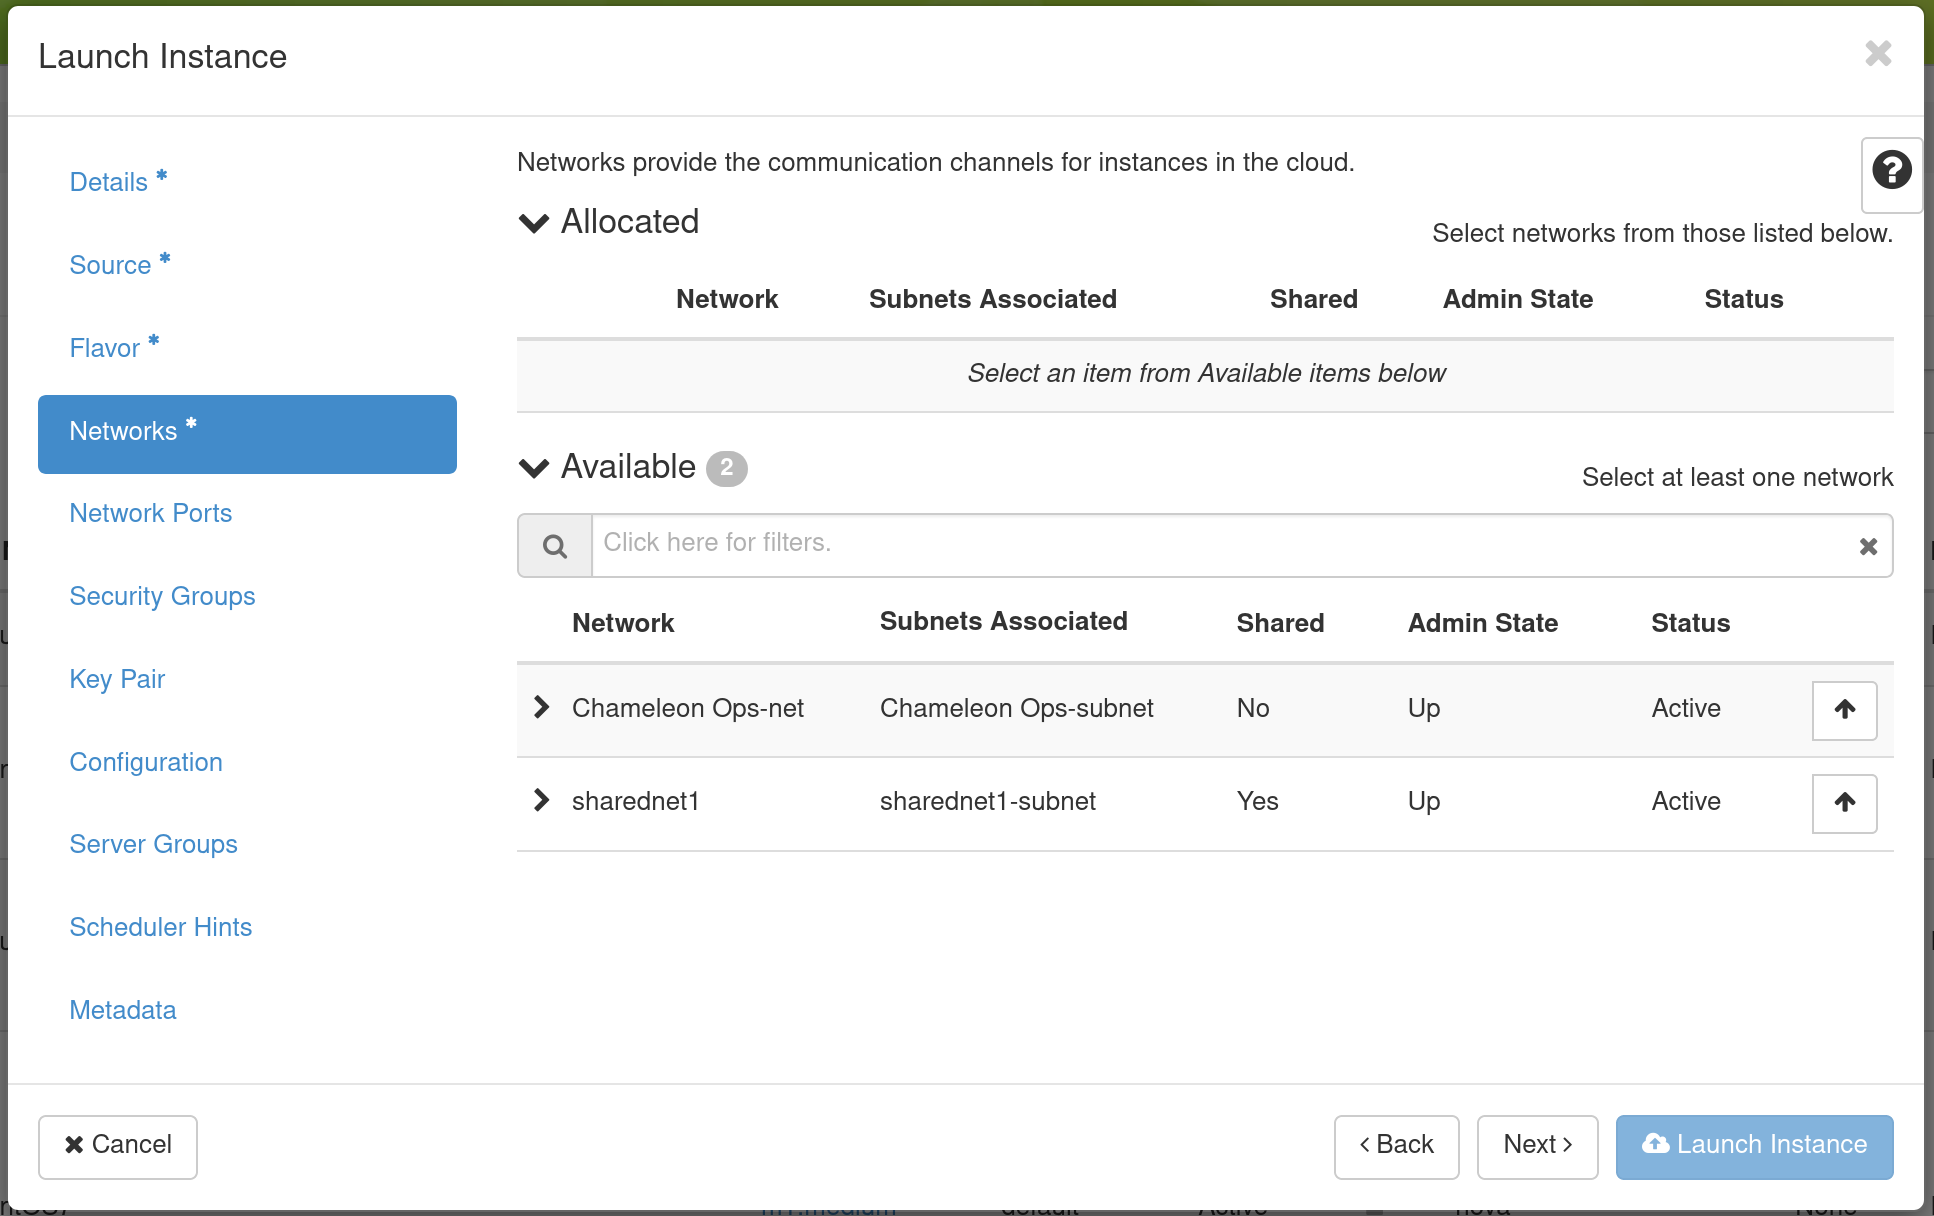
Select which network should be associated with the instance. Click the Up arrow
next to your project’s private network (PROJECT_NAME-net), not ext-net.
Now you can launch your instance by clicking on the Launch button and the Instances page will show progress as it starts.
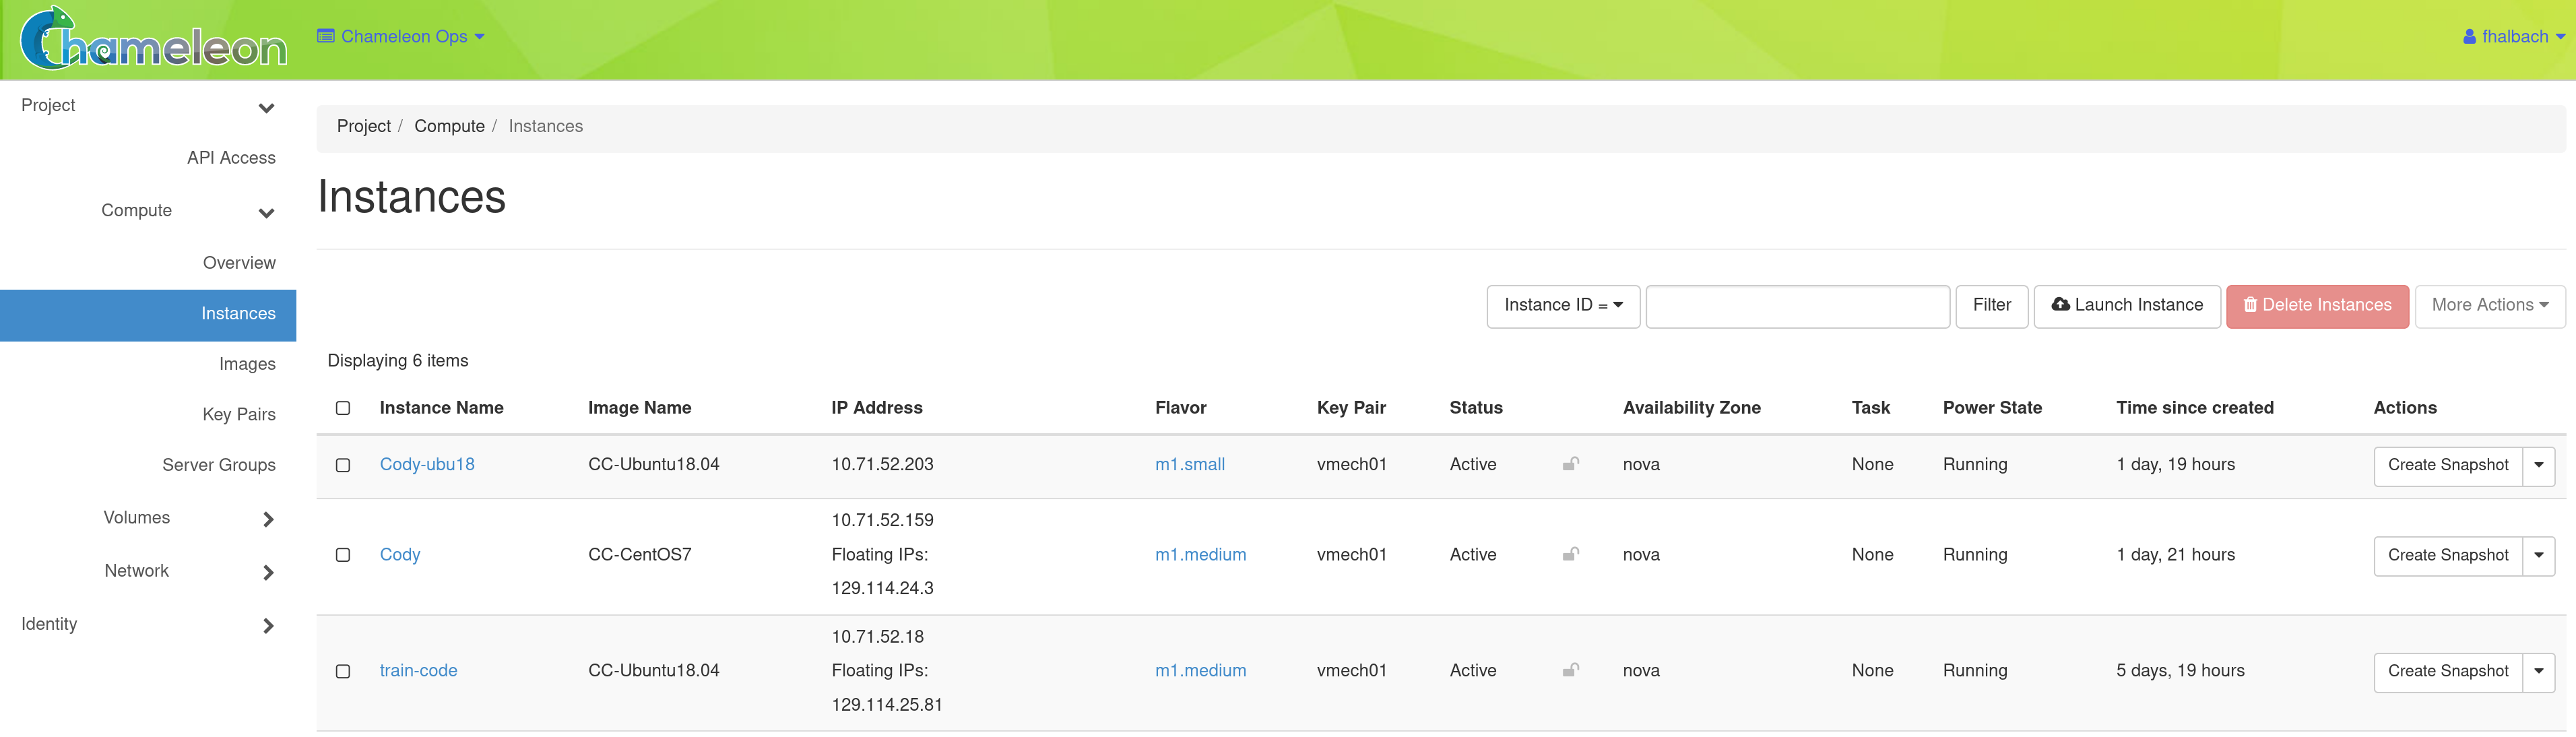
Managing virtual machine instances
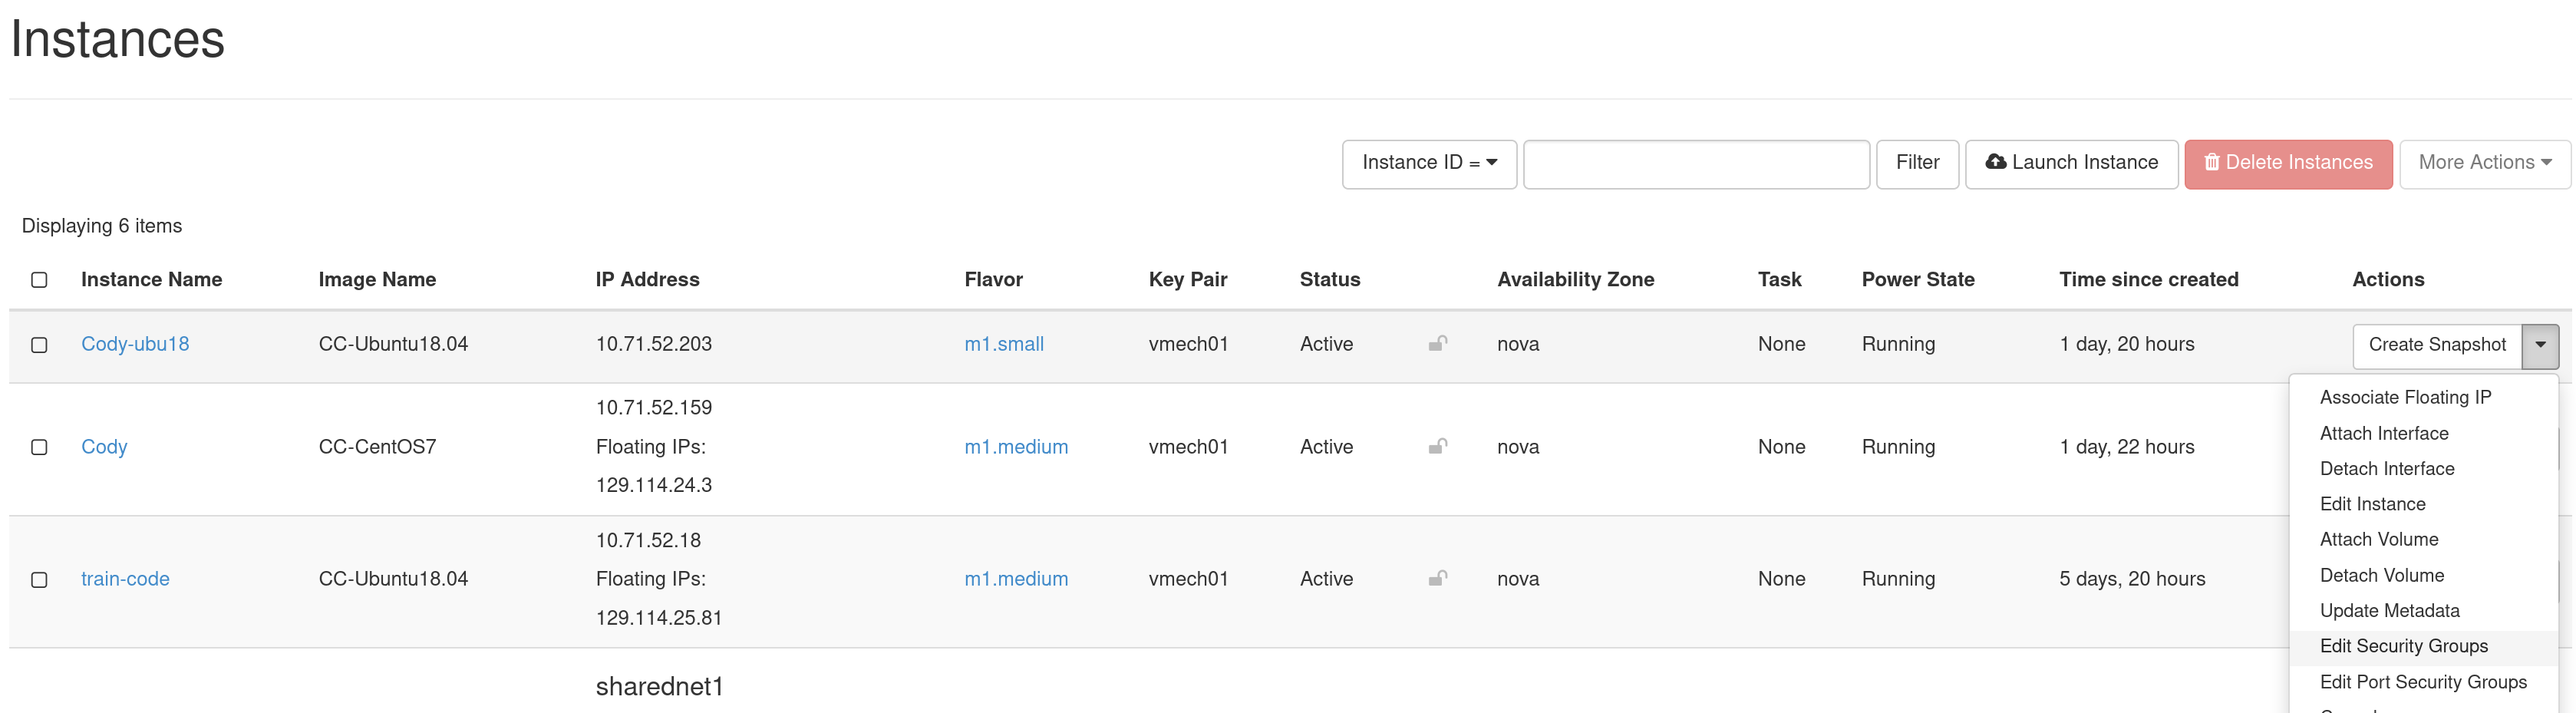
One of the main activities you’ll be performing in the GUI is management of virtual machines, or instances. Go to Project > Compute > Instances in the navigation sidebar. For instances that you have running, you can click on the name of the instance to get more information about it and to access the VNC interface to the console. The dropdown menu to the right of the instance lets you perform a variety of tasks such as suspending, terminating, or rebooting the instance.
Associating a floating IP address
You may assign a Floating IP Address to your Instance by selecting Associate Floating IP in the dropdown menu next to your Instance on the Instances page.

This process is similar to Associate a floating IP on CHI@TACC and CHI@UC bare metal sites.
Key pairs
You will need to import or create SSH Key pairs. This process is similar to the process performed on CHI@TACC and CHI@UC bare metal sites.
Security groups
Security Groups allow you to specify what inbound and outbound traffic is allowed or blocked to Instances. Unlike the CHI@TACC and CHI@UC bare metal sites, KVM@TACC observes Security Groups for Instances.
Note
By default, all inbound traffic is blocked to KVM@TACC Instances, including SSH. You must apply a Security Group that allows TCP port 22 inbound to access your instance via SSH.
To create a Security Group, click Projects > Network > Security Groups in the navigation side bar.
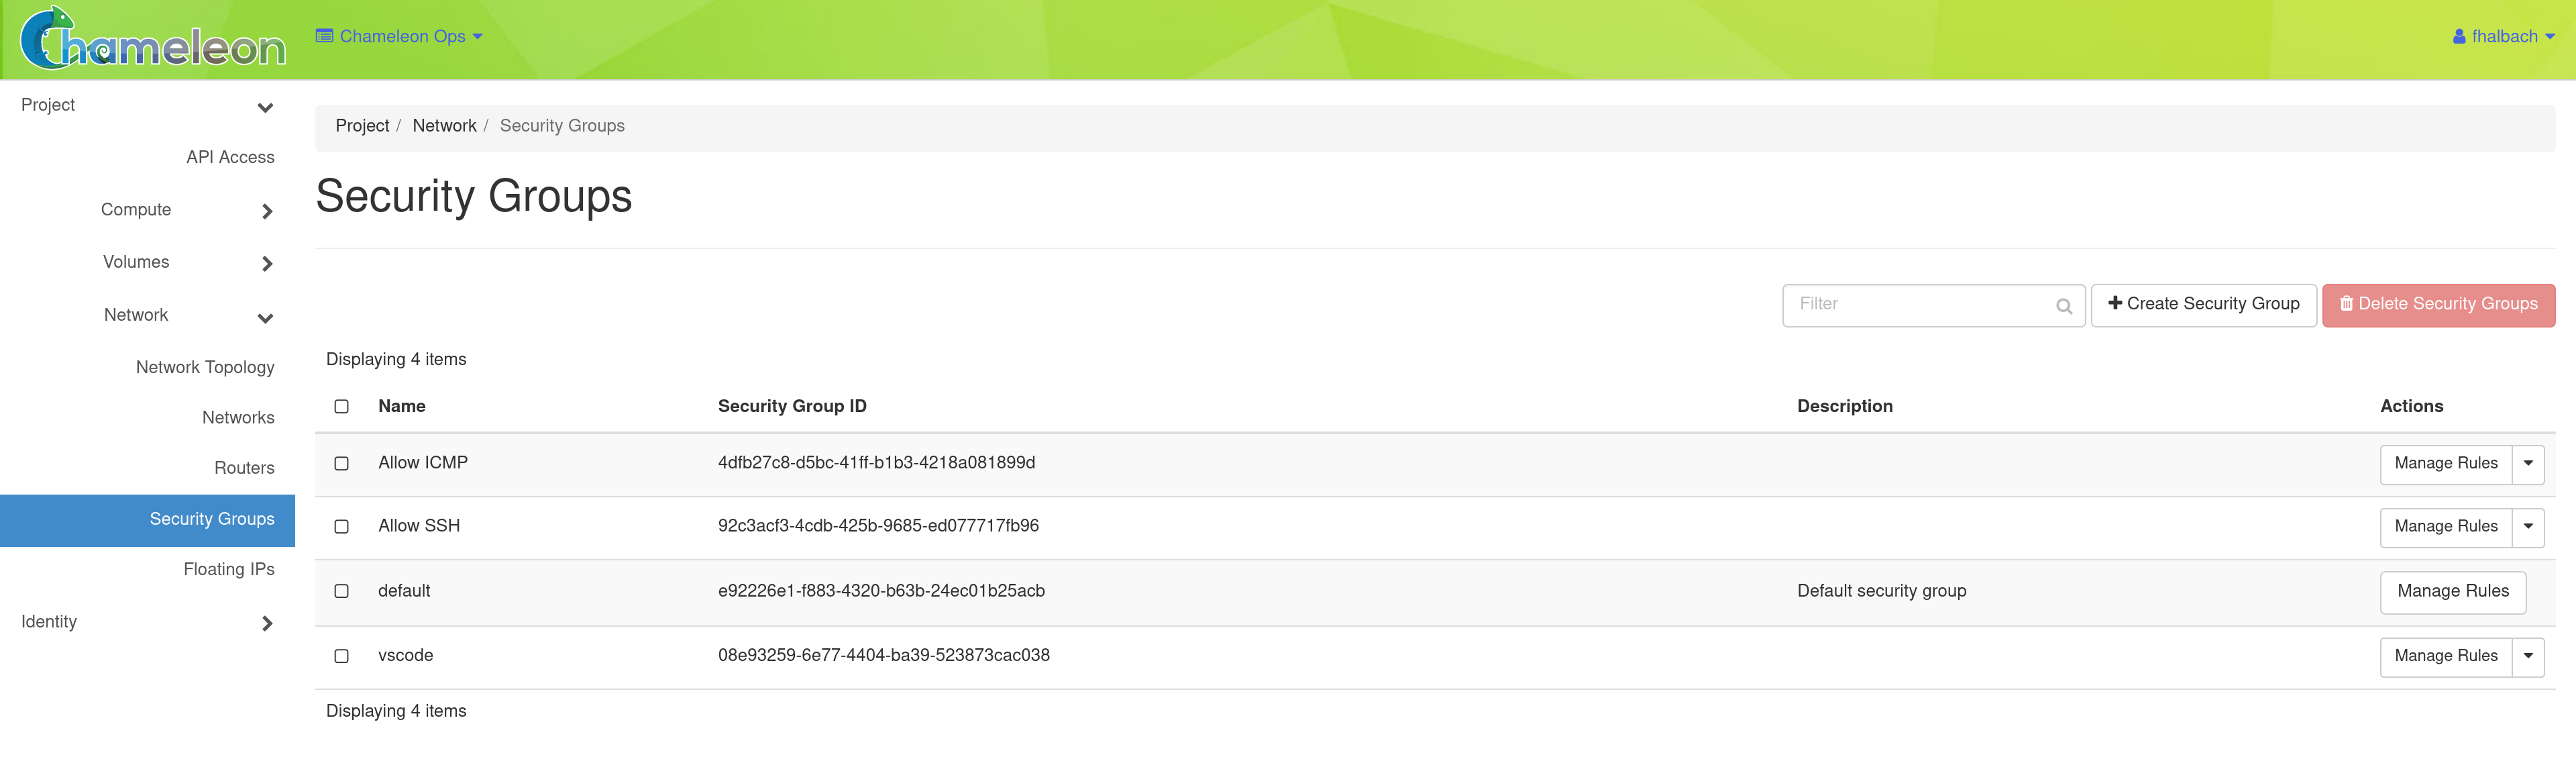
Click the +Create Security Group button to open the Create Security Group page.
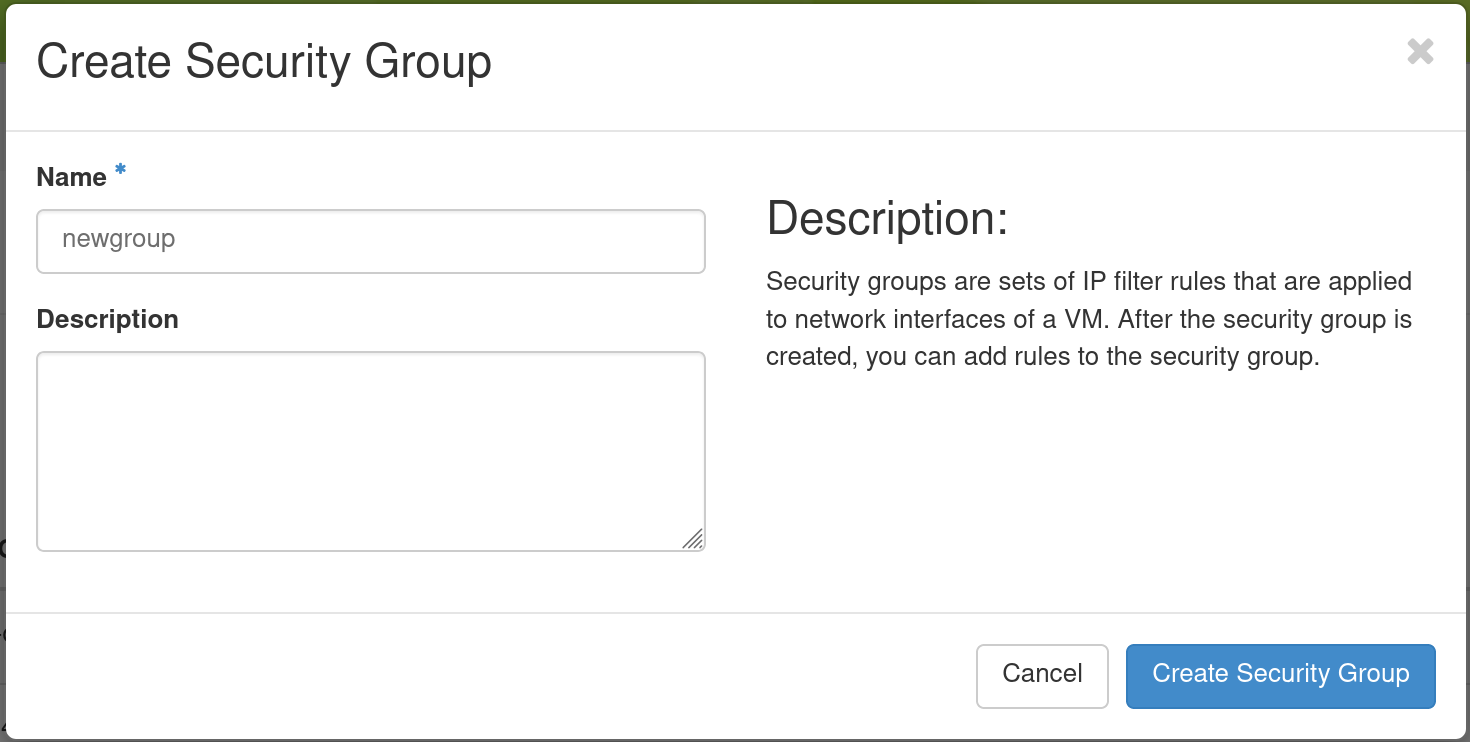
Enter a Name for your Security Group, and optionally provide a Description. Then click the Create Security Group button. Now, you should see your Security Group listed on the Access and Security page.
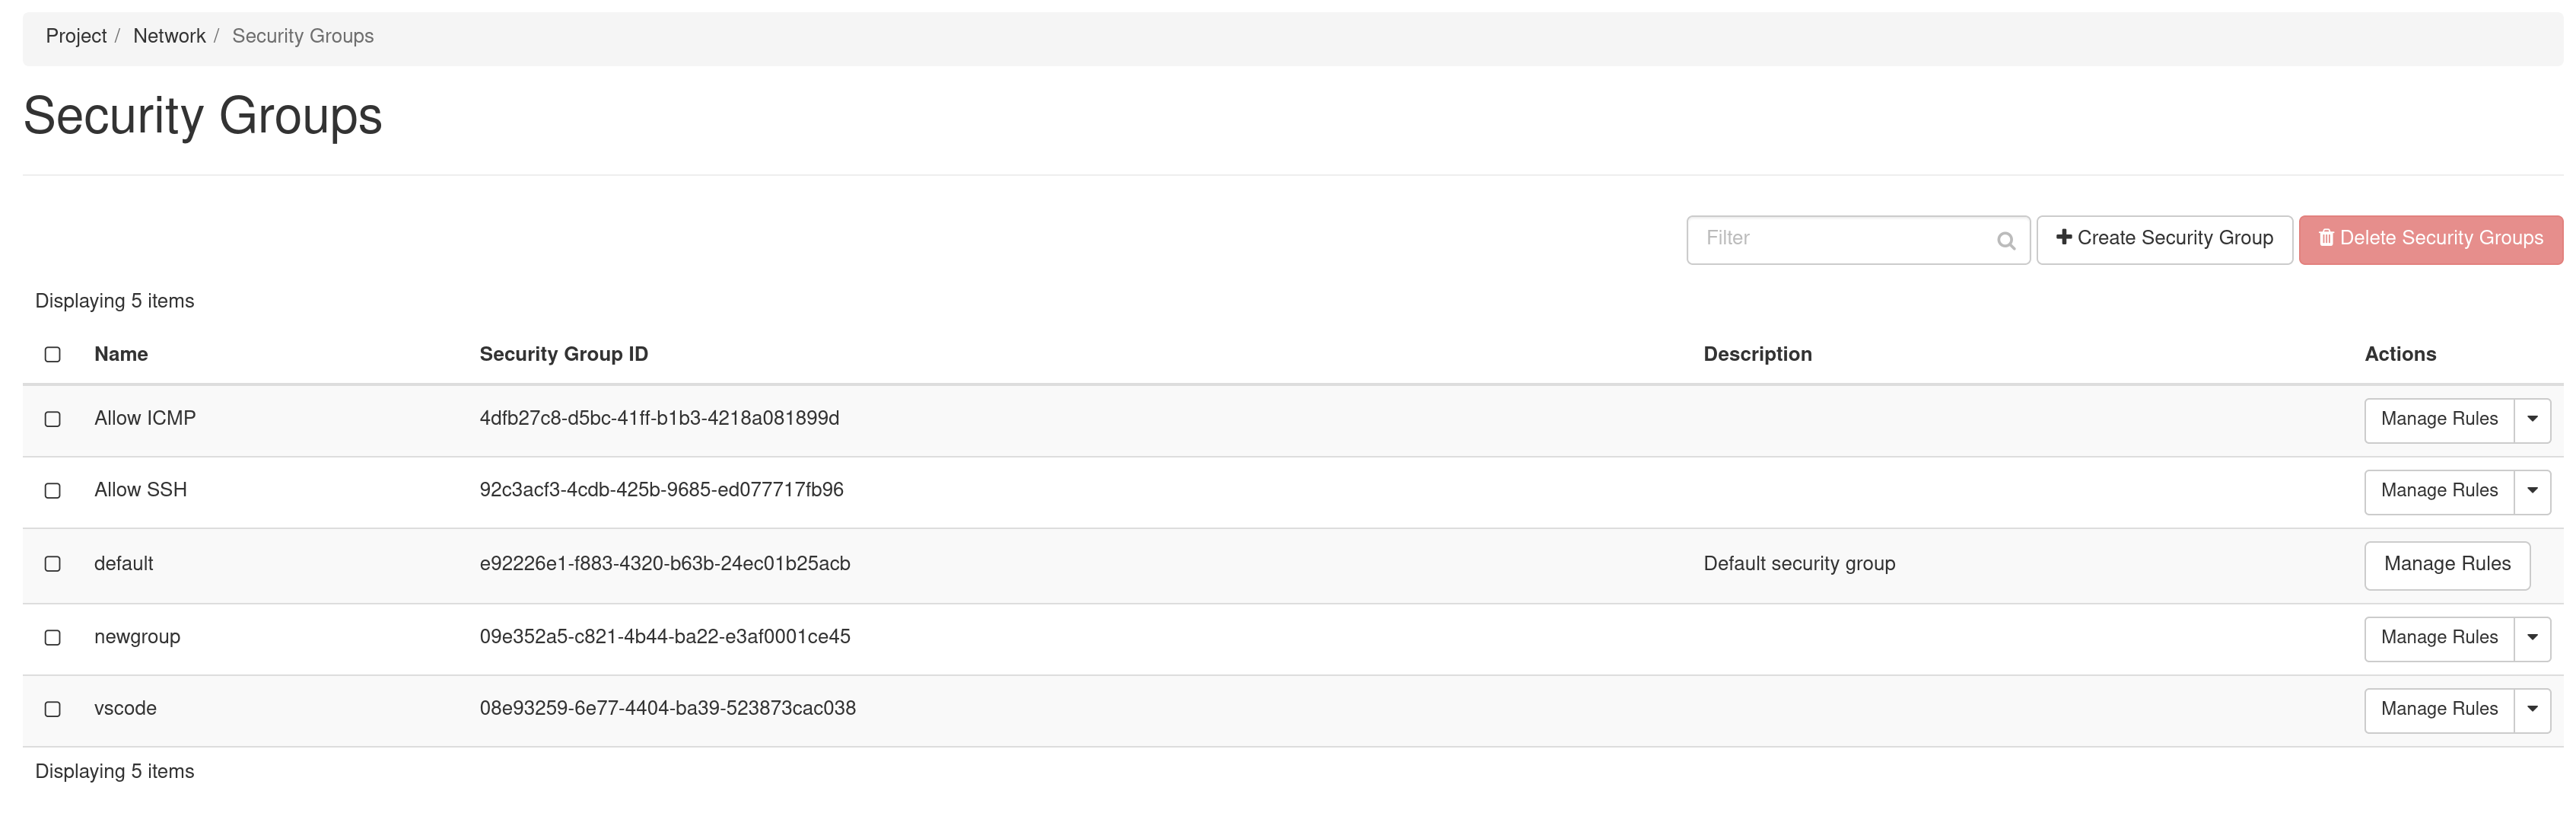
Click the Manage Rules button in the Action column to open the Manage Security Group Rules page.
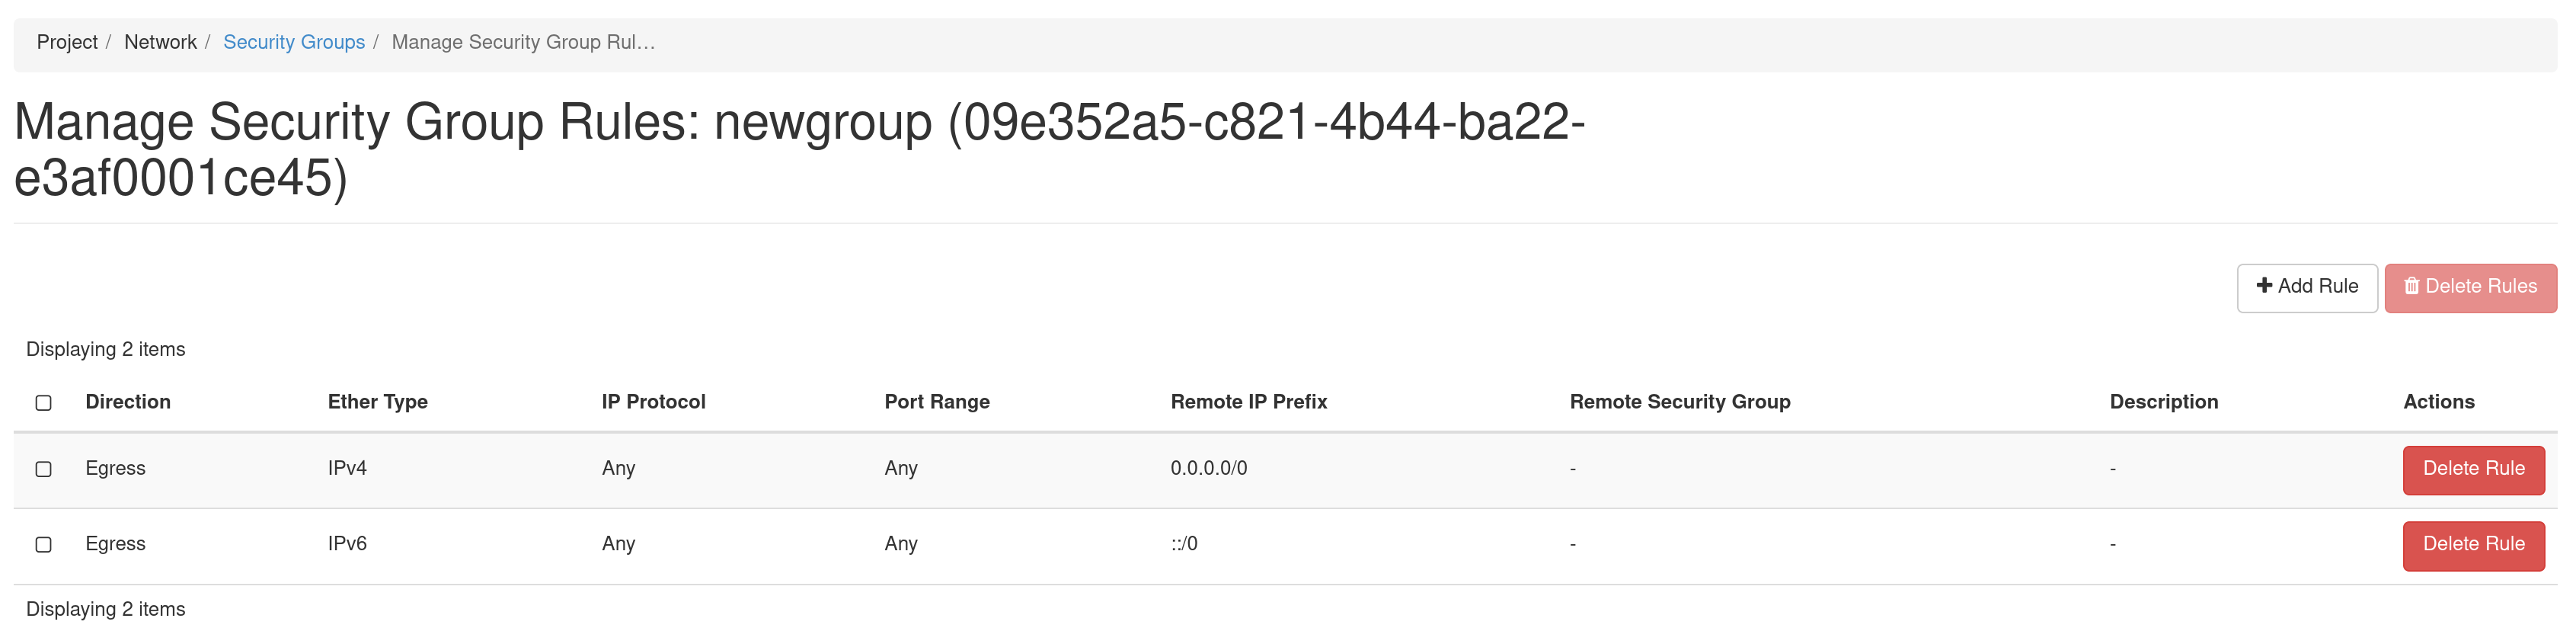
The default Security Group allows outbound IPv4 and IPv6 traffic for Any IP Protocol and Port Range. If no entry for Ingress, no inbound traffic will be allowed. You may add an additional rule by clicking on the +Add Rule to open the Add Rule dialog.
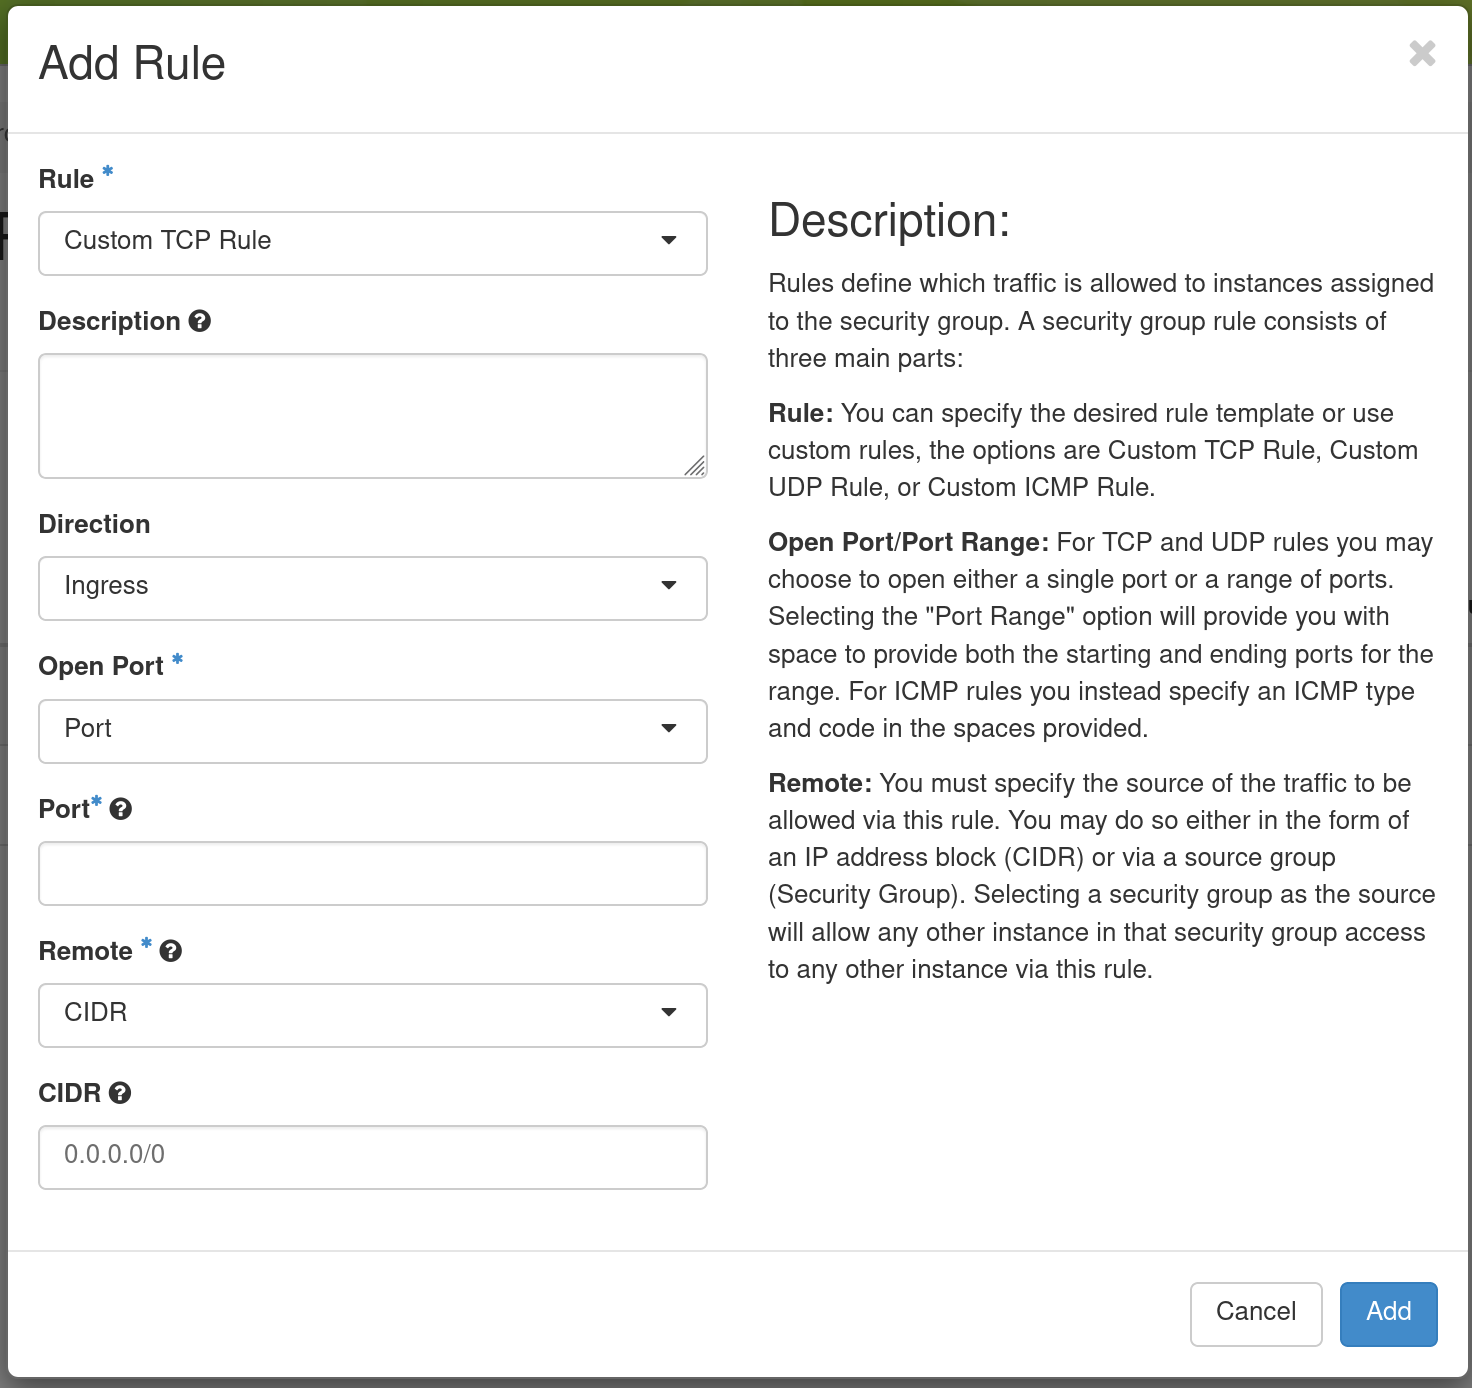
In this dialog, you can specify Custom TCP Rule (or Custom UDP Rule or Custom ICMP Rule), a Direction (Ingress for inbound traffic to your Instance or Egress for outbound traffic) and a Port. Alternatively, you can use a pre-defined rule in the Rule dropdown, such as SSH. when you are finished, click Add.
Adding a security group to an instance
Once you have defined a Security Group, you may apply it to an Instance by clicking Project > Compute > Instances in the navigation sidebar and clicking the Edit Security Groups option in the Actions dropdown.
The Security Groups tab in the Edit Instance dialog will pop up.
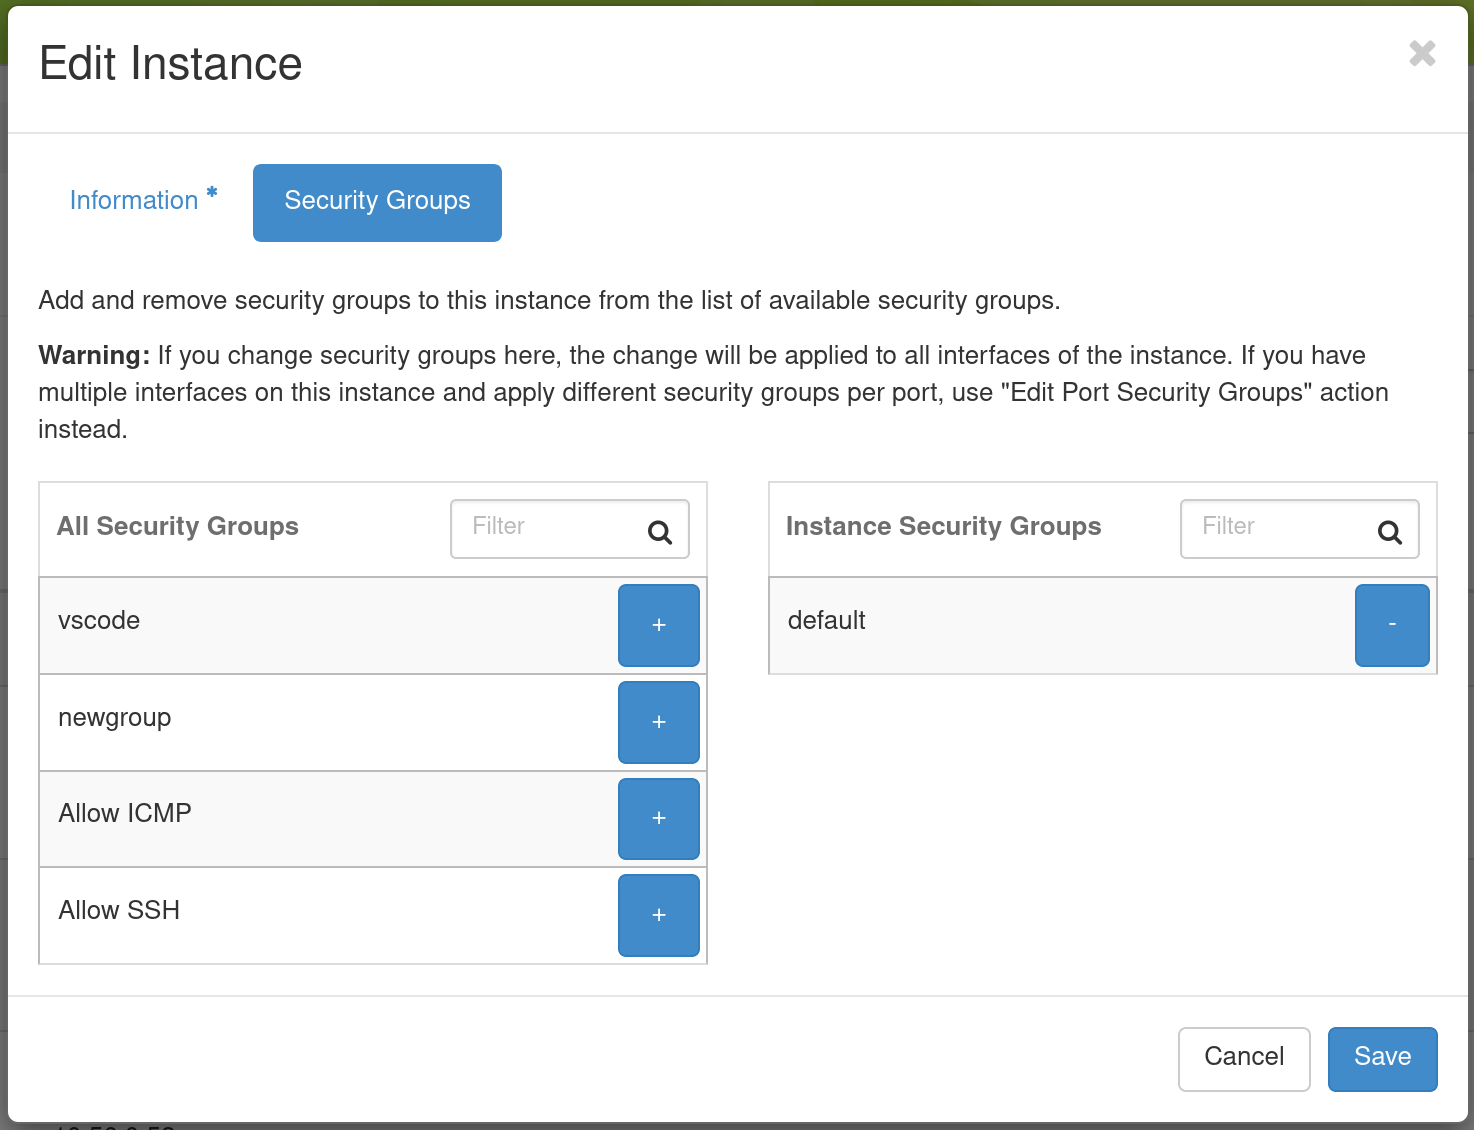
You may click the + button next to the Security Group you wish to apply in the All Security Groups list on the left. Once you are finished, click Save to finish the process.
Creating a instance snapshot
Unlike the baremetal sites, where you must use the cc-snapshot tool inside your instance to create a snapshot, on KVM@TACC you can create a snapshot directly from the GUI.
First, navigate to the Instances page by clicking “Compute > Instances” in the navigation sidebar. Click the “Create Snapshot” action next to your instance on the right size of the instance’s row. Enter a snapshot name that is meaningful to you. On the Instances overview page, you’ll now see a running task with the status of the snapshot job. You can see a corresponding Image in the Images page by clicking “Compute > Images” in the navigation sidebar and searching for your snapshot’s name.
It may some time for the snapshot to complete. Once you see the Image is “Active,” it is safe to delete the instance if you no longer need it.
Launching an instance from a snapshot
To launch an instance from a snapshot, follow the instructions from the guide above, but under the “Source” tab, select “Instance Snapshot” instead of “Image” in the dropdown. Then you can find the name of your snapshot in the table below and select it.
Alternatively, if you find your snapshot in the Images page (from “Compute > Images”), you can click “Launch” next to the snapshot’s name. This will open the “Launch Instance” dialog with the snapshot preselected.