Provisioning and managing resources using the GUI
To make reservations of the resources, first log into the Horizon GUI - either CHI@TACC or CHI@UC. Then, choose a project and configure your local timezone. For details on how to choose a project and update personalized settings, see Graphical User Interface (GUI).
In the navigation sidebar, go to the Reservations section and click Leases.
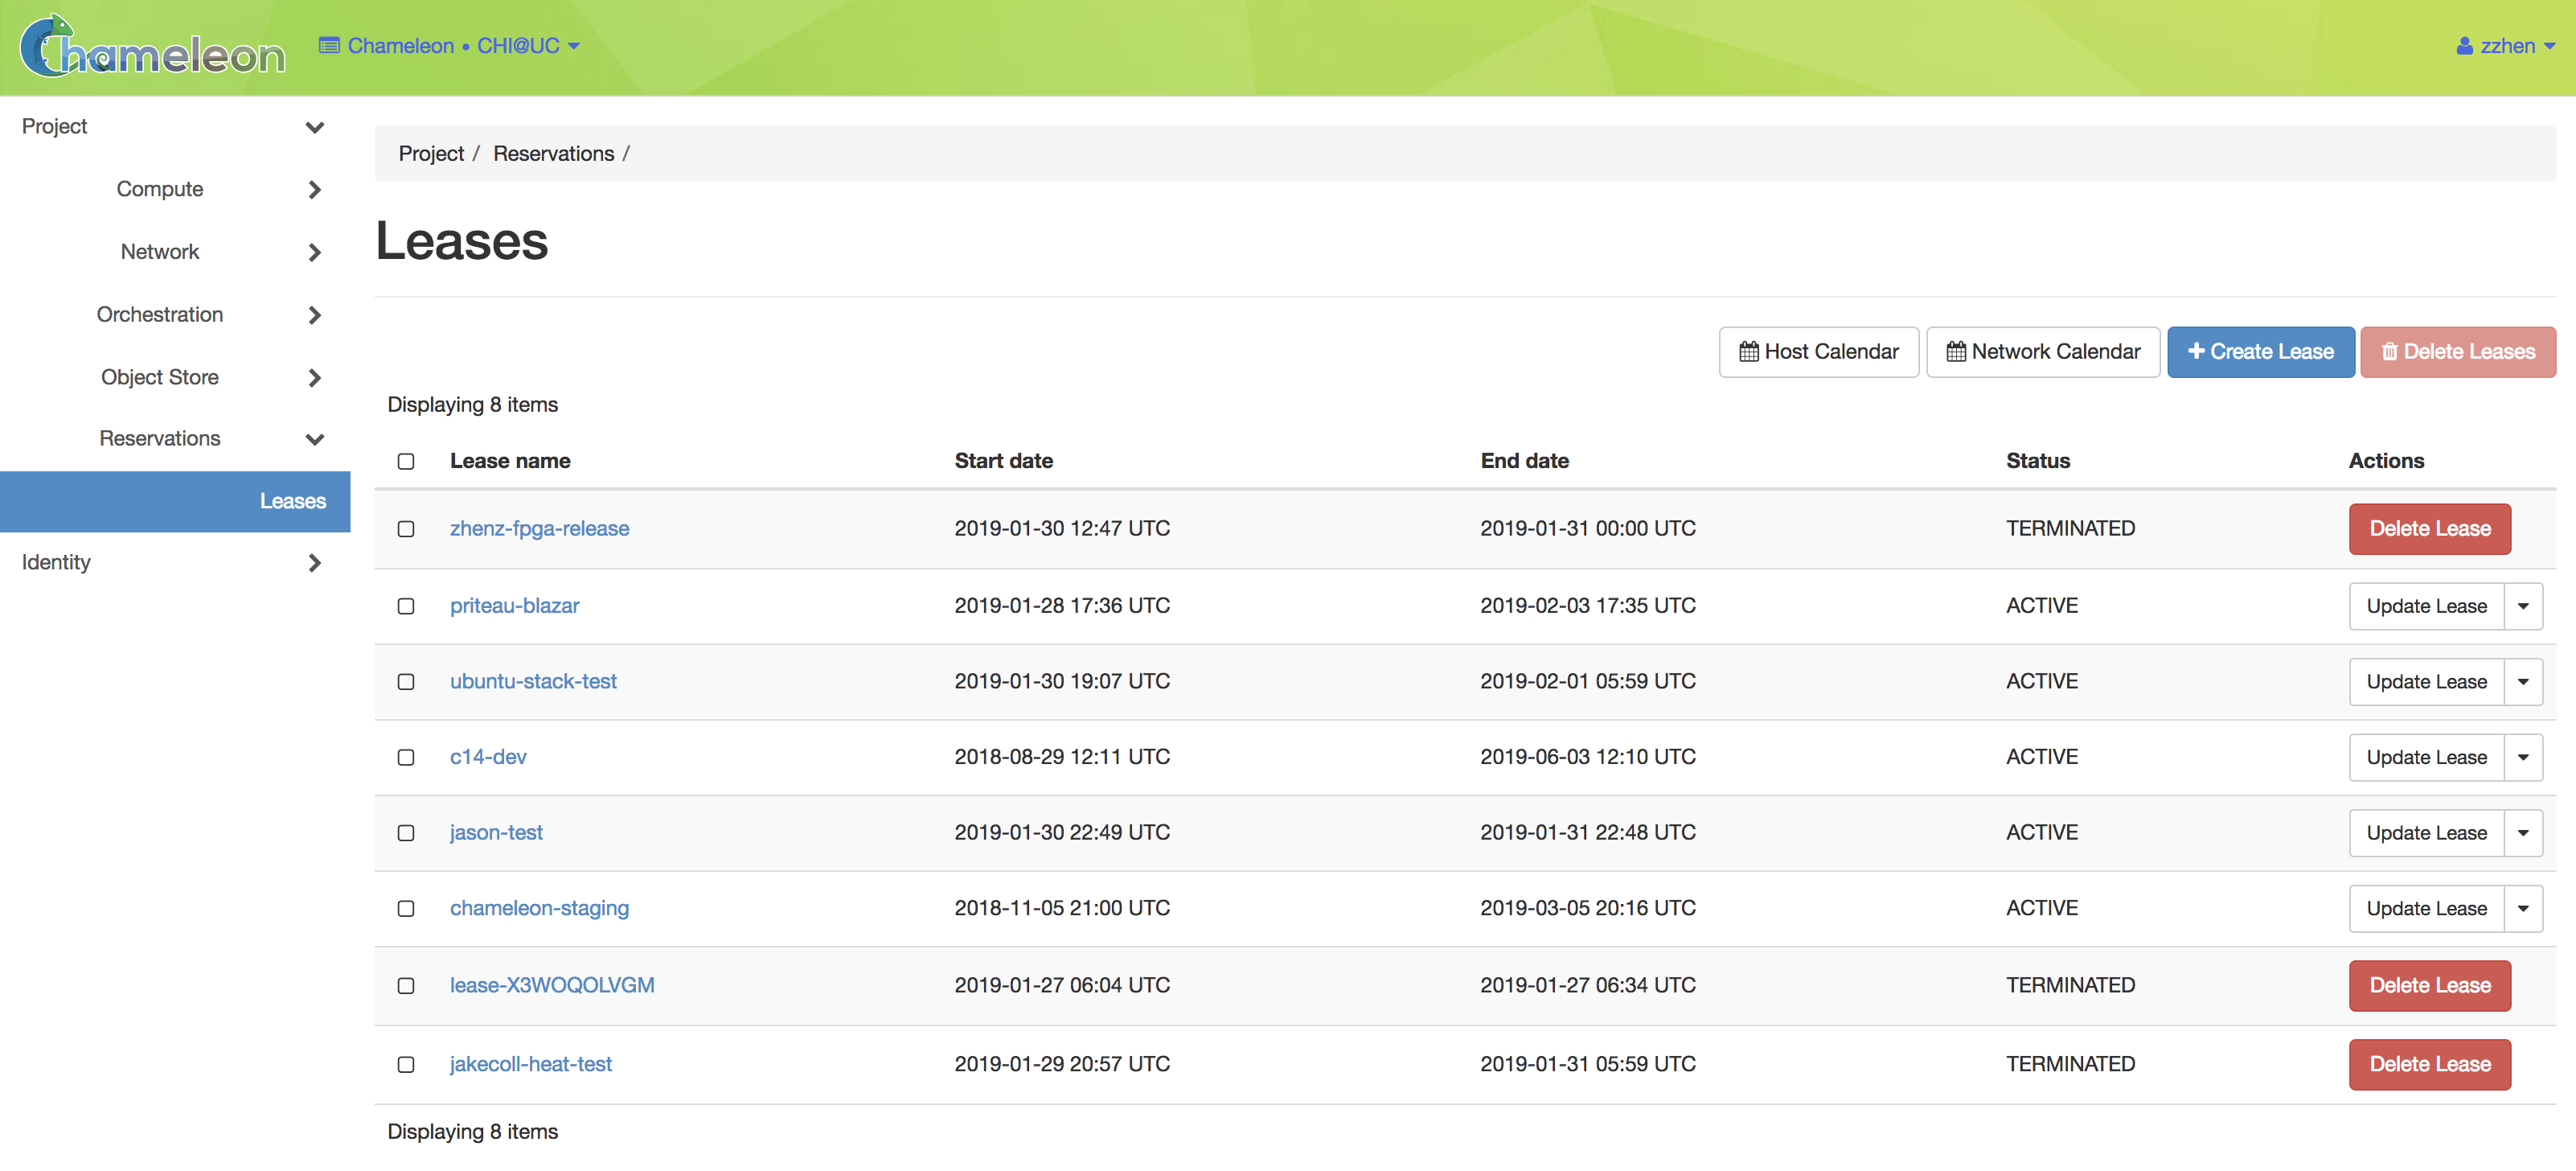
The Leases page in the GUI
The lease calendars
To discover when resources are available, You can access the lease calendars by clicking on the Host Calendar button for physical hosts and clicking on the Network Calendar button for VLANs. This will display a Gantt chart of the reservations which allows you to find when resources are available. The Y axis represents the different physical nodes in the system and the X axis represents time.
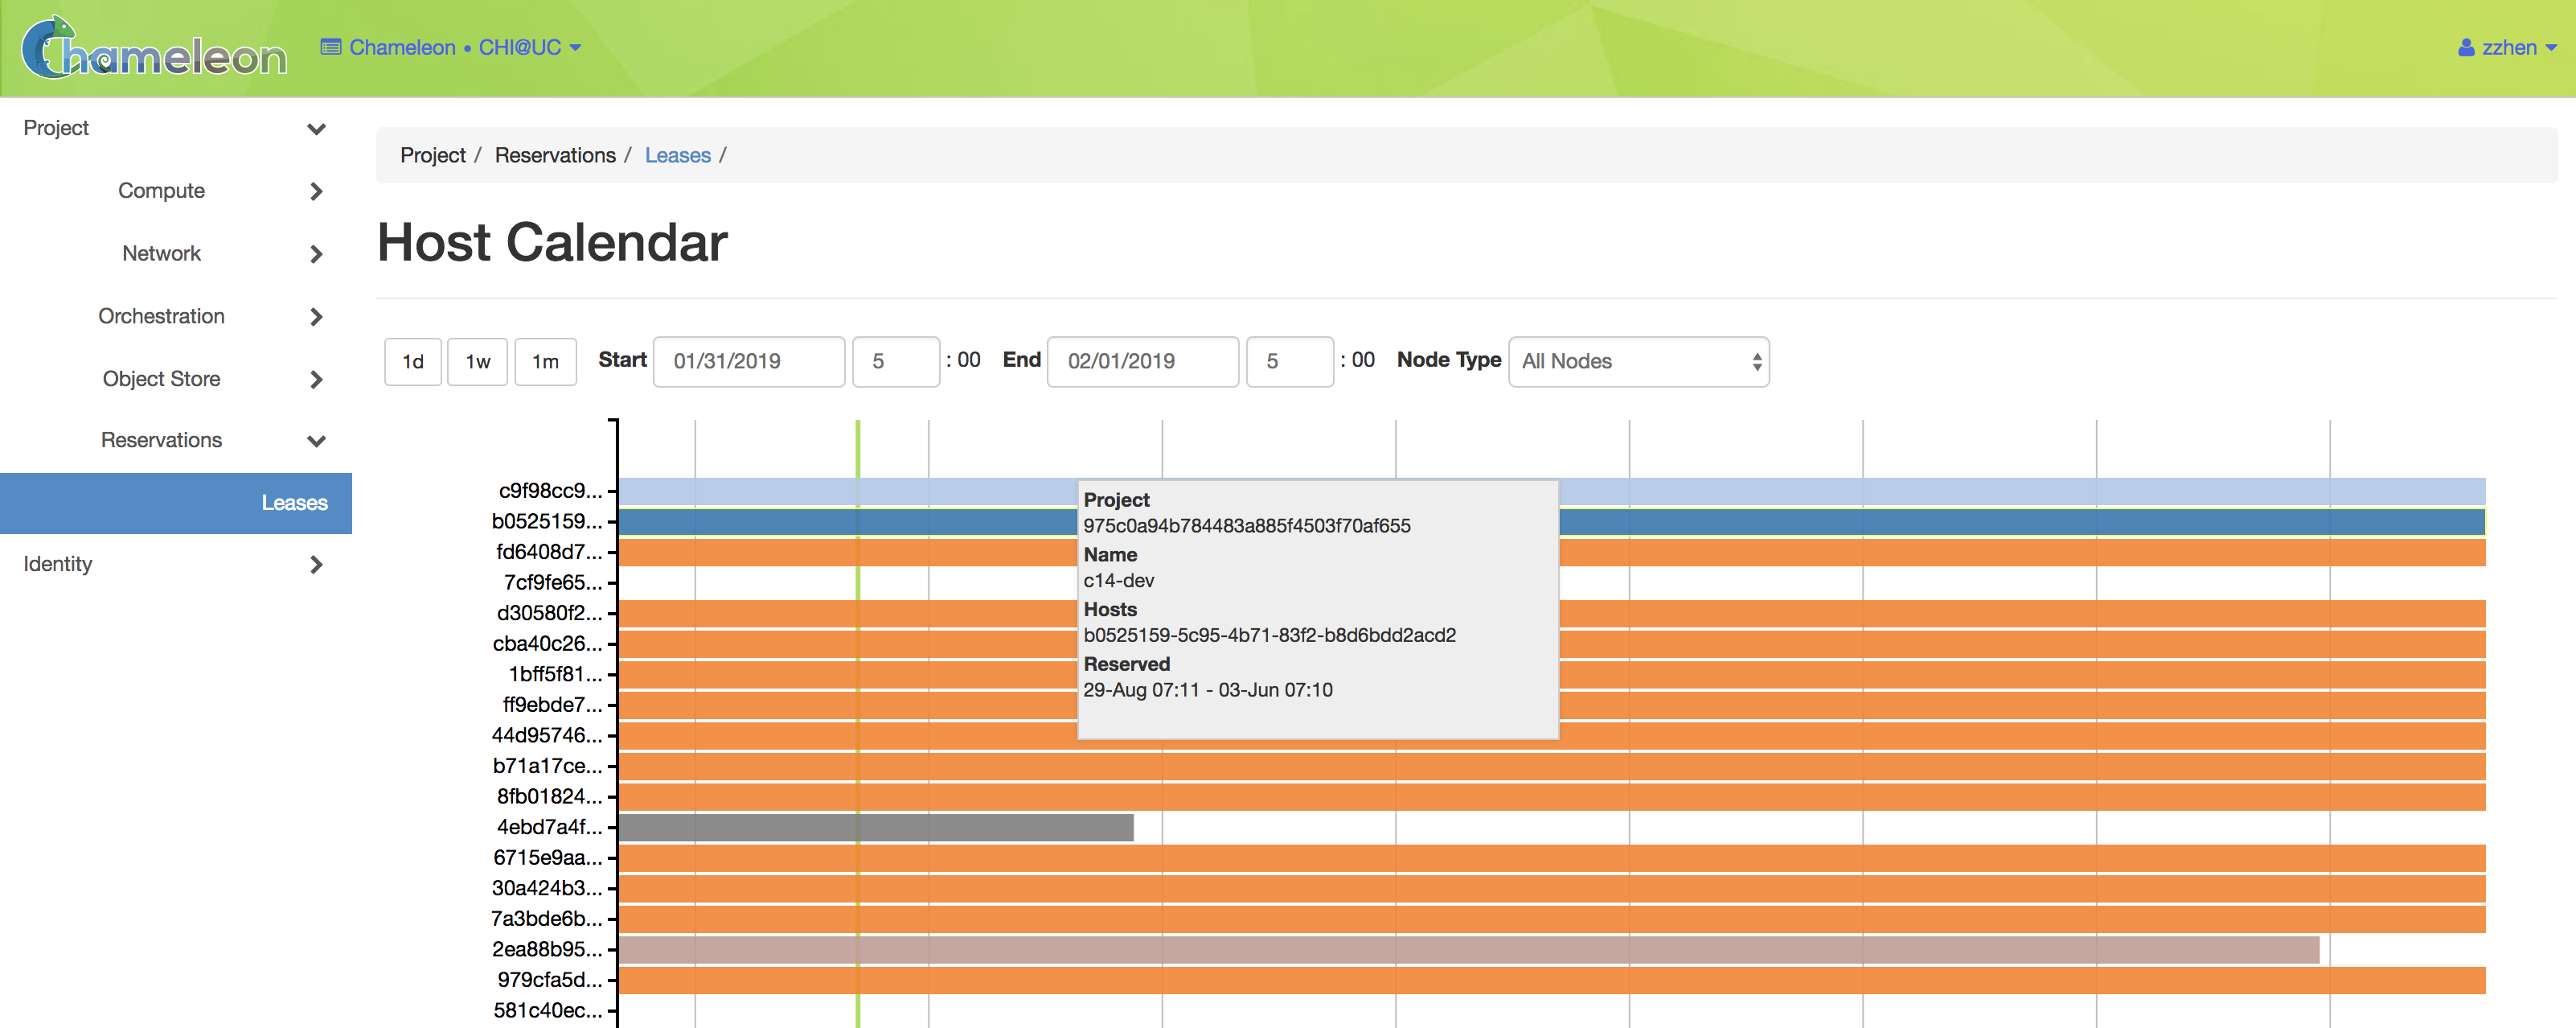
The Host Calendar
Tip
Education projects may require “sub-leases” to facillitate student access to a node during a project, while keeping that node available to the project. This ensures that resources required for a class are not unavailable before a deadline. If this is required for your usage, we can temporarily grant exclusive access to a node to your project. Create a lease for the node, and contact the Help Desk to request exclusive node access for your project.
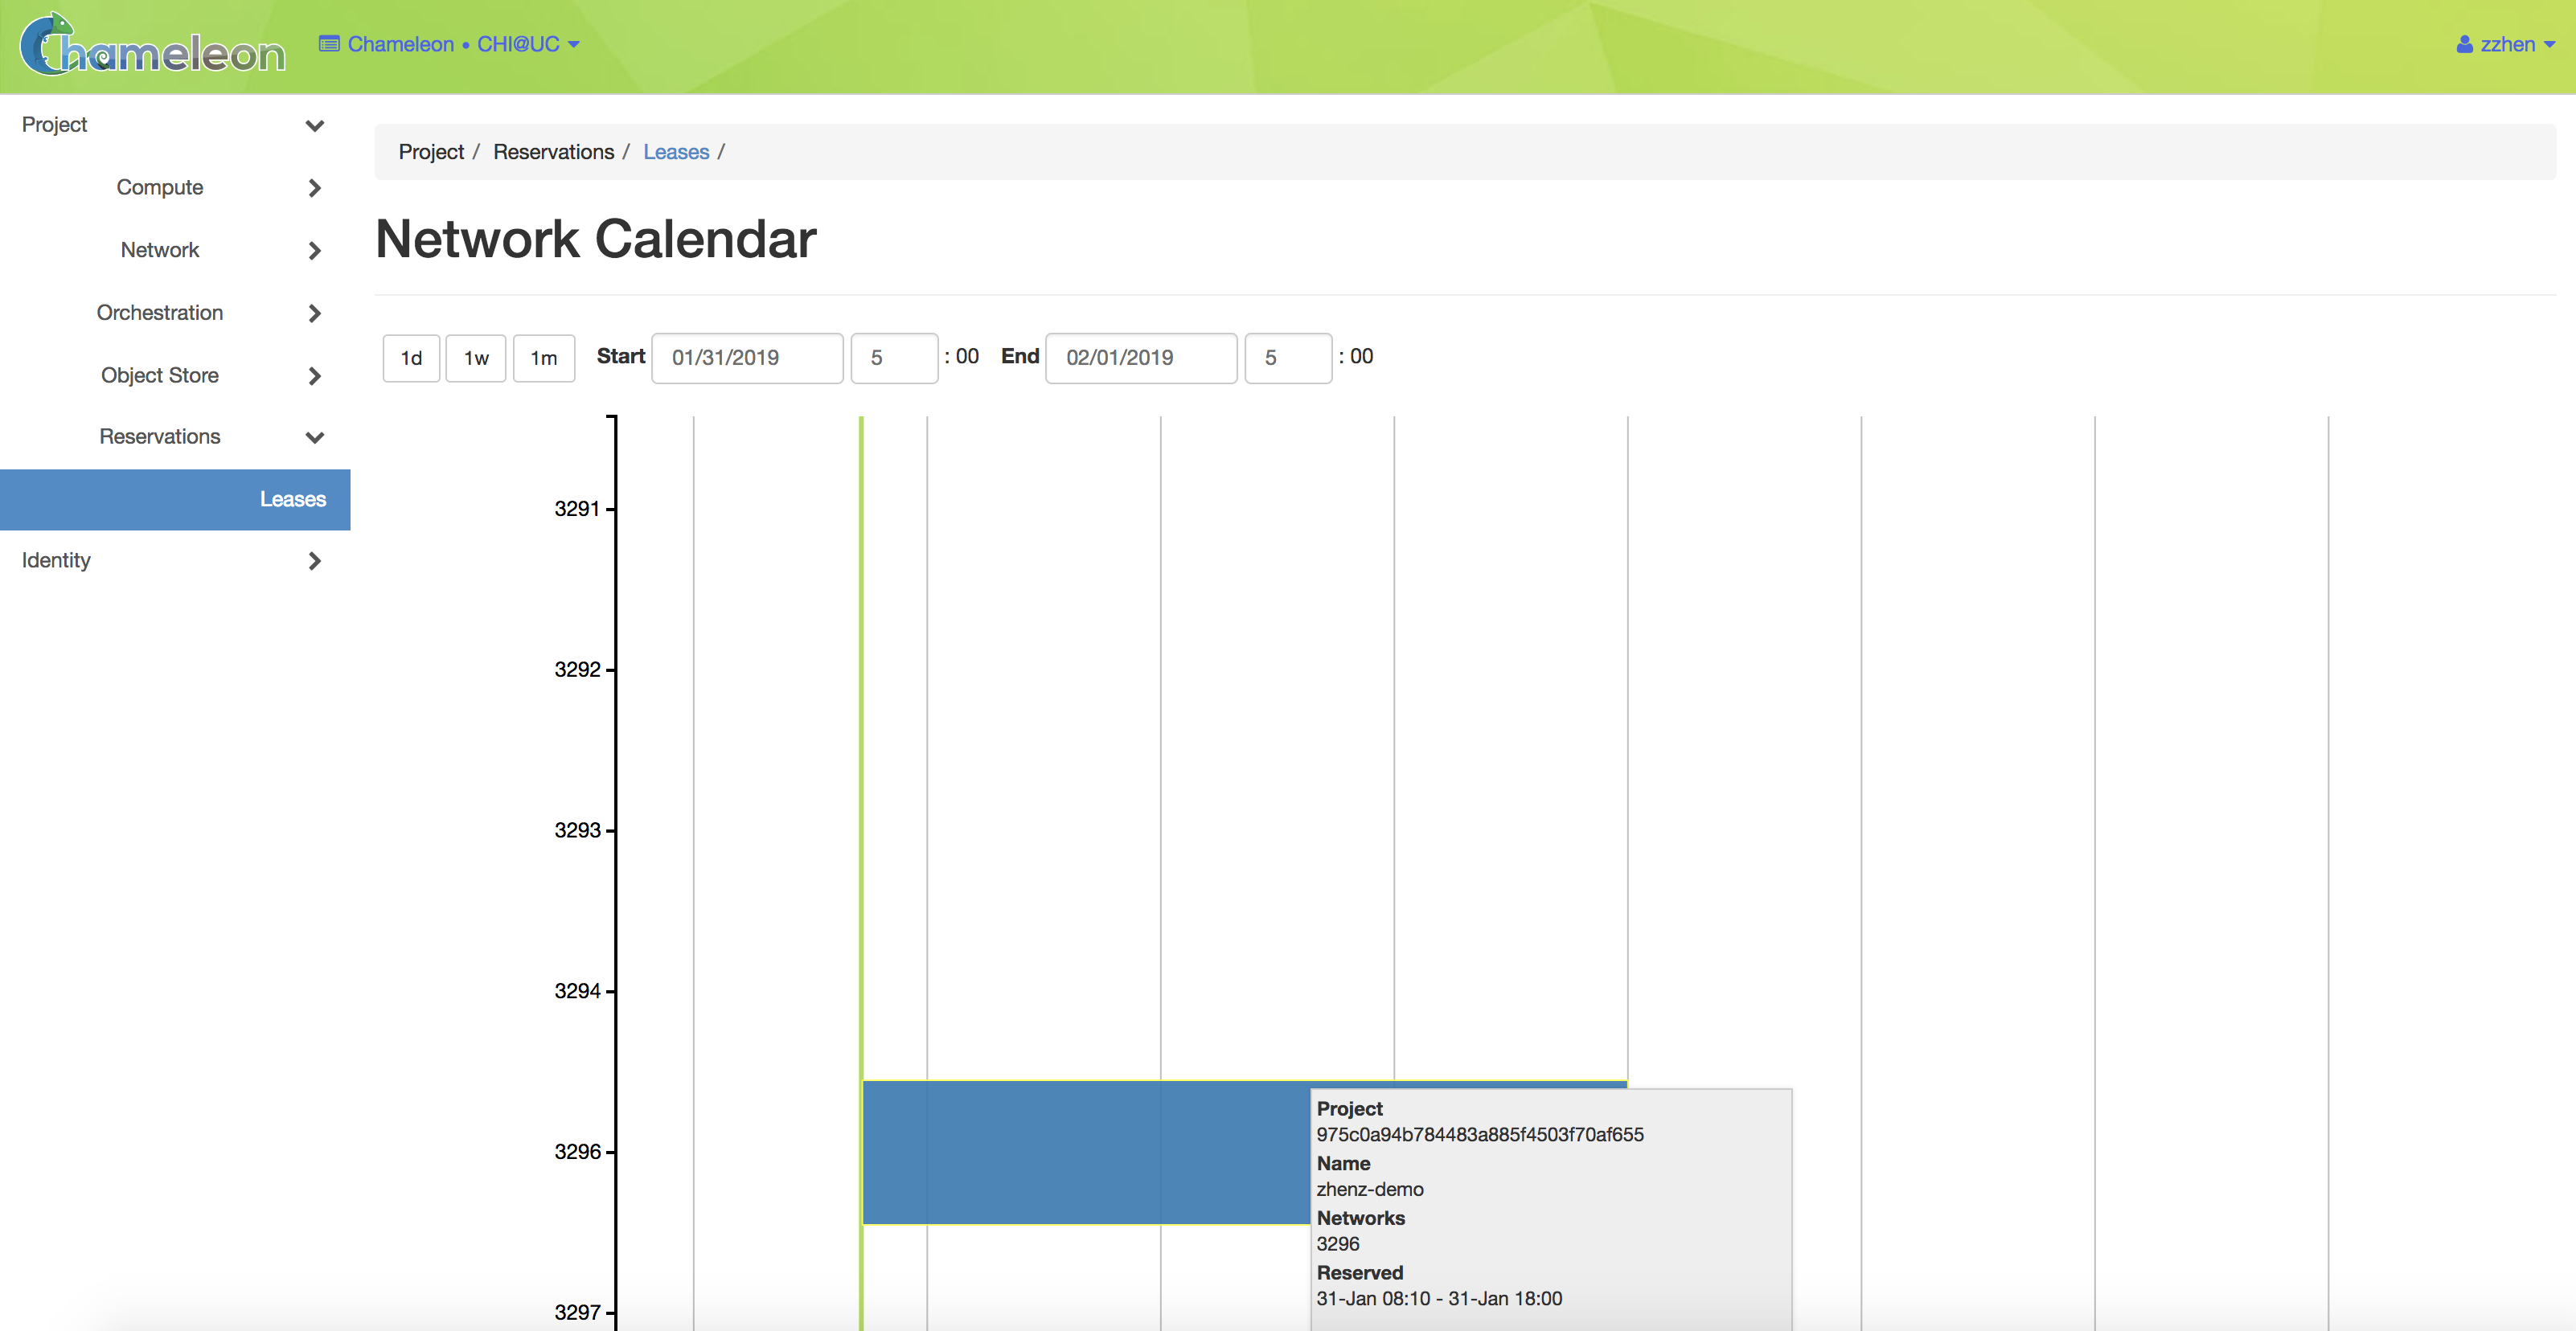
The Network Calendar
Tip
The nodes and VLANs are identified by their UUIDs. The colors are used to
indicate different reservations, i.e. the resources that belong to the same
reservation are colored the same. Hovering over the chart provides the
details about the reservation. To change the display time frame, click on
1d, 1w, and 1m buttons or fill in the start and end times.
Creating a lease to reserve resources
Once you have chosen a time period when you want to reserve resources, go back to the Leases screen and click on the Create Lease button. It should bring up the window displayed below:
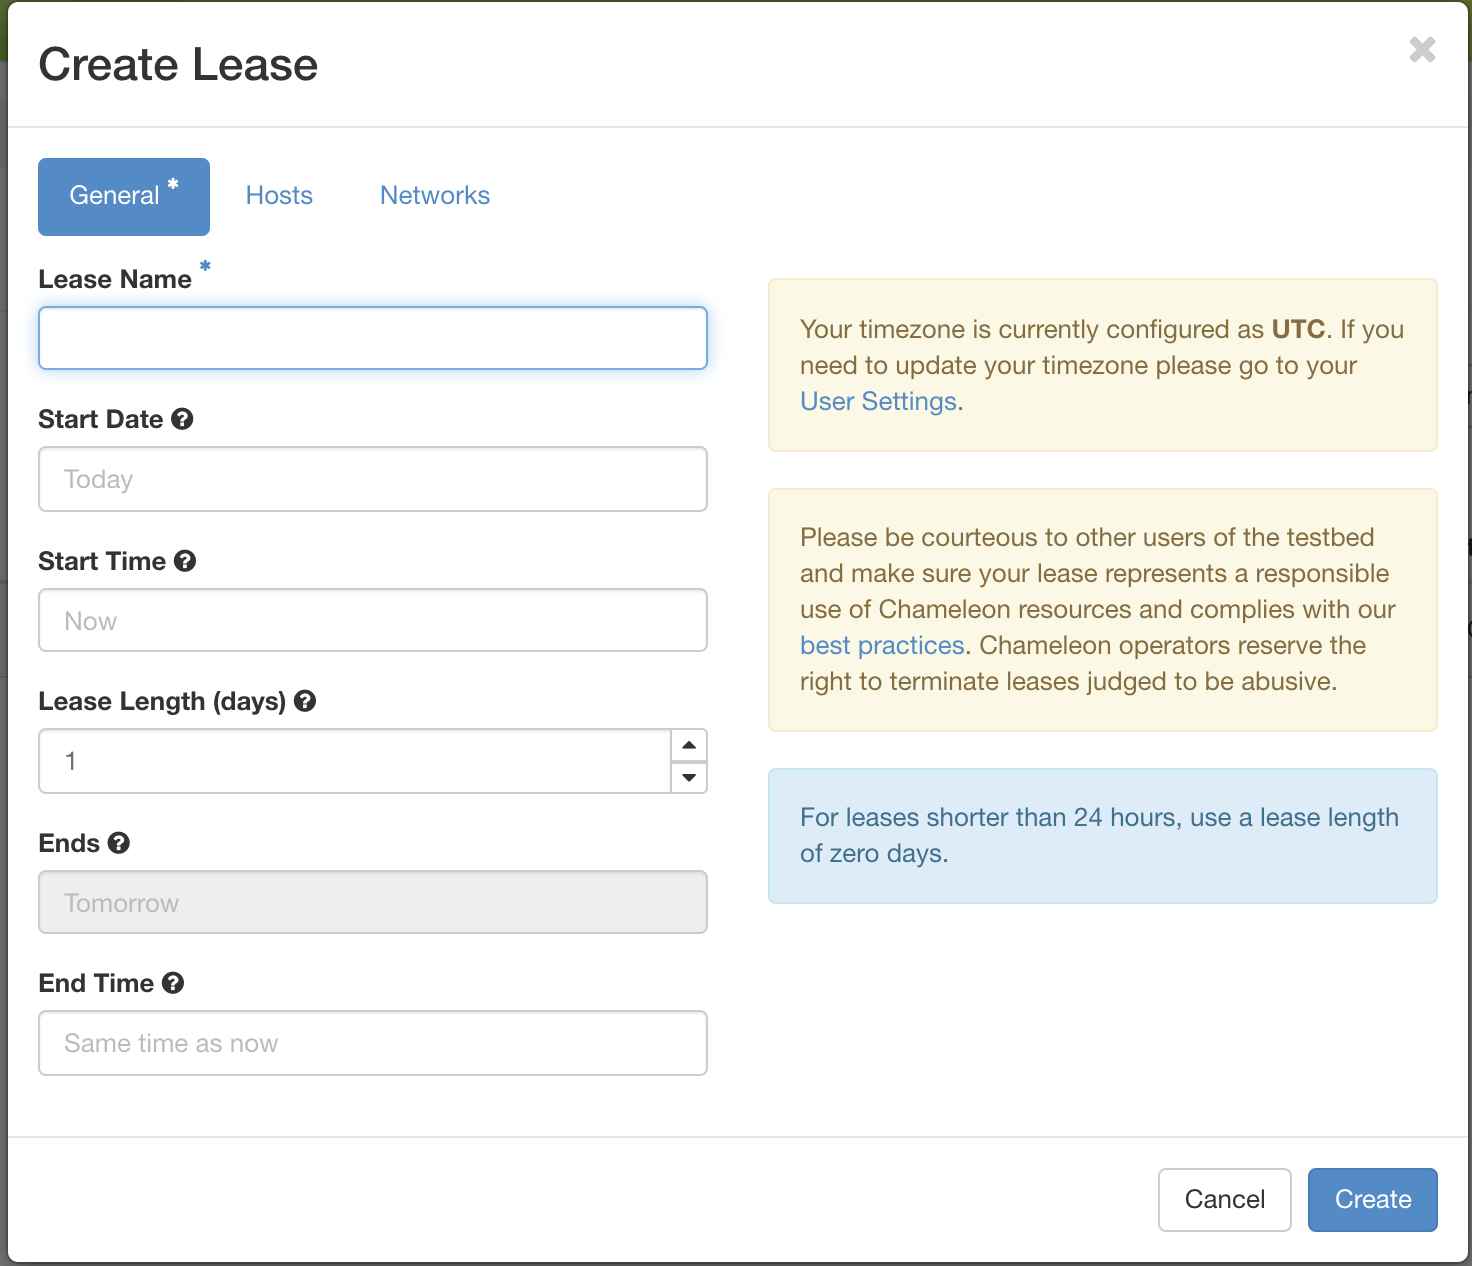
The Create Lease dialog
Pick a name for the lease. The name needs to be unique across your project.
Pick a start time and lease duration in days. If you would like to start your lease as soon as possible, you may leave the start time blank and Chameleon will attempt to reserve your nodes to begin immediately with a default Lease duration of 1 day.
Note
If you have not selected a timezone earlier, the default timezone is UTC. Therefore, the date must be entered in UTC!
Tip
You can get the UTC time by running
date -uin your terminal.To reserve a bare metal node, navigate to the “Hosts” tab.
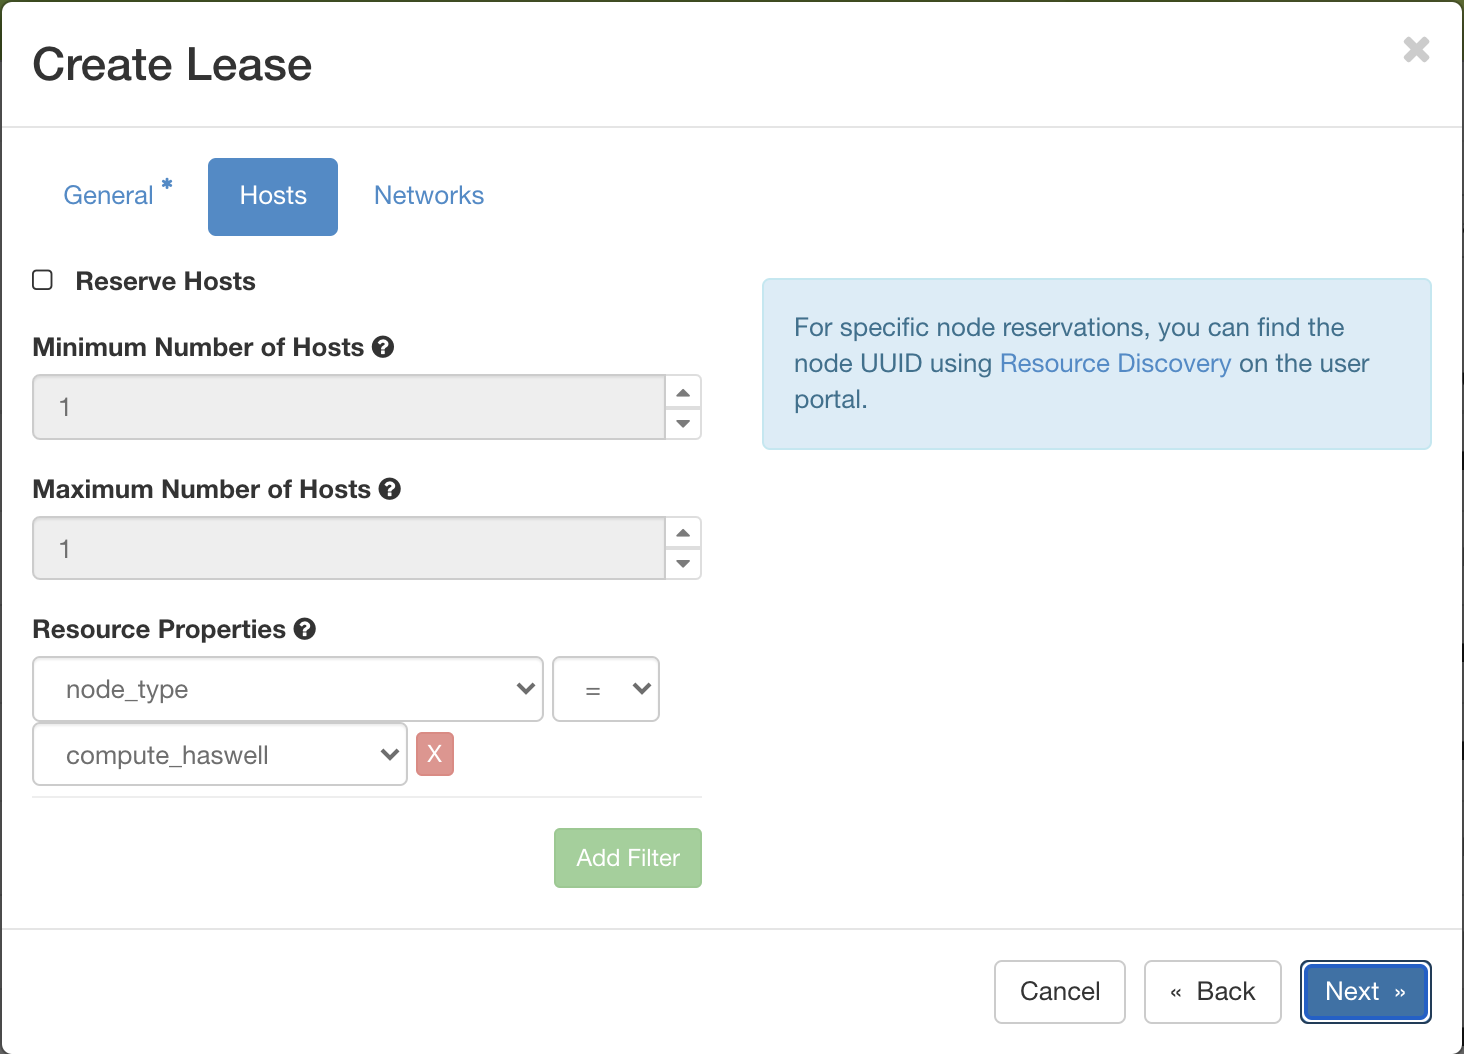
The Create Lease dialog Host reservation tab
Check “Reserve Hosts”.
Choose the minimum and maximum number of hosts.
Choose a node type in the drop down menu below the node_type and = drop down lists.
Note
You may only request one type of node in each individual lease. If you wish to request multiple node types, you must create separate Leases for each node type.
Warning
You must select = when matching the node_type to a specific selection. Using other operators like >= may yield unexpected results.
To reserve a vlan segment, navigate to the “Networks” tab.
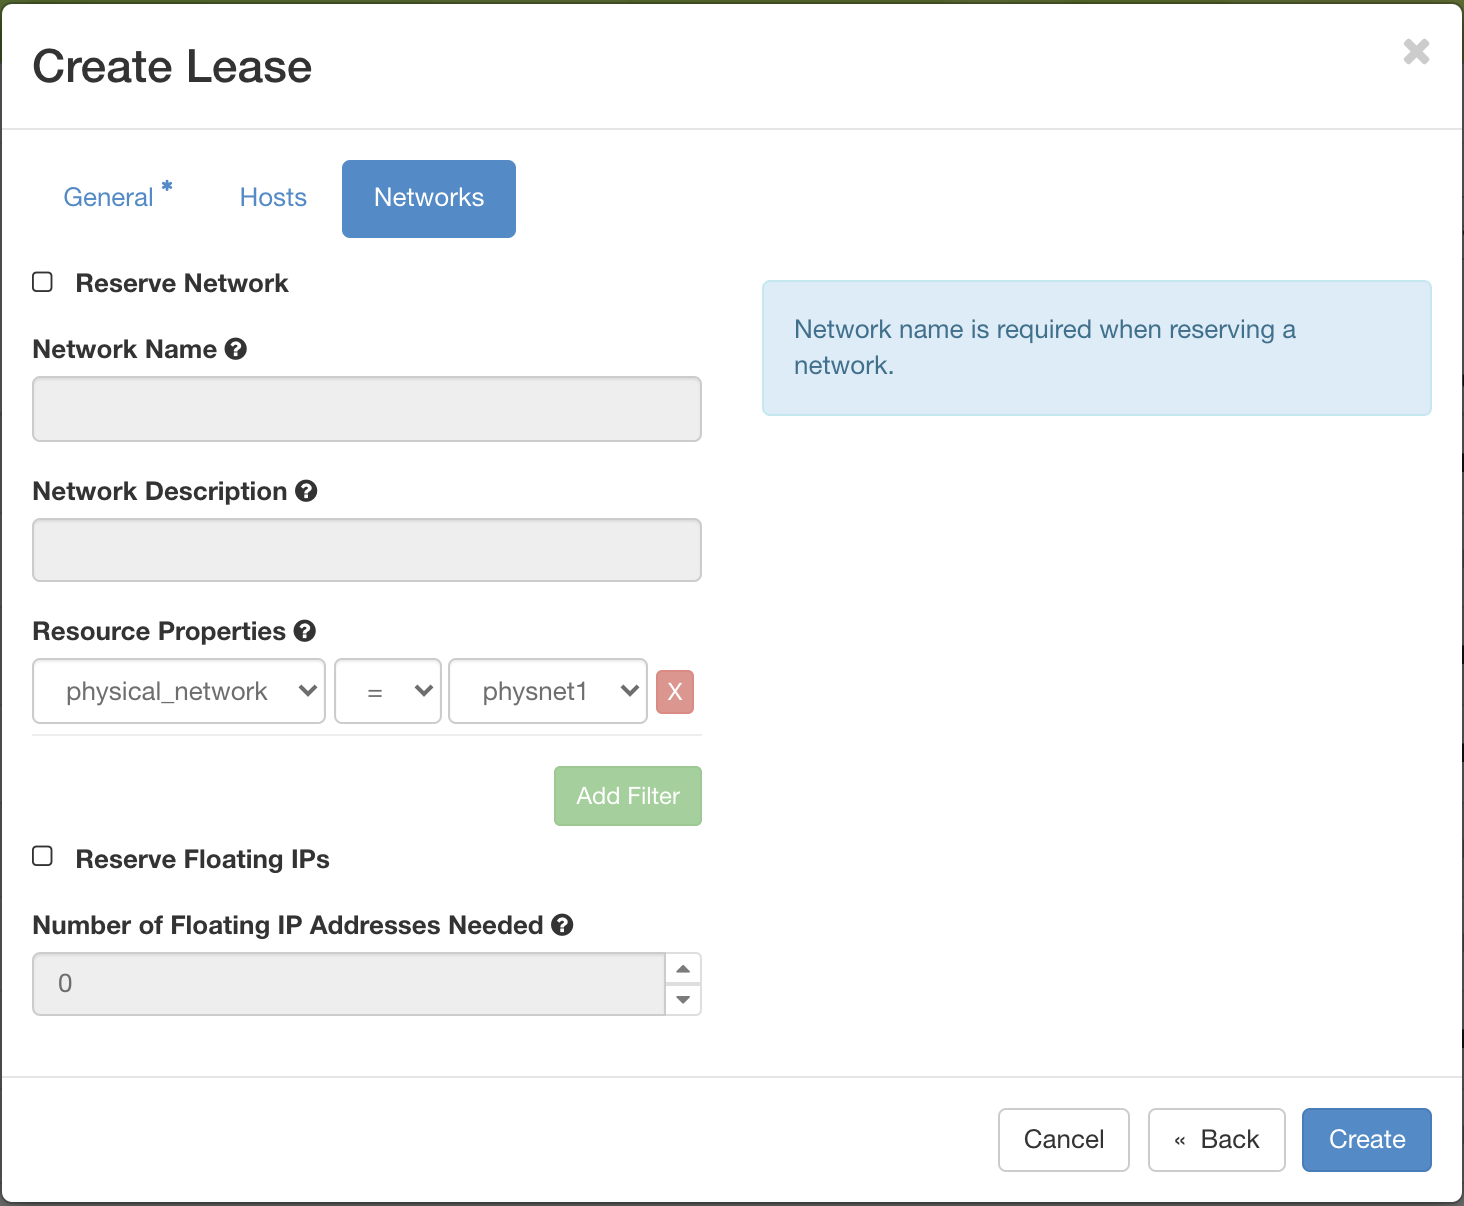
The Create Lease dialog Network reservation tab
Check “Reserve Network”
Enter the network name and description
Note
When a VLAN segment reservation ends, all Neutron resources attached to the network will be automatically deleted. Bare metal instances using the network will lose network connectivity.
Tip
Network name is required when reserving VLAN segment.
To reserve floating IPs, navigate to the “Networks” tab.
Check “Reserve Floating IPs”.
Choose the number of floating IPs.
Click on the Create button.
Once created, the lease details will be displayed. At the bottom of the page are
the details about the reservation. Initially the reservation is in the
Pending status, and stays in this state until it reaches the start time.
Tip
If you want Blazar to launch an instances or complex appliance as soon as the lease starts, read the
Advanced Reservation Orchestrationsection our Complex Appliances documentation.
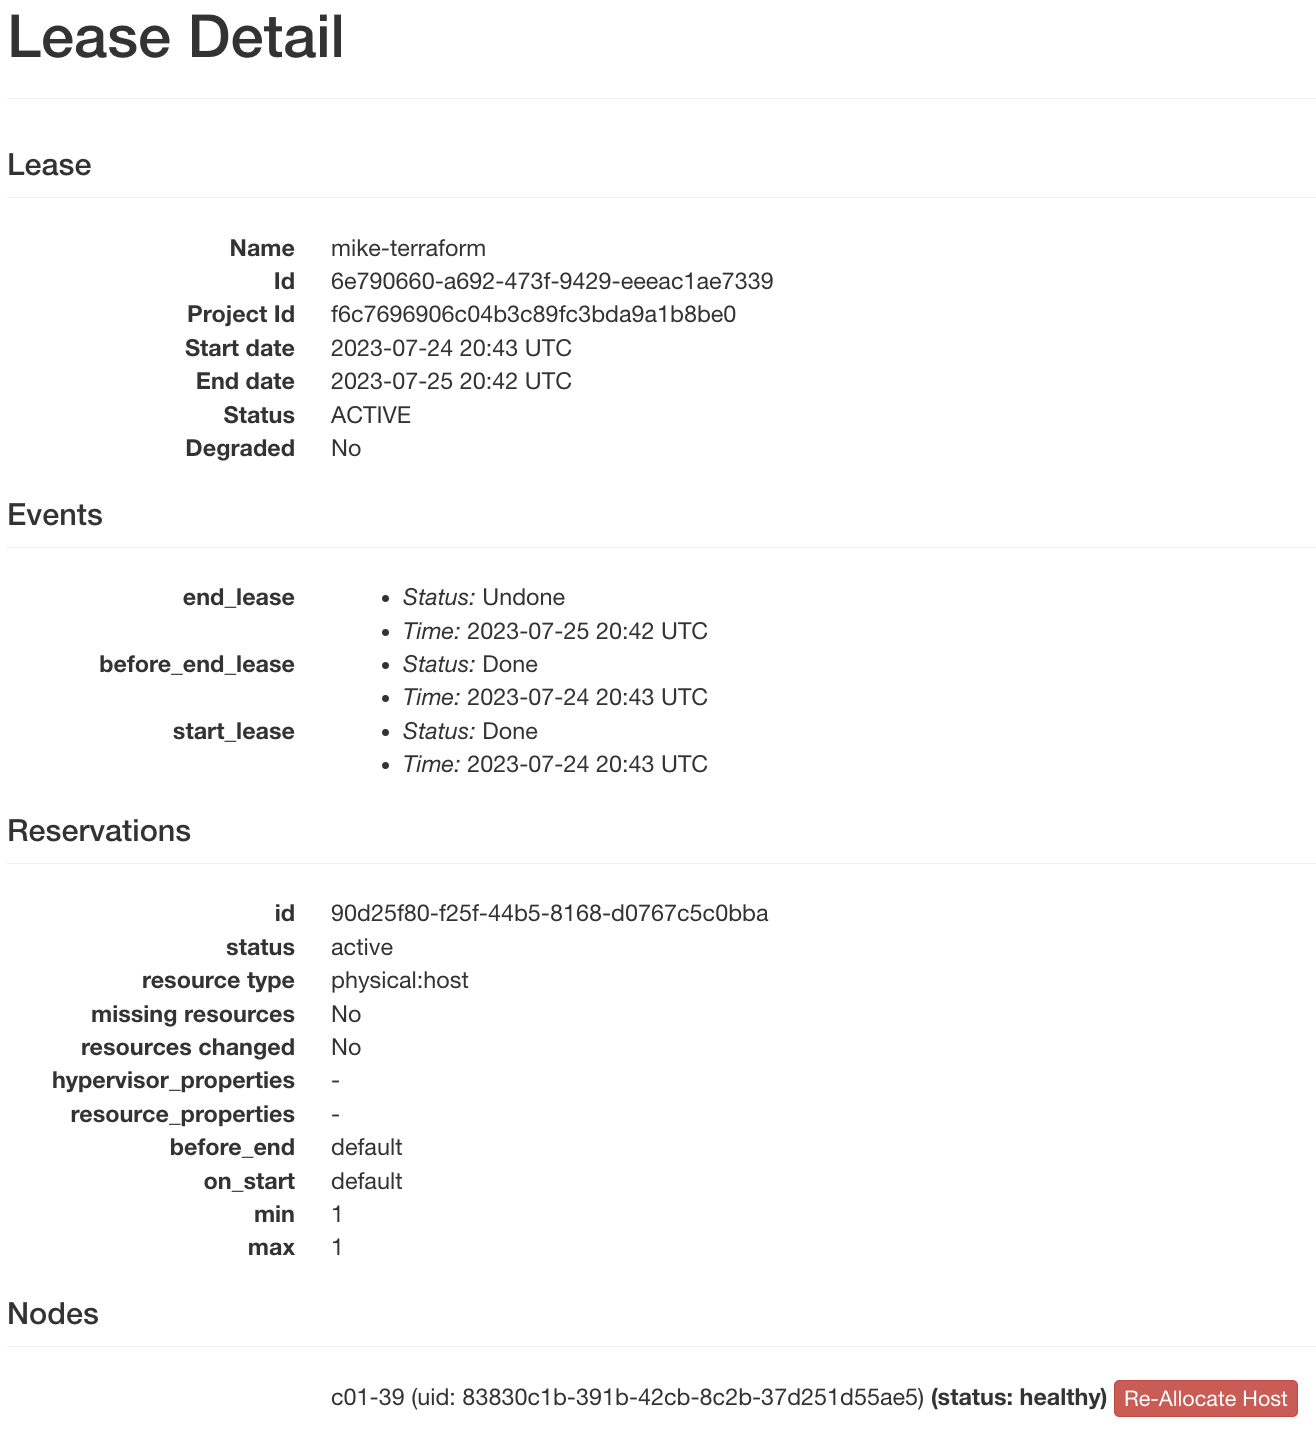
Lease details page
Once the start time of the lease is reached, the lease will be started and its
reservation will change to Active; you may need to refresh the page to see
the updates.
Tip
The lease is identified by a UUID. You may find it useful when using the CLI or submitting tickets on our Help Desk.
Attention
To ensure fairness to all users, resource reservations (leases) are limited to a duration of 7 days. However, an active lease within 48 hours of its end time can be prolonged by up to 7 days from the moment of request if resources are available.
Chameleon will send an email reminder to you 48 hours before your lease ends. If your lease duration is less than 48 hours, Chameleon will send you an email right after your lease is created. You can disable the email notification by using the command line.
Note
This 7-day limit applies to bare metal host leases. KVM@TACC instance leases follow a different policy: 6 months for standard flavors, but the same 7-day cap for GPU-attached flavors. See the Chameleon FAQ for the authoritative policy.
Extending a lease
To prolong a lease, click on the Update Lease button in Actions column.
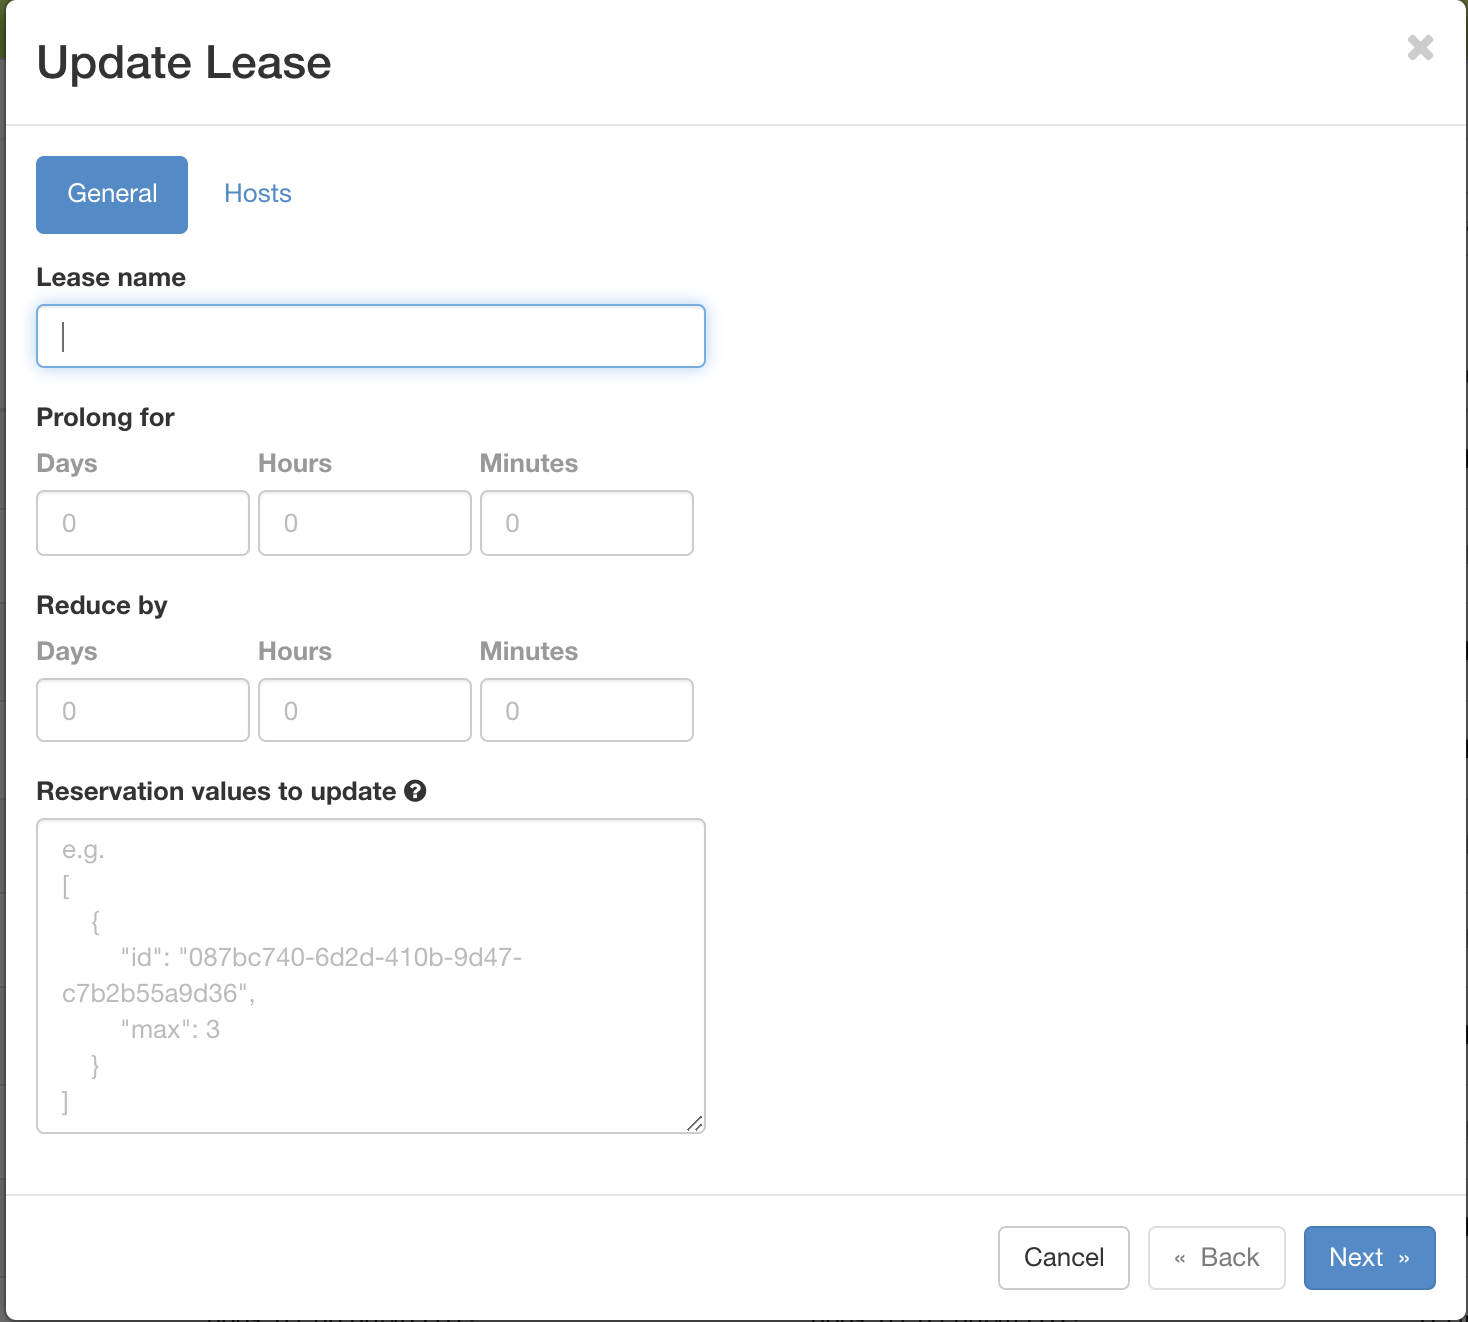
The Update Lease Parameters dialog
Fill out the form by specifying the amount of additional time to add to the lease. Then, click on the Update button to finish your request.
Tip
If there is an advance reservation blocking your lease prolongation that could potentially be moved, you can interact through the users mailing list to coordinate with others users. Additionally, if you know from the start that your lease will require longer than a week and can justify it, you can submit a ticket on our Help Desk to request a one-time exception of creating a longer lease. You may also other exceptions to our other policies, such as idle lease termination, by submitting a request.
Changing the number of nodes of a lease
It is now possible to change the number of nodes reserved in a lease. For advance reservations that haven’t yet started, the node count can be increased or decreased. For reservations already started, only new nodes can be added.
To change the number of nodes of a lease, click on the Update Lease button in Actions column.
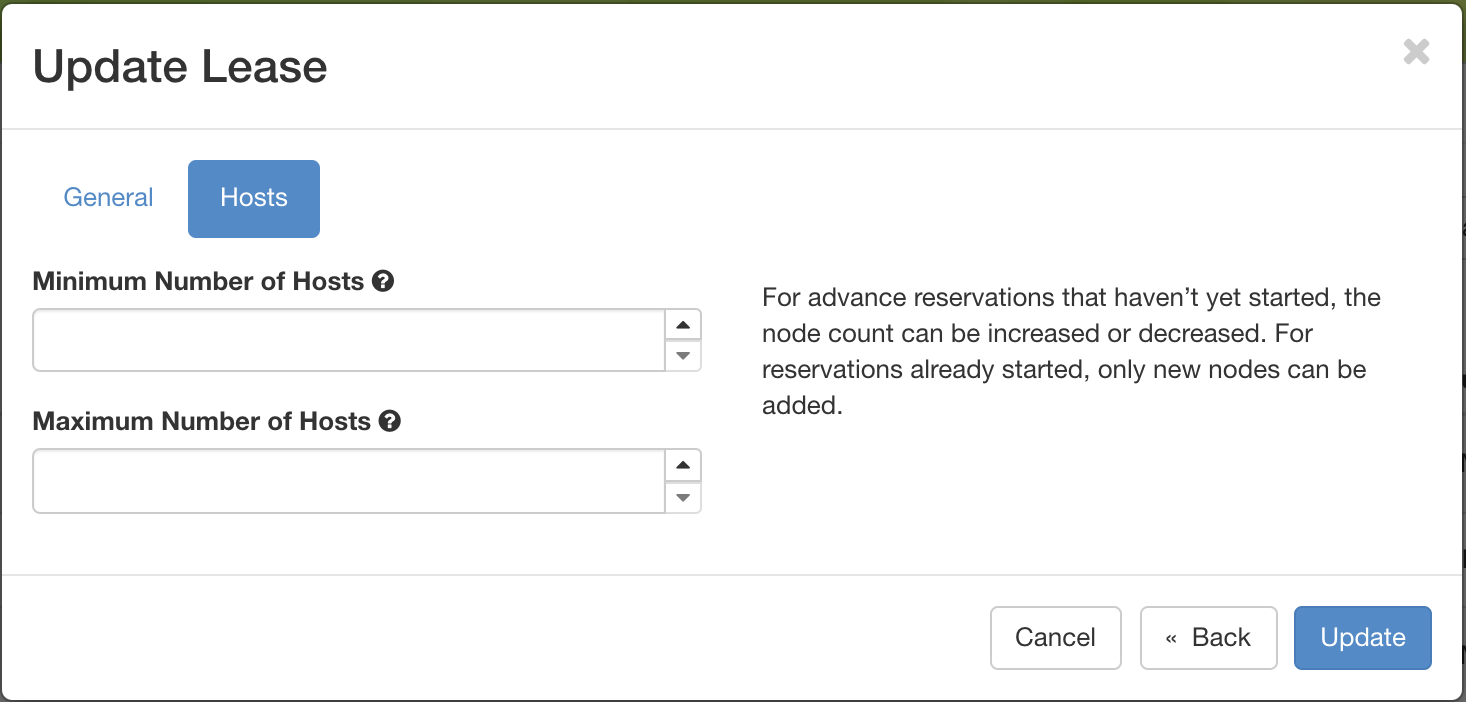
The Update Lease Parameters dialog, changing the number of reserved nodes
Navigate to the “Hosts” tab, and fill out the form by specifying the new minimum and maximum numbers of hosts. Then, click on the Update button to finish your request.
Changing the number of floating IPs in a lease
It is possible to change the number of floating IPs in a lease, whether the lease is pending or active. In some situations, you cannot renew a lease due to another user reserving the same floating IP in your lease. In this case, you can set your lease to have 0 floating IPs, and create a second lease just for reserving floating IPs.
To change the number of floating IPs, click on the Update Lease button in Actions column.
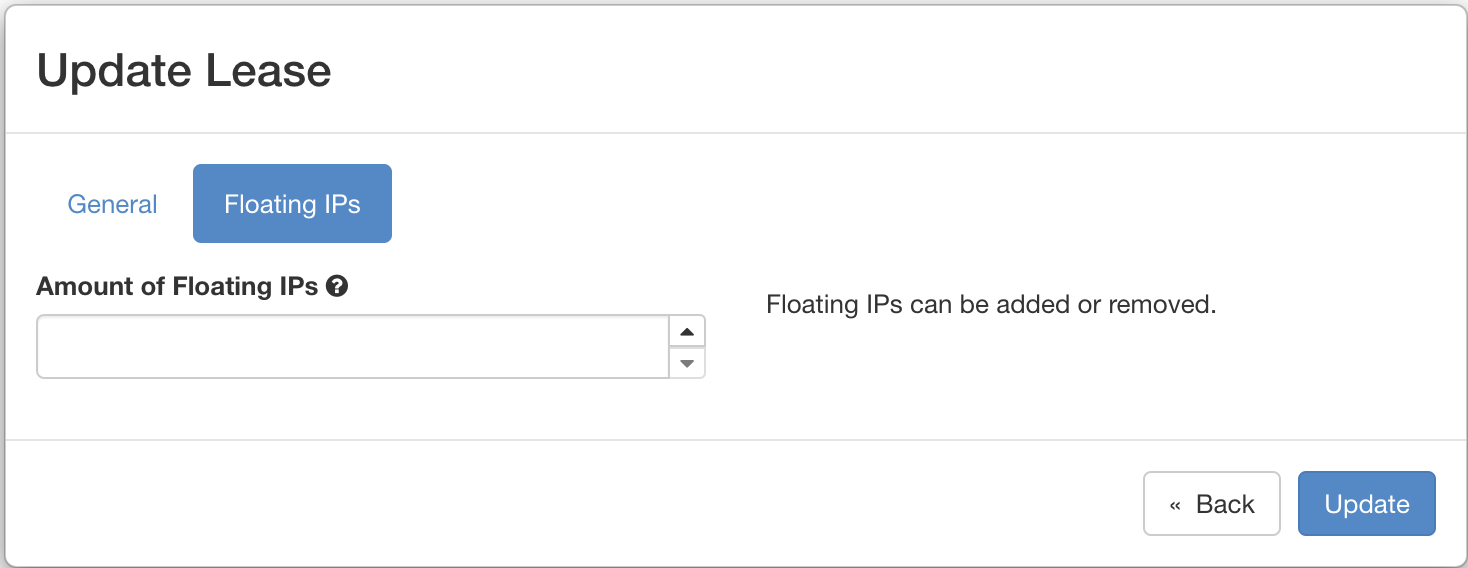
The Update Lease Parameters dialog, changing the number of reserved IPs
Navigate to the “Floating IPs” tab, and fill out the form by specifying the amount of floating IPs. Then, click on the Update button to finish your request.
Reserving a node by UUID
You may reserve a specific node by providing its UUID. To learn more about how to find a node with a specific type, see Resource Discovery. In the Create Lease dialog, use the Resource Properties bar to filter by the uid keyword then paste the ID of your desired node.
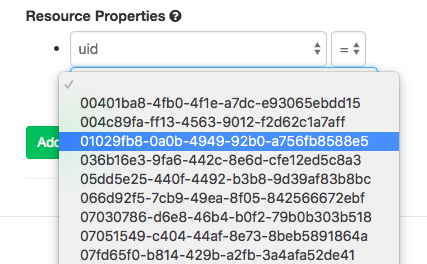
Selecting a node by UUID